
.png)
TABLE OF CONTENTS
Key Takeaways
-
n8n is an open-source workflow automation tool that enables visual, low-code orchestration of automated processes.
-
Hyperstack AI Studio provides OpenAI-compatible LLM APIs that can be integrated into external automation platforms.
-
The integration works by configuring n8n’s AI Agent node with Hyperstack’s API key and base URL.
-
Setting up the connection involves running n8n, generating a Hyperstack API key, and creating a workflow that triggers AI tasks.
-
Once connected, Hyperstack models can be used in n8n for tasks like chat automation, summarisation, and classification.
-
The workflow can be tested and extended with additional nodes or memory features without writing custom code.
Connecting Hyperstack AI Studio with n8n allows teams to automate AI workflows without heavy custom engineering. This tutorial shows how to integrate the two platforms step by step, enabling triggers, model execution and downstream actions in minutes. We start with the outcome, fully automated AI pipelines and then walk through setup, configuration, and real examples like data ingestion and inference automation. Designed for builders and operators, this guide focuses on speed, flexibility, and no-code orchestration so you can move from manual AI workflows to scalable automation fast.
What is n8n?
n8n stands for “nodemation”, short for node-based automation.
It allows you to:
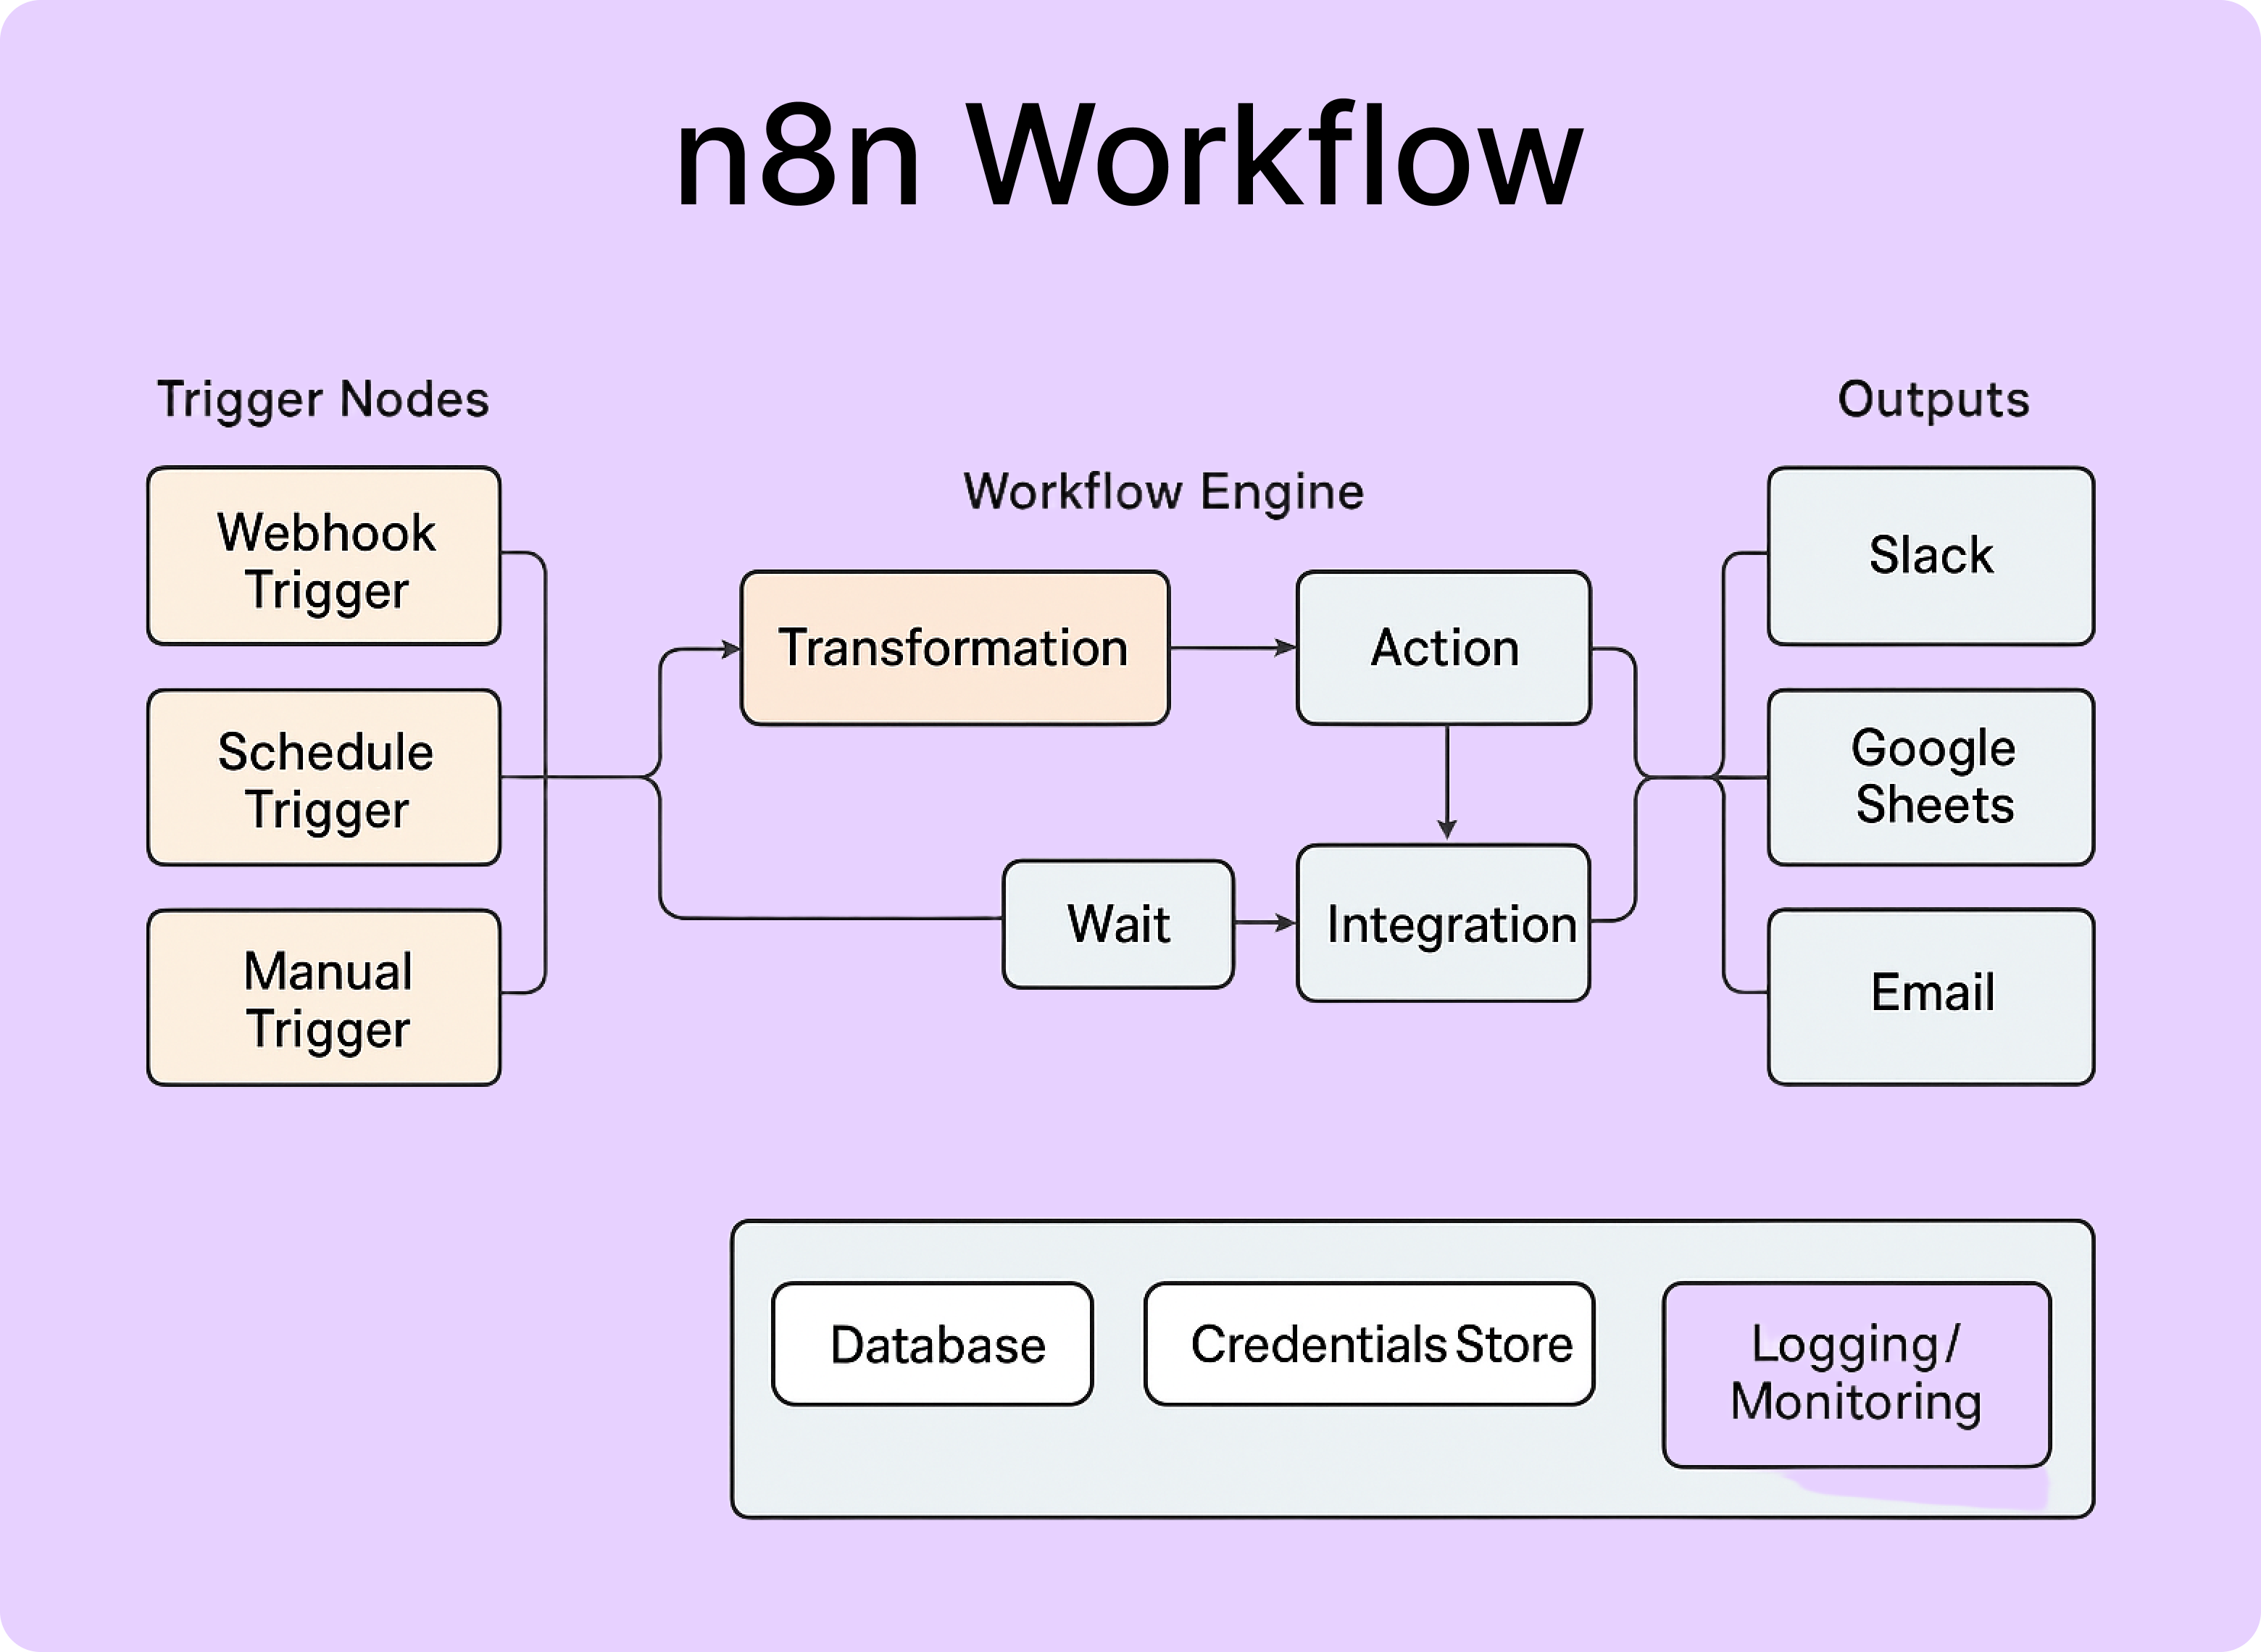
- Automate workflows across various services and APIs.
- Orchestrate tasks like data collection, AI inference, chat automation, and more.
- Build both simple and complex data pipelines visually.
You can run n8n self-hosted (via Docker or locally) or use its cloud version at Cloud dashboard.
Why n8n is Important
- Open Source: Gives full control and customizability over workflows.
- Visual Workflow Builder: No need to manually code automations; simply drag and connect nodes.
- Extensible: Supports hundreds of integrations and APIs, including AI tools.
- Flexible Deployment: Can be hosted in Docker, local environments, or the cloud.
- AI Agent Ready: n8n supports OpenAI-compatible models, allowing easy integration with platforms like Hyperstack AI Studio.
For more technical details, refer to the official n8n documentation: https://docs.n8n.io/
Introduction to Hyperstack AI Studio
Hyperstack AI Studio is a scalable AI development and deployment platform that enables developers to train, fine-tune, and deploy large language models (LLMs).
It provides OpenAI-compatible APIs, meaning that any existing integration or SDK built for OpenAI (like the one in n8n) can work seamlessly with Hyperstack—without code changes.
Why Use Hyperstack AI Studio
- OpenAI-Compatible SDK: Fully works with OpenAI API-compatible integrations such as n8n’s AI Agent node.
- Inference for Different LLM Sizes: Choose from lightweight models to massive LLMs depending on your needs.
- Fine-Tuning Support: Easily fine-tune models to match specific tasks or domains.
- Evaluation Framework: Benchmark models quickly using built-in evaluation tools.
- Playground for Testing: Experiment interactively before deployment.
- Cost-Effective: Lower inference costs compared to many commercial LLM providers.
- Secure and Scalable: Enterprise-grade infrastructure and API security.
- Easy Integration: No additional setup required; simply replace the API key and base URL in OpenAI-compatible apps.
You can learn more about AI Studio at Hyperstack documentation.
Why Hyperstack AI Studio is Important for n8n
n8n provides an AI Agent node that works with OpenAI-compatible APIs. Because Hyperstack follows the same API format, it can be used as a drop-in replacement for OpenAI.
This means:
- You can connect n8n workflows directly to Hyperstack’s LLMs for tasks like chat automation, summarization, classification, or code generation.
- You can use fine-tuned models specific to your business workflows.
- You can evaluate and test models inside the Hyperstack Playground before using them in production workflows.
In short, Hyperstack enables n8n to become a powerful AI automation platform, connecting smart models to automated workflows.
Steps to Integrate Hyperstack AI Studio with n8n
Step 1: Setting Up n8n Environment
Make sure you have Docker downloaded and installed on your machine.

n8n recommends using Docker for a secure and consistent deployment environment.
Docker ensures compatibility across systems and simplifies database and configuration management.
Note: You can also deploy n8n via Docker Compose using pre-built configurations available in the n8n-hosting repository.
You will add the Docker download section later as per your note.
Once the docker is installed, the first step is to create a persistent volume to store n8n data.
# Create a persistent volume for n8n data
docker volume create n8n_data
Next, you can run the n8n container using the following command. Make sure to replace <YOUR_TIMEZONE> with your actual timezone (e.g., America/New_York).
If you are unsure about your timezone, you can leave it as is, and n8n will default to UTC.
# Run the n8n container
docker run -it --rm \
 --name n8n \
 -p 5678:5678 \
 -e GENERIC_TIMEZONE="<YOUR_TIMEZONE>" \
 -e TZ="<YOUR_TIMEZONE>" \
 -e N8N_ENFORCE_SETTINGS_FILE_PERMISSIONS=true \
 -e N8N_RUNNERS_ENABLED=true \
 -v n8n_data:/home/node/.n8n \
 docker.n8n.io/n8nio/n8n
Let’s break down what this command does:
docker run -it --rm: Runs the container interactively and removes it when stopped.--name n8n: Names the container "n8n".-p 5678:5678: Maps port 5678 on your host to port 5678 in the container (n8n’s default port).-e GENERIC_TIMEZONEand-e TZ: Sets the timezone for the container.-e N8N_ENFORCE_SETTINGS_FILE_PERMISSIONS=true: Enforces secure file permissions for the n8n config file.-e N8N_RUNNERS_ENABLED=true: Enables task runners, the recommended way to execute tasks in n8n.-v n8n_data:/home/node/.n8n: Mounts the persistent volume to store n8n data.docker.n8n.io/n8nio/n8n: Specifies the n8n Docker image to use.
When you run this command, Docker will download the required n8n image (if not already present) and start the container.
You can visit the n8n interface by opening your browser and navigating to: localhost:5678
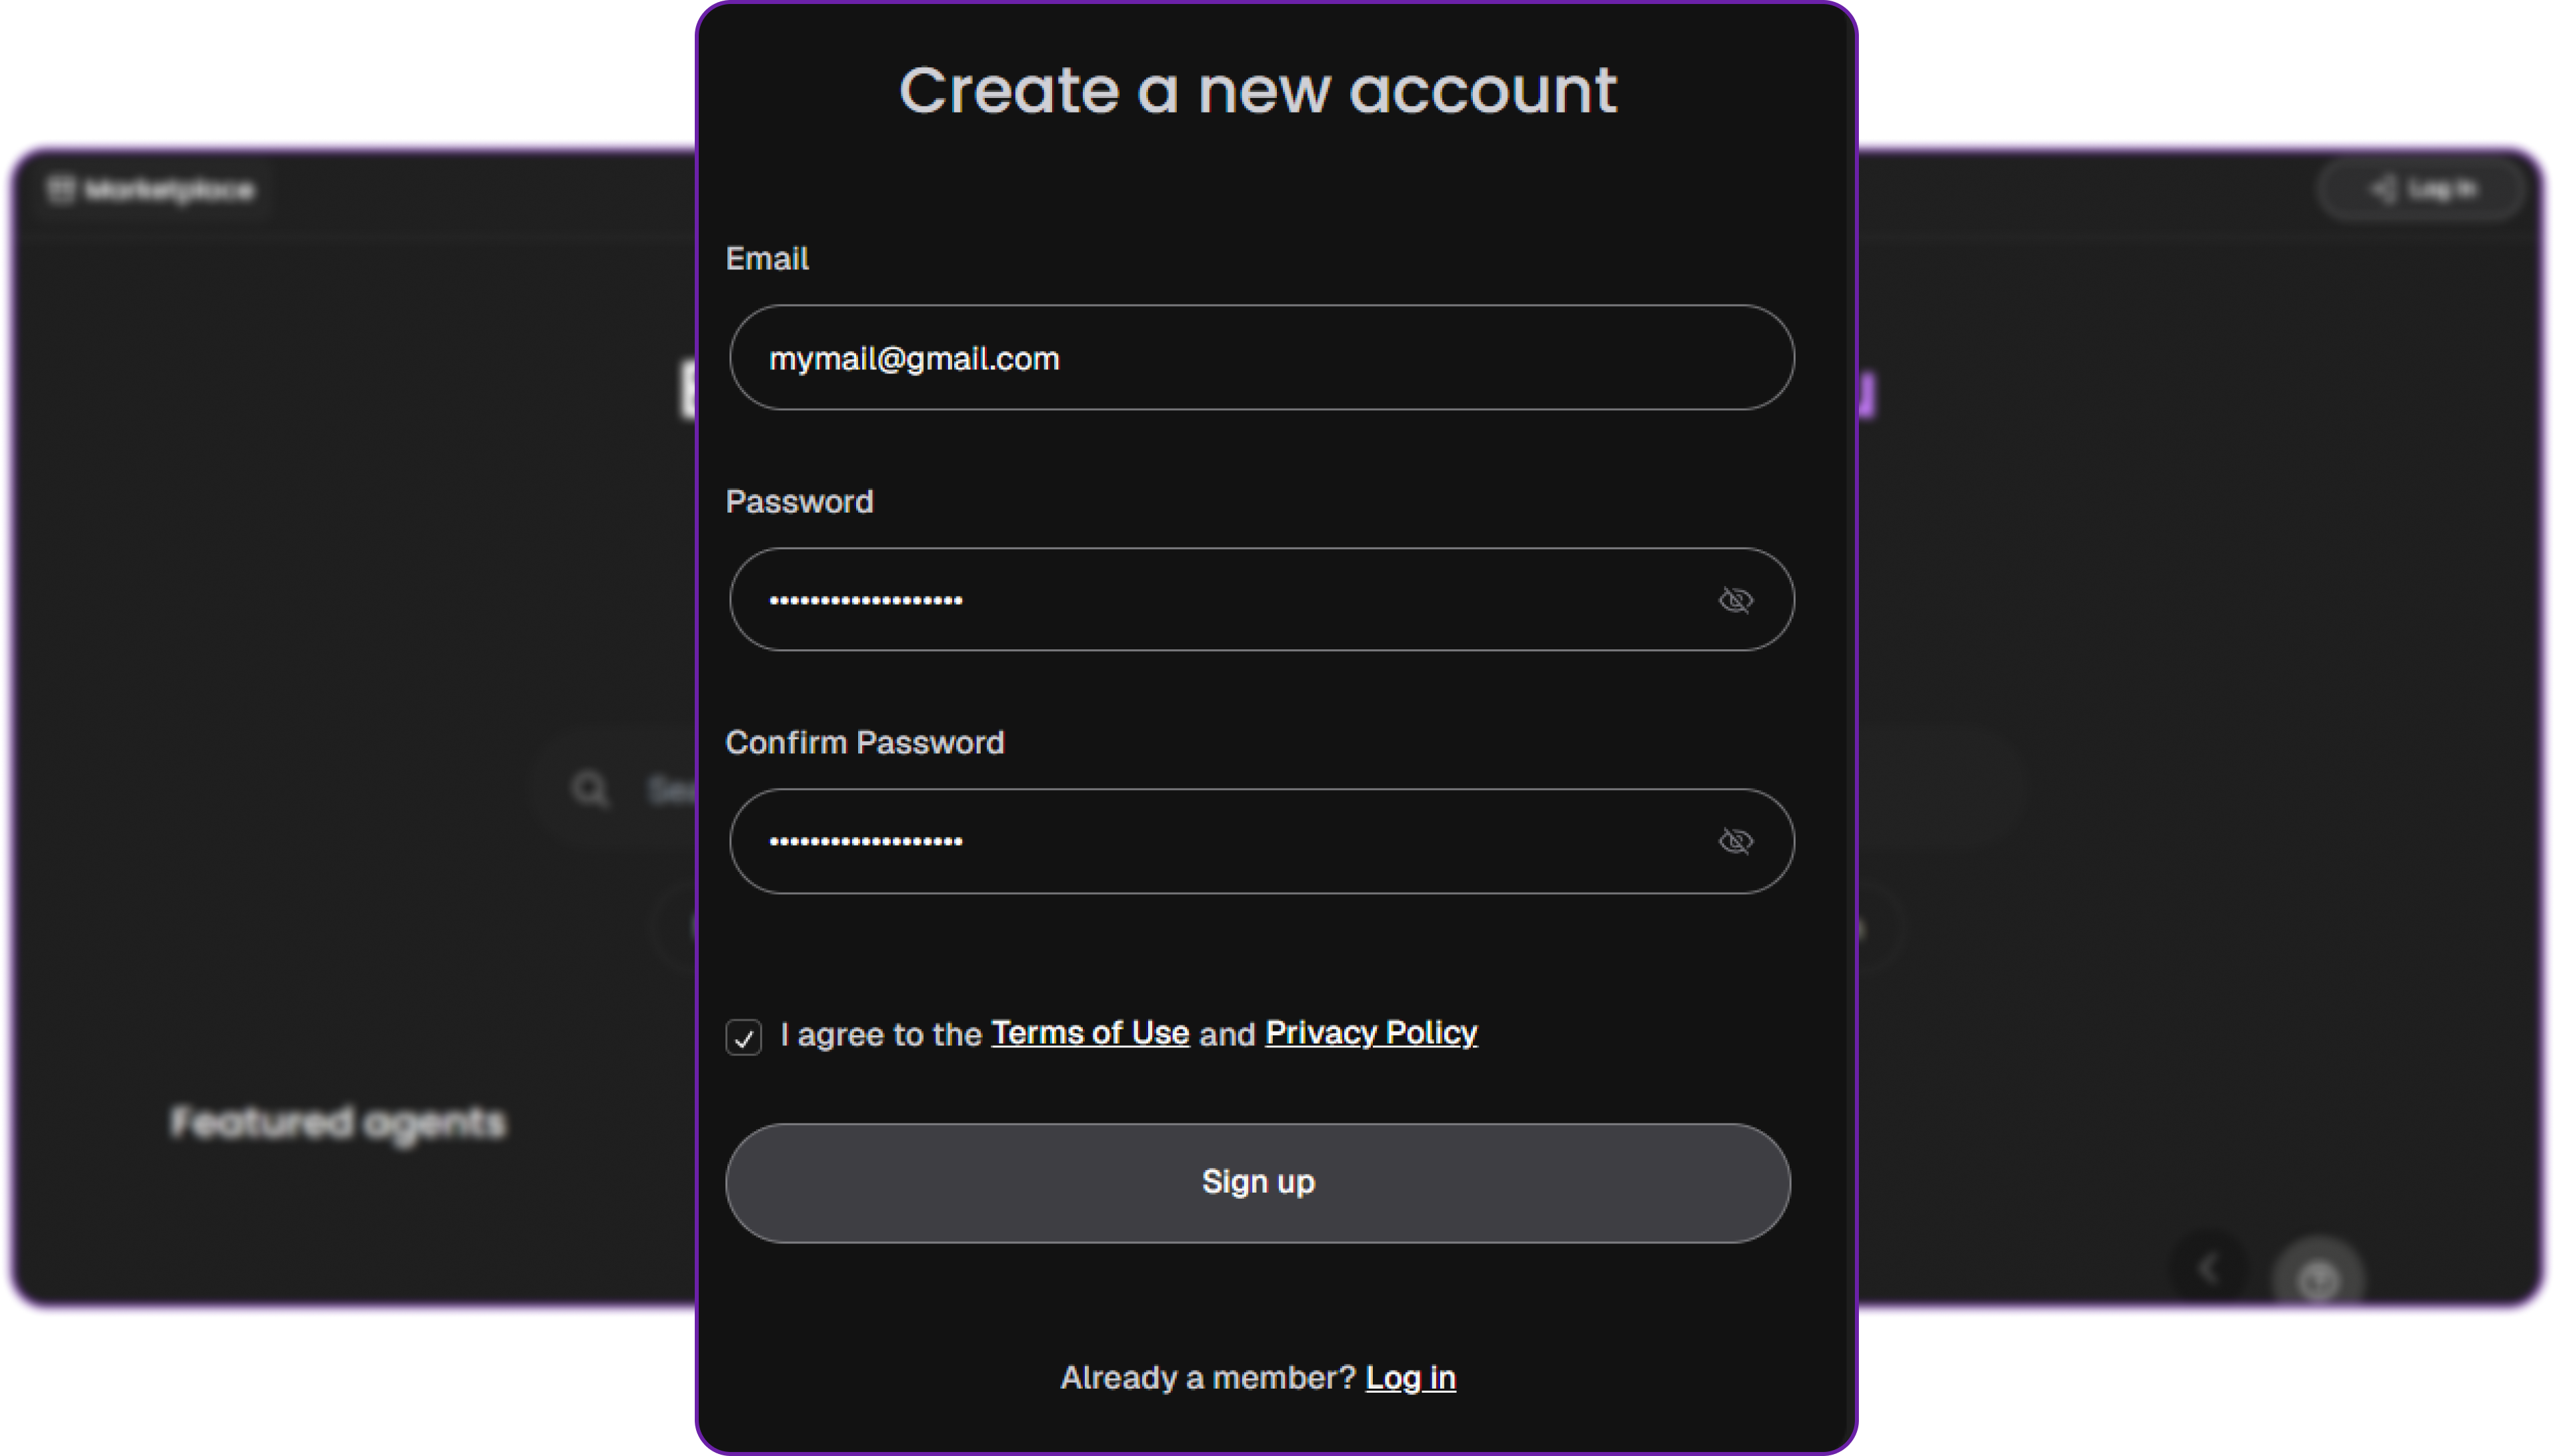
You will be prompted to create an initial user account. This account will have full administrative access to your n8n instance. After that you will redirect to homepage.
Now that you have n8n up and running, the next step is to get your Hyperstack API key.
Step 2: Retrieve Hyperstack API Details
Before we perform the installation steps of n8n using Docker, we have to get some info that later we will be using to configure our Hyperstack LLM with n8n like base url, model id, api key and so on.
- Go to the Hyperstack Console and log in with your credentials.
- Navigate to the AI Studio Playground to explore available models before integration them with n8n.

In the playground, Select your desired model after quick testing it on the interface. We are going with openai/gpt-oss-120b for this integration.
Then click on the API section to get the Base URL and Model ID.

You can check the available models on their base model documentation page. You can copy the model id and base url from here, we will need it in the next step.
Step 3: Generating an API Key
To authenticate, we will need a valid API key from Hyperstack AI Studio.
-
Go to the API Keys section in the Hyperstack console.
-
Click Generate New Key.
-
Give it a name (e.g.,
n8n-integration-key). -
Copy the generated key, we will use it in n8n module.

Now that we have the required details for n8n, let's now use them.
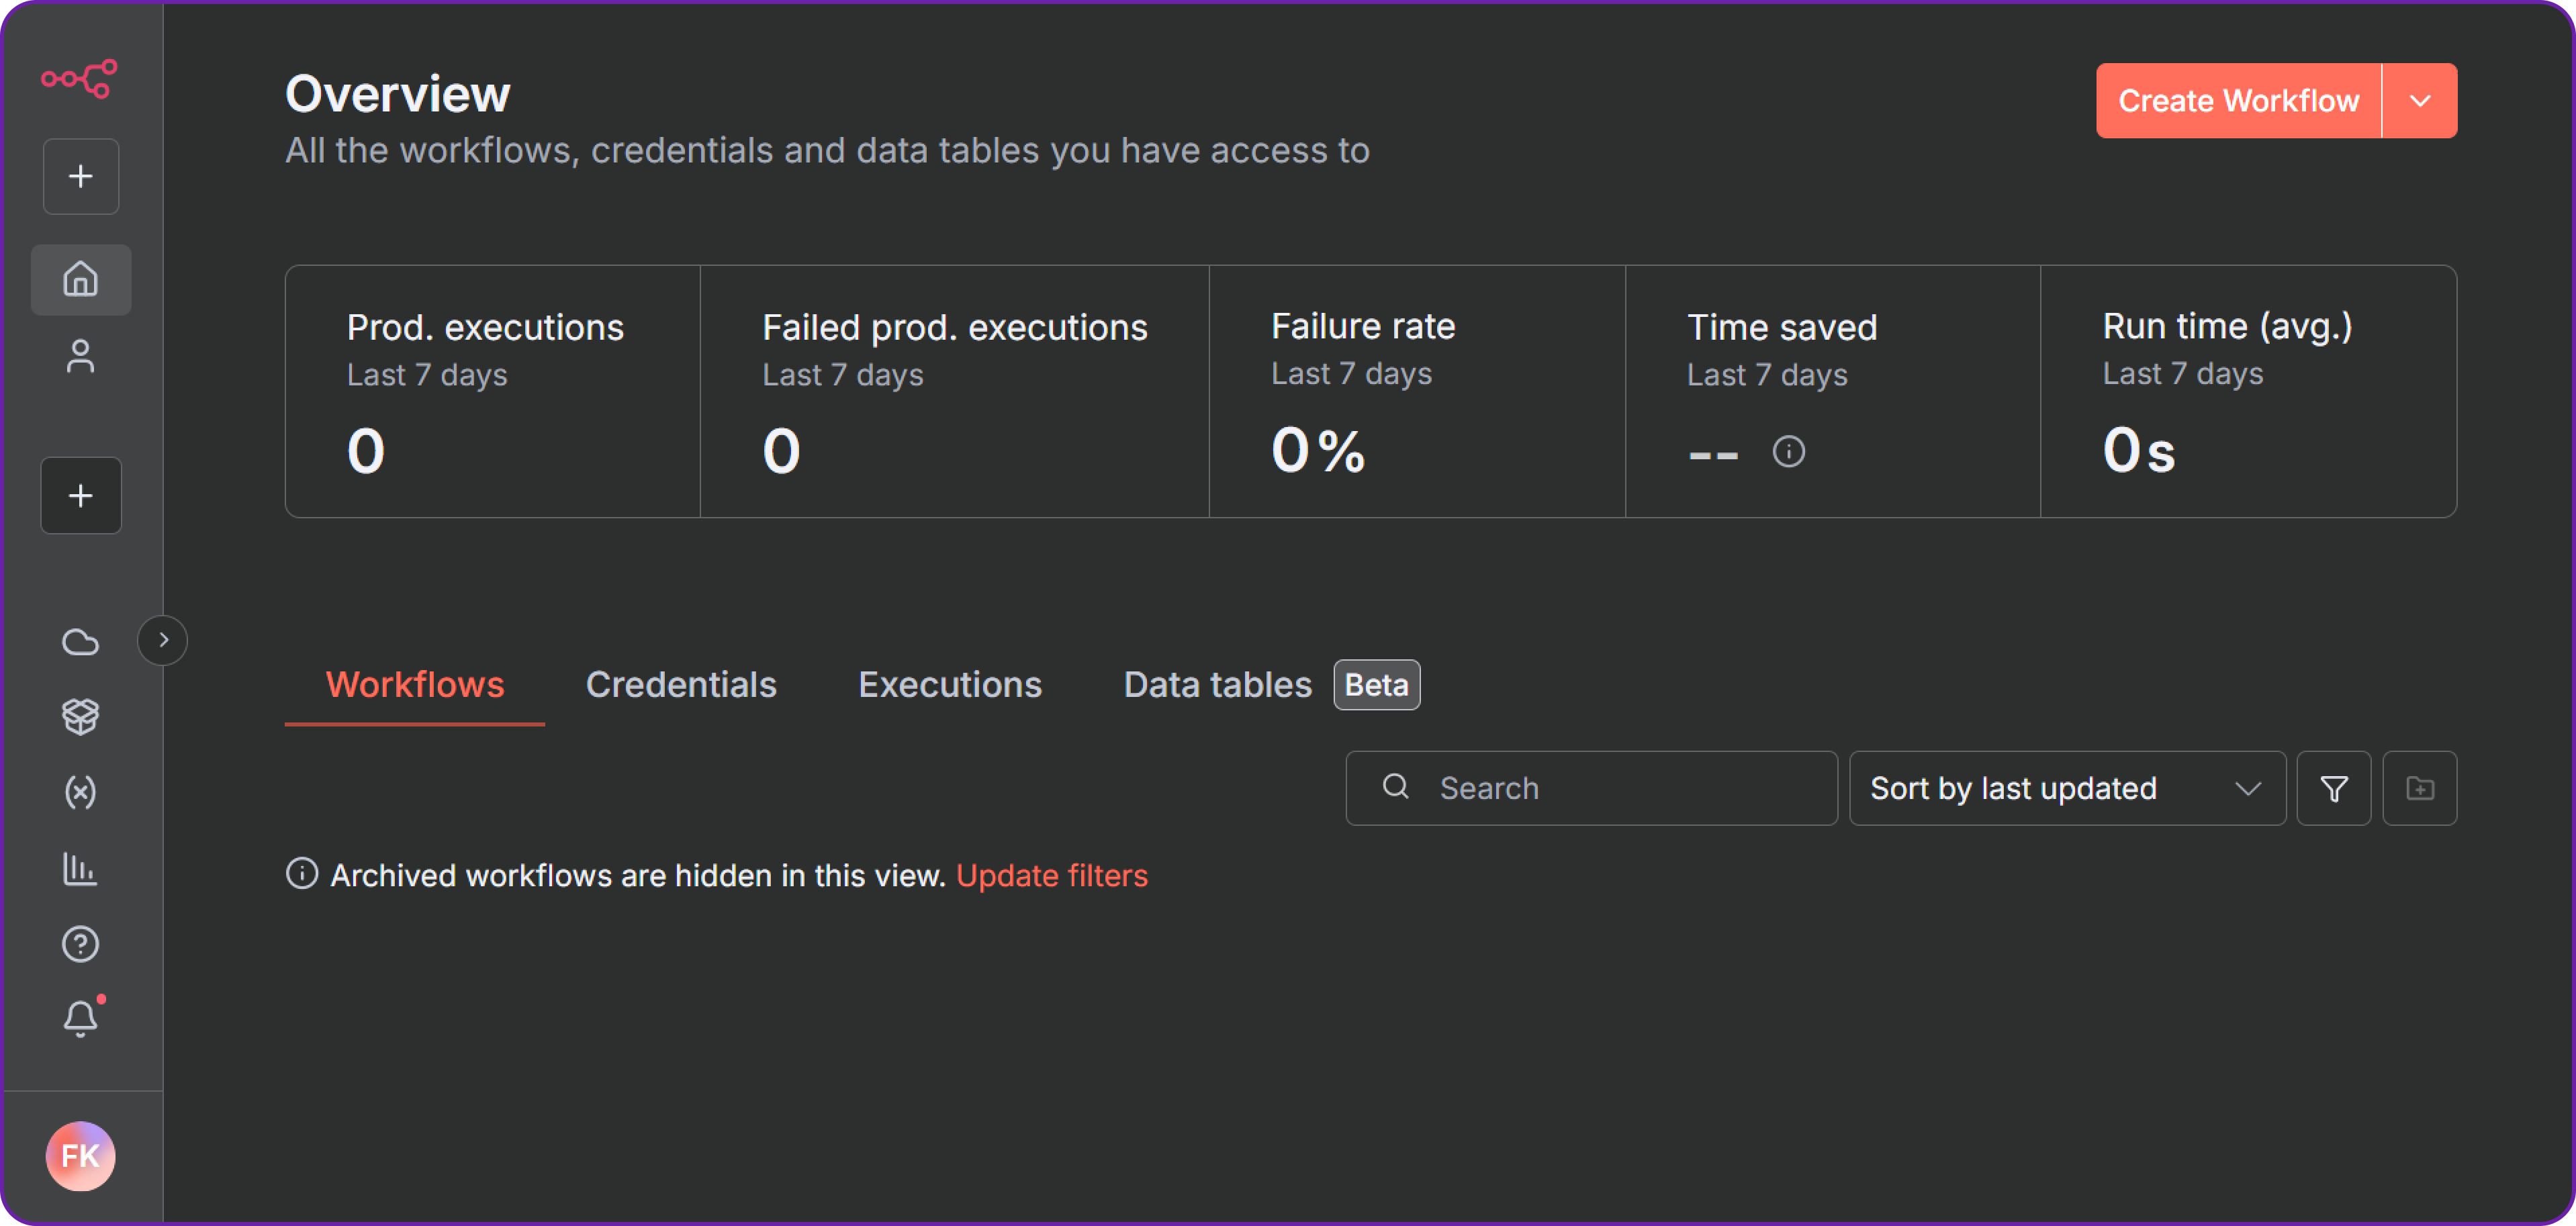
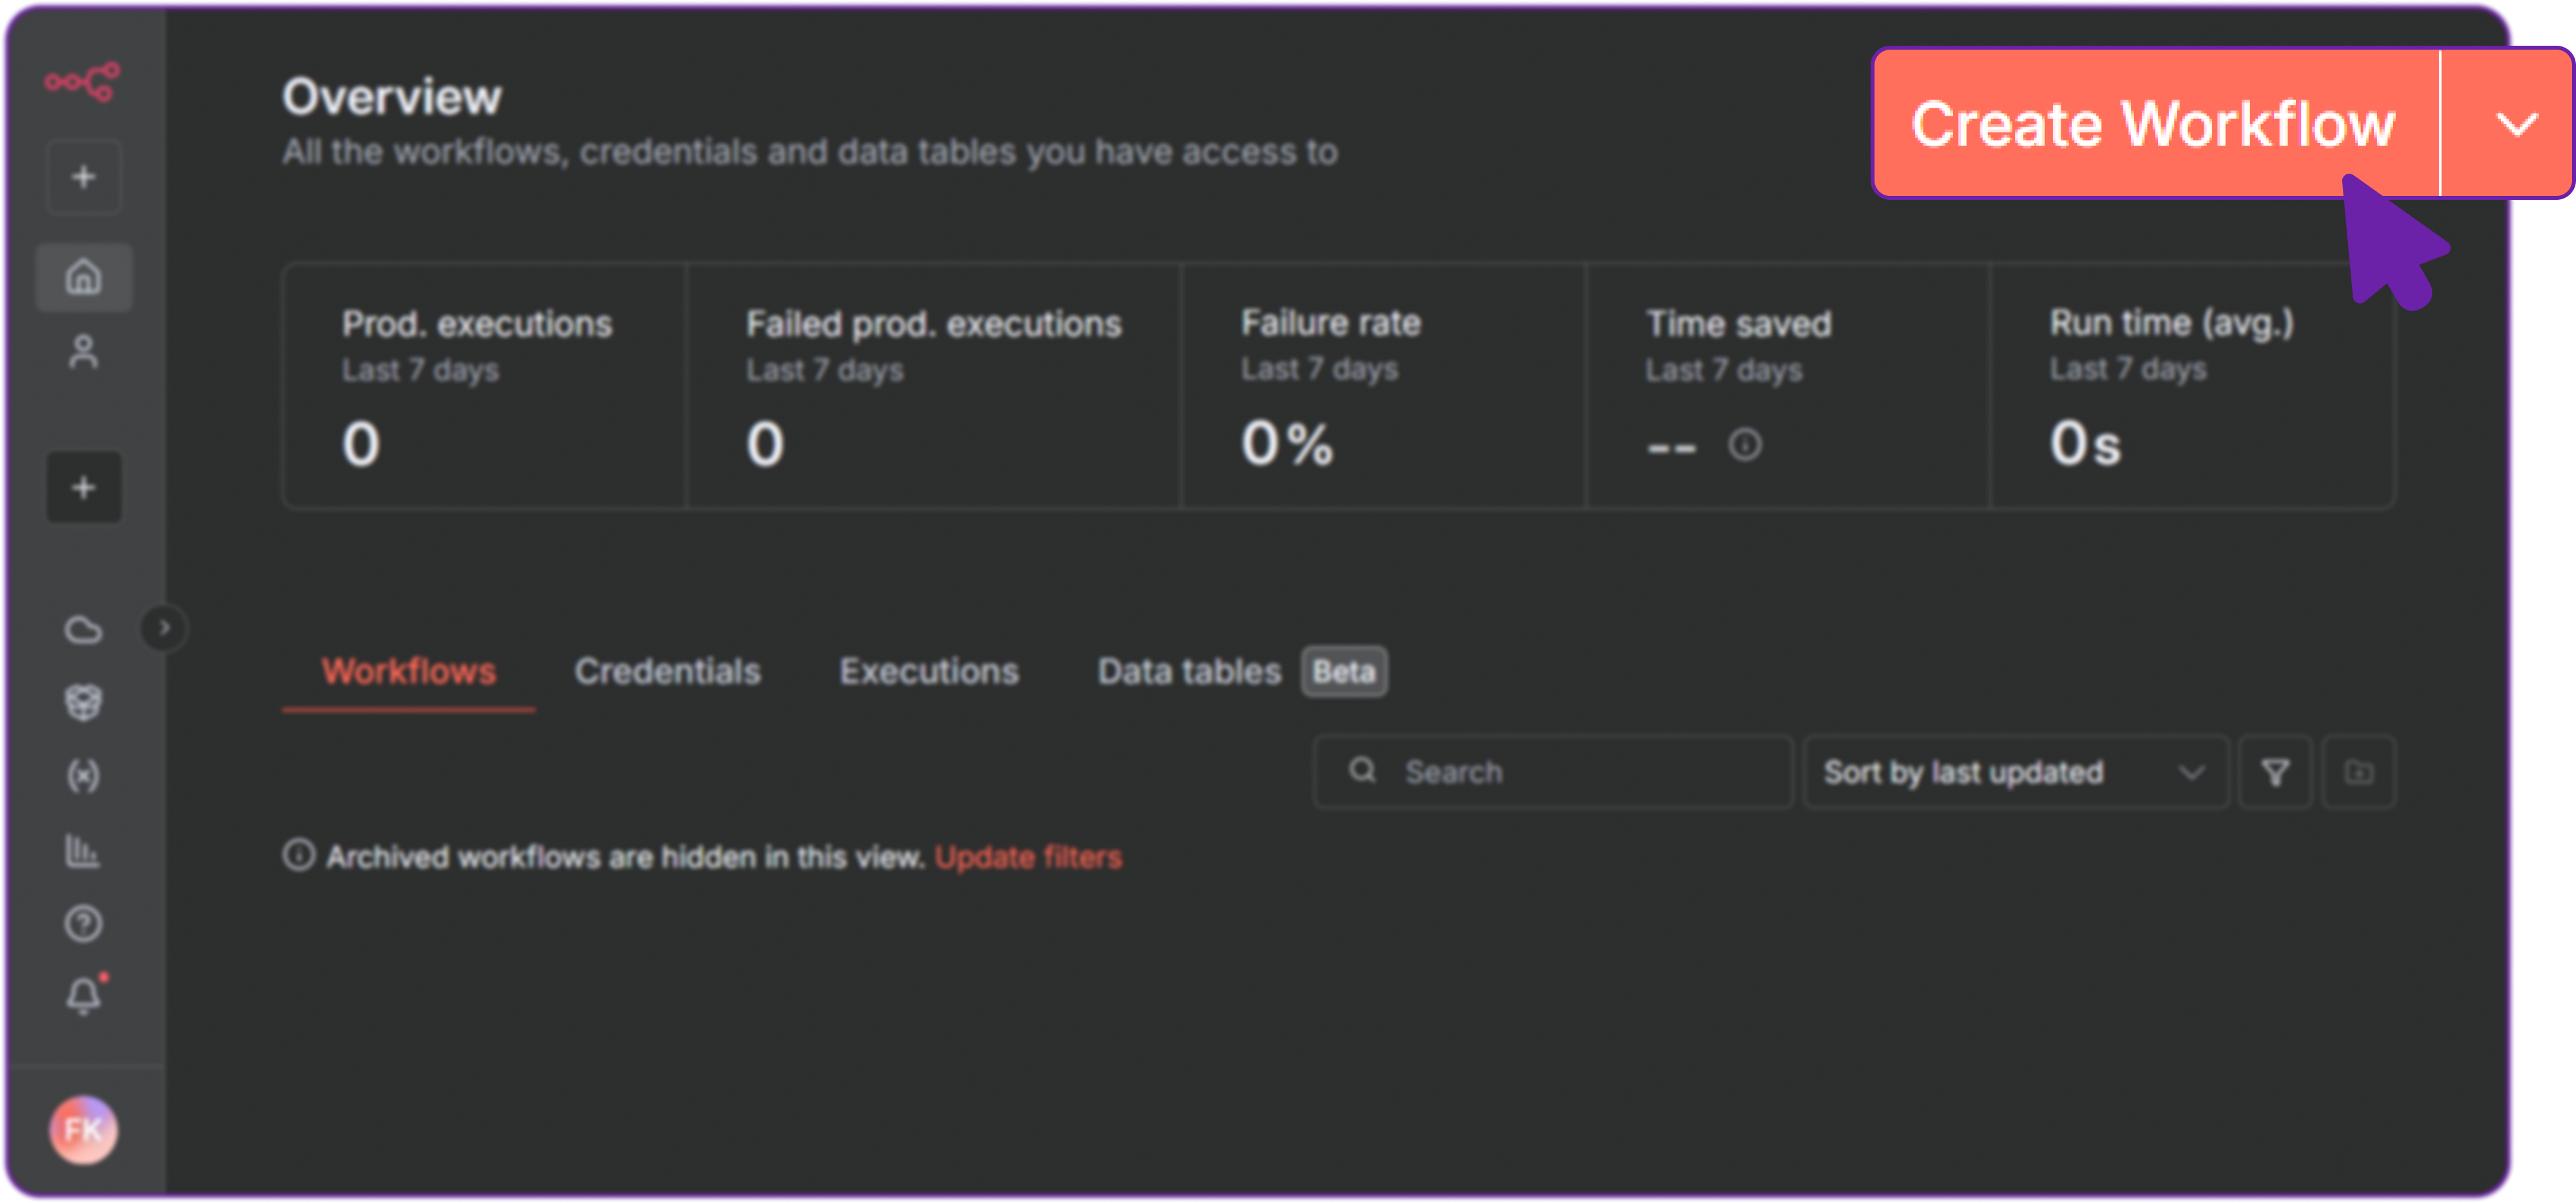
Step 4: Create a New Workflow in n8n
Great! Now that you have both n8n and your Hyperstack API key ready, let’s create a new workflow in n8n to integrate Hyperstack AI Studio.
Once logged into n8n, click on “New Workflow” to start a fresh automation pipeline.
Workflow is basically a series of connected nodes that perform specific tasks. In our case we are going to create a workflow that takes chat input and processes it using a Hyperstack model and generates a response.
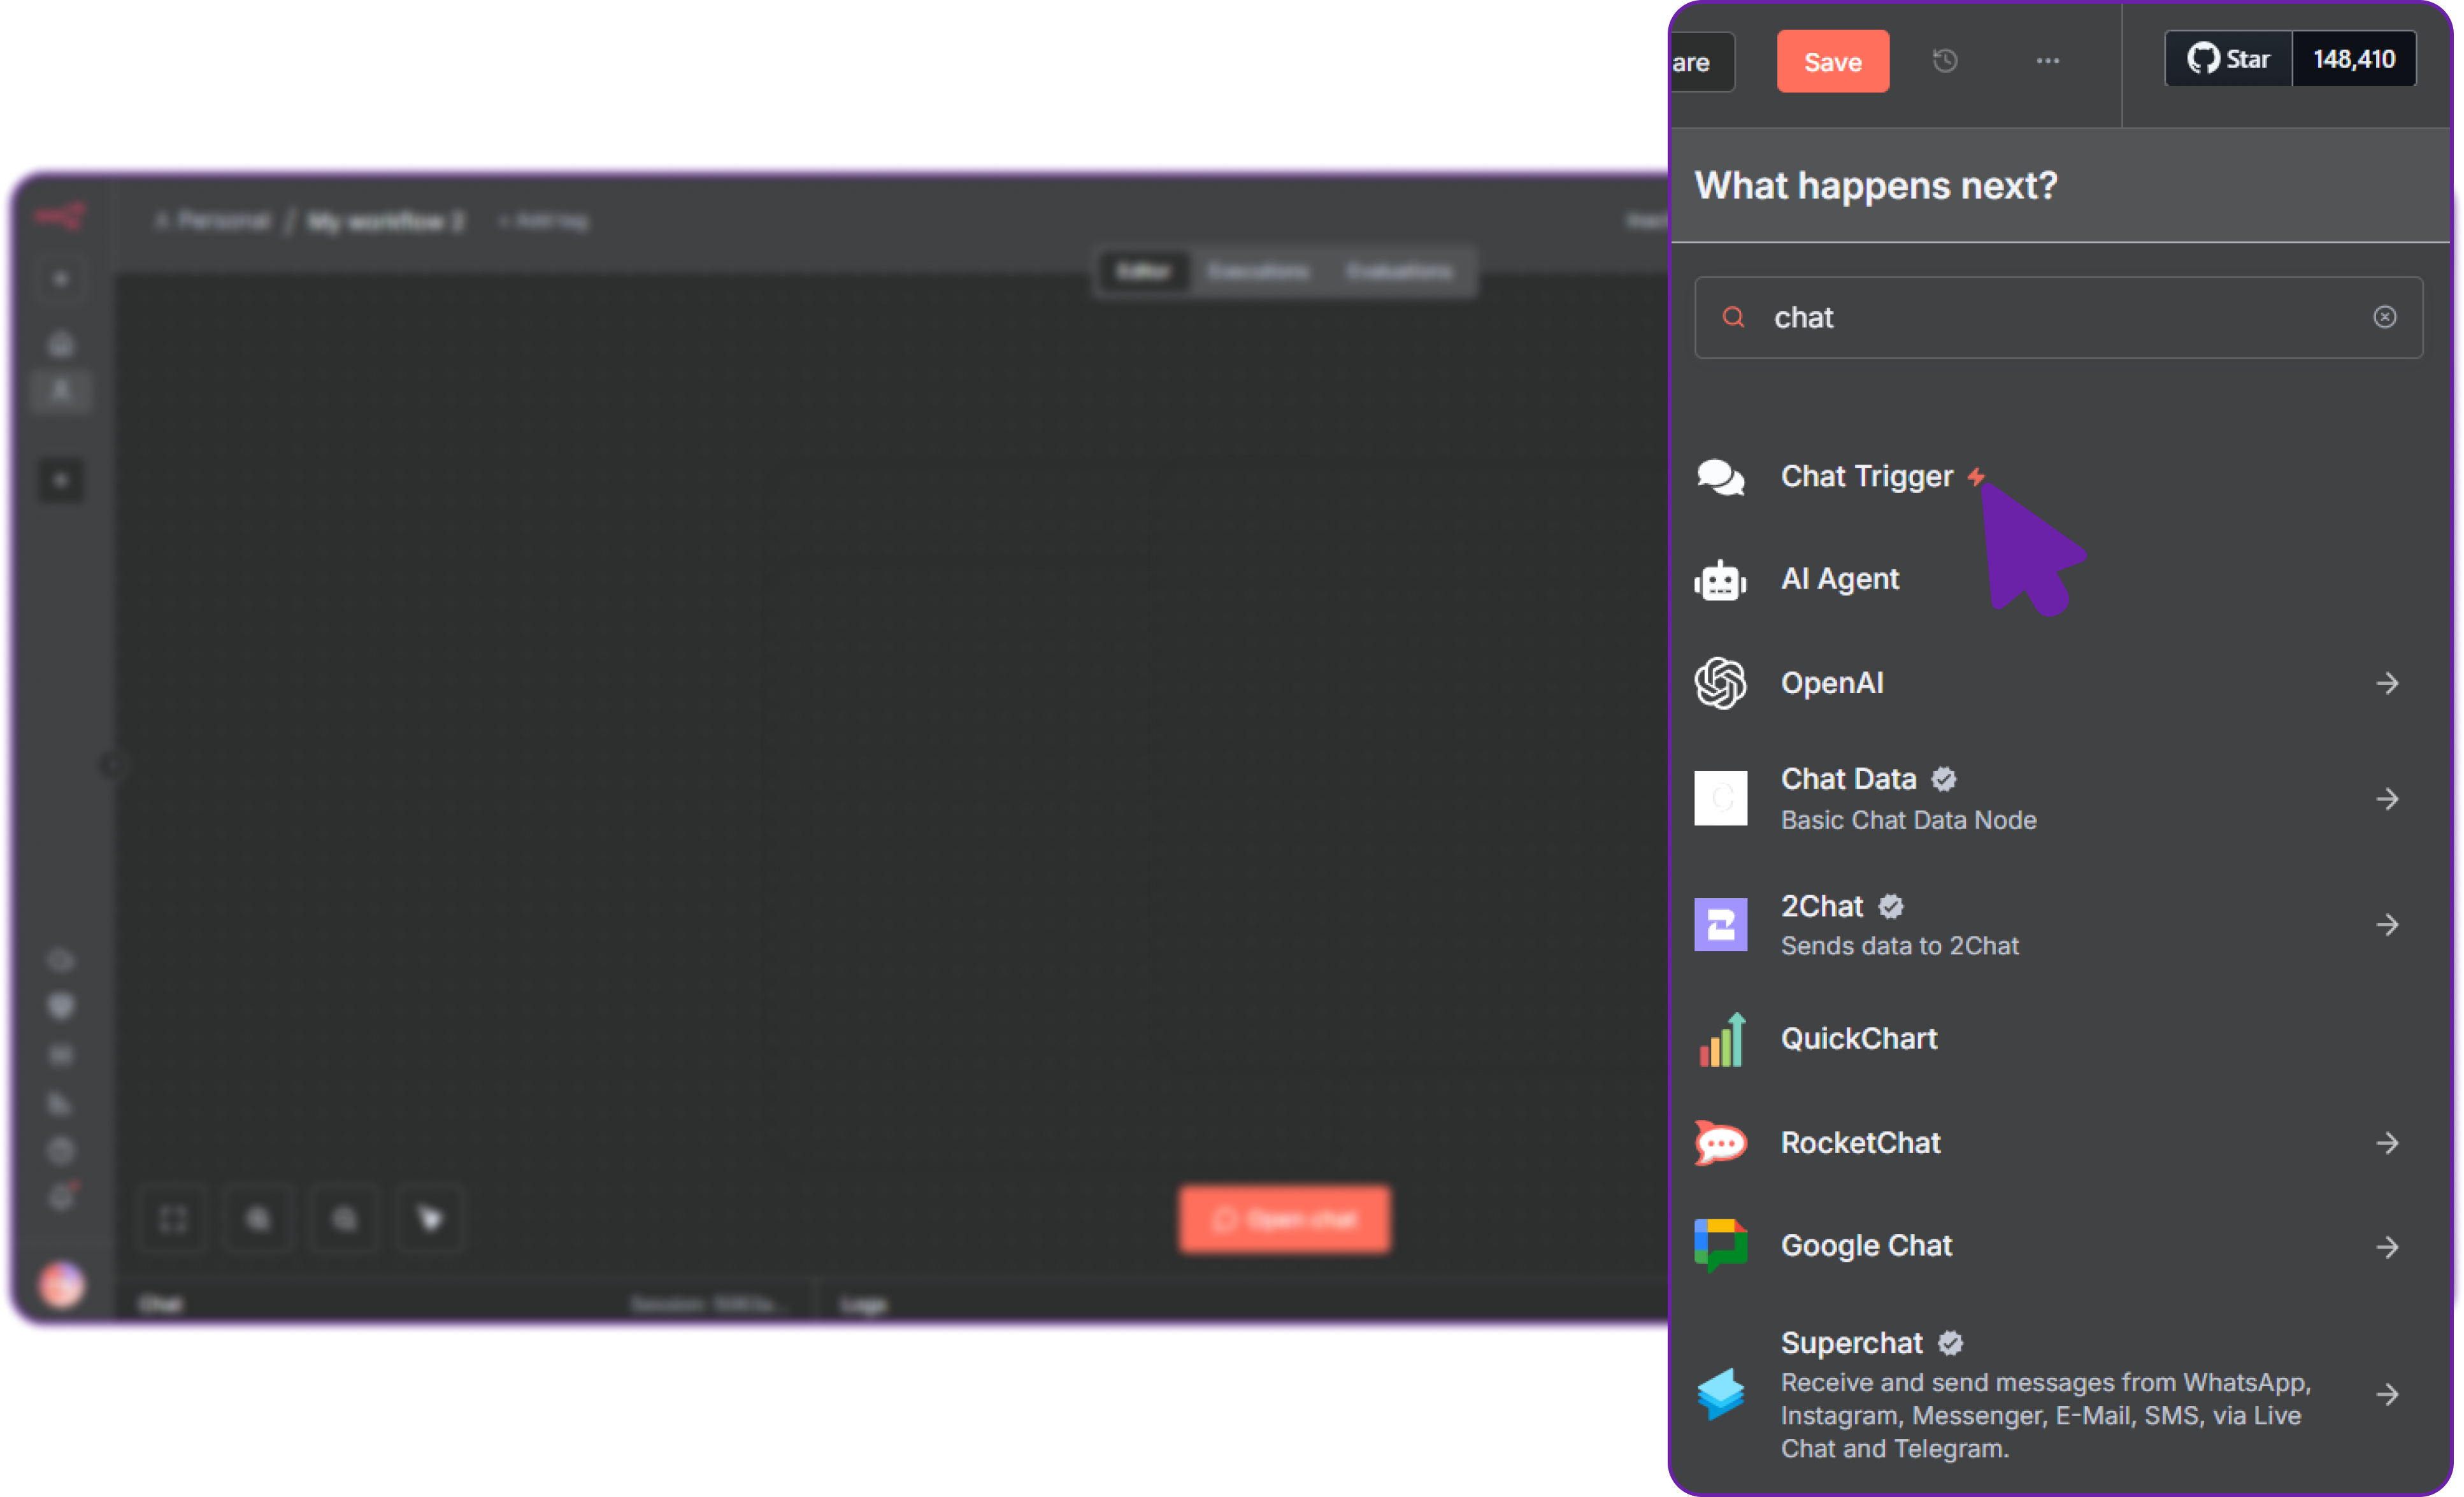
Step 5: Add a Chat Trigger Node
To create a workflow that responds to chat messages, we first need to add a Chat Trigger Node.
Click the “+” icon and search for Chat Trigger Node.
This node will act as a starting point for messages received from a chat or input source.
We can configure many options like public accessibility, authentication, or webhook settings but for now, we can leave it as default.
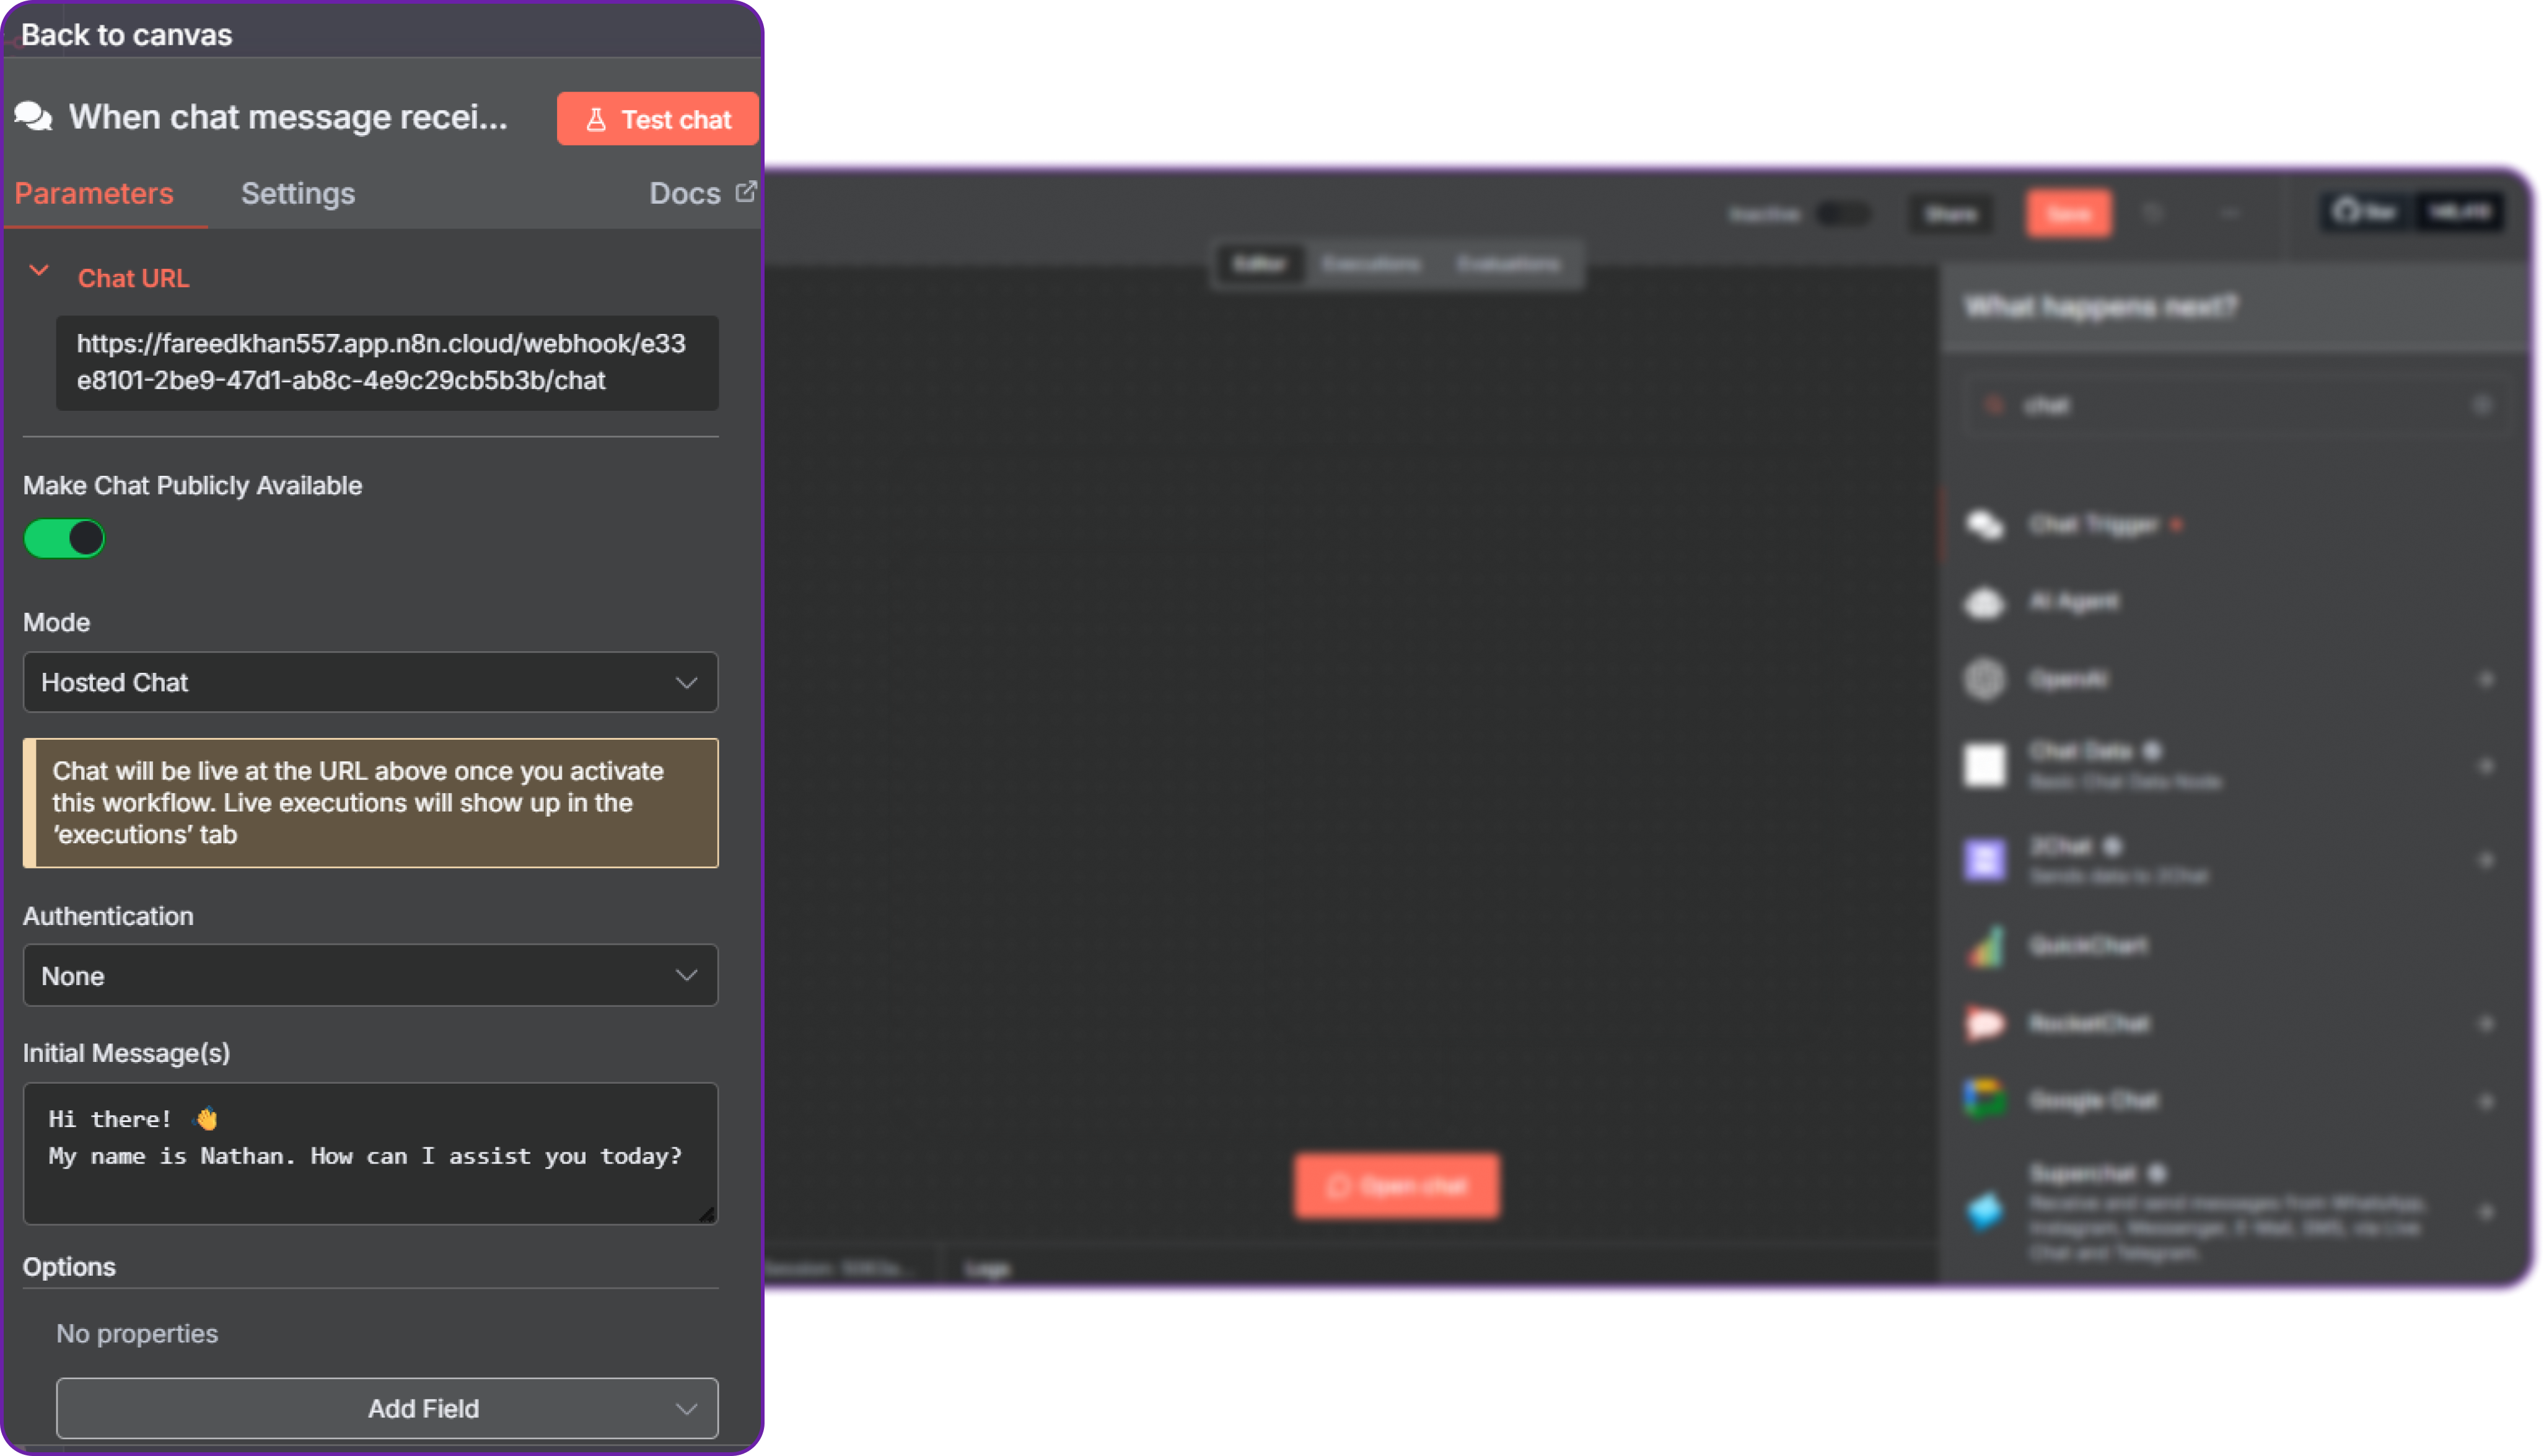
Once done, click Back to Canvas to return to the main workflow editor.
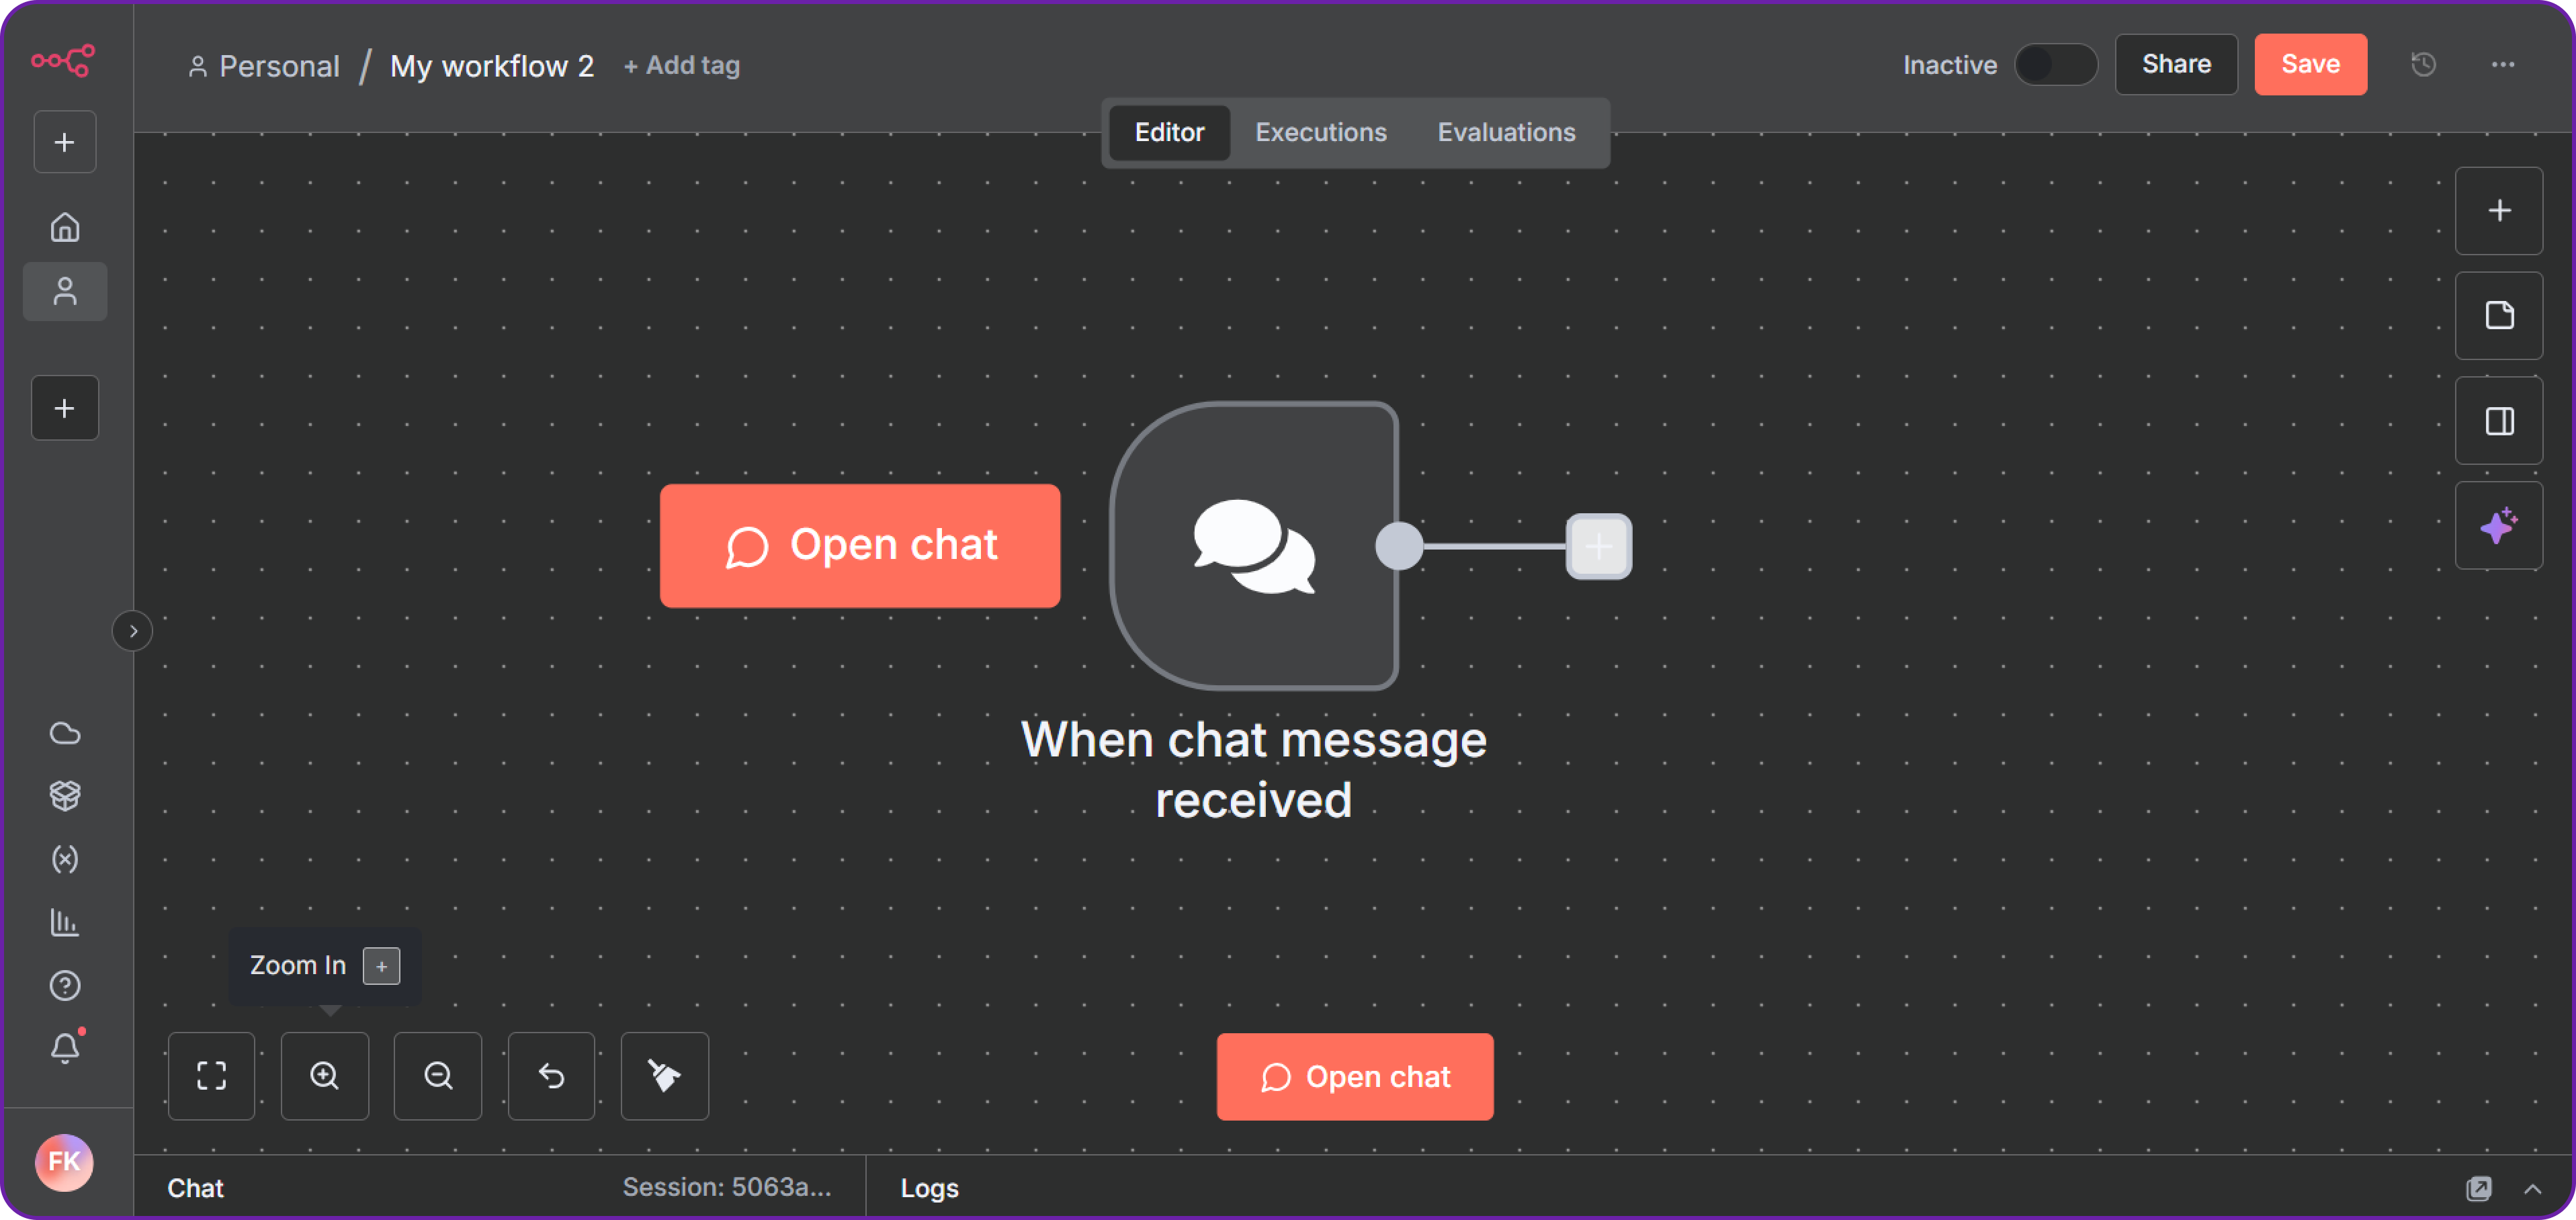
Now we can add another node to the workflow by clicking on the "+", so let's proceed to the next step.
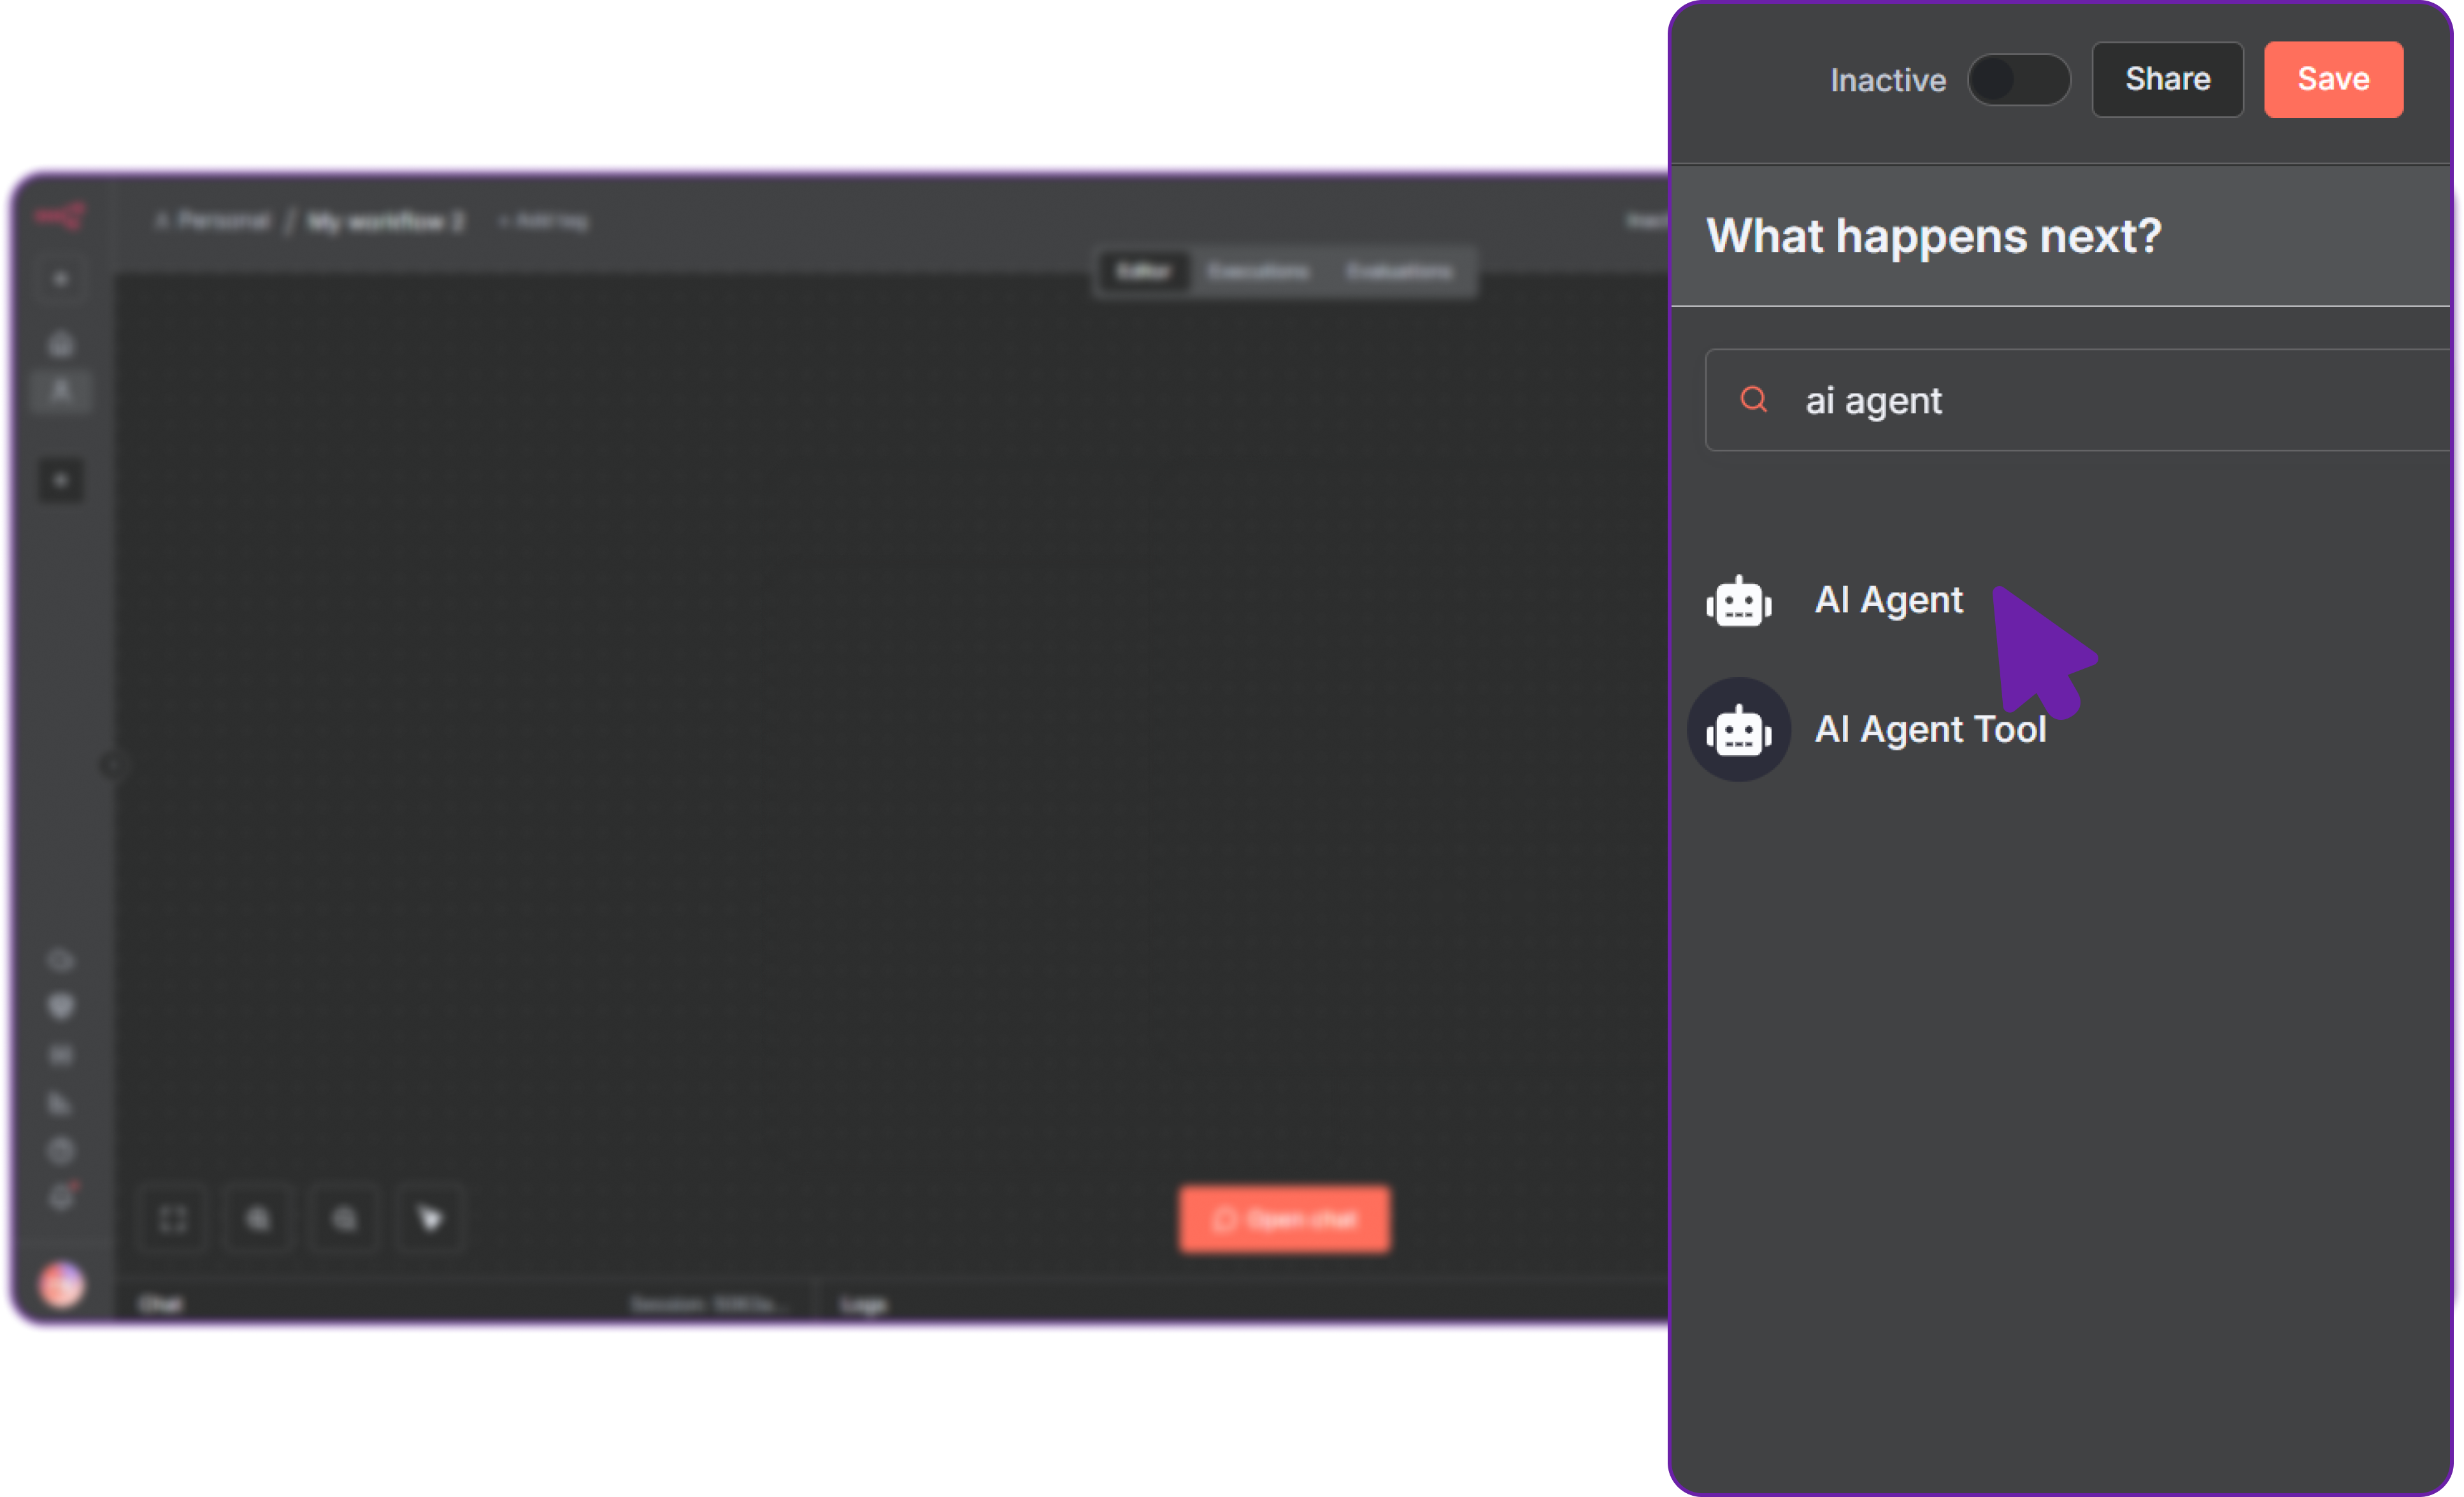
Step 6: Add an AI Agent Node (Hyperstack Model)
Our workflow for now only has a chat trigger node, which listens for incoming messages but what about processing those messages?
For that, we need to add an AI Agent Node that will use our Hyperstack model to process the incoming chat messages.
Now, click the “+” icon again and select the AI Agent Node.
This node will process incoming messages through your Hyperstack model.
Under Credentials, click the “+” icon to configure a new model connection, this is where we will set up Hyperstack.
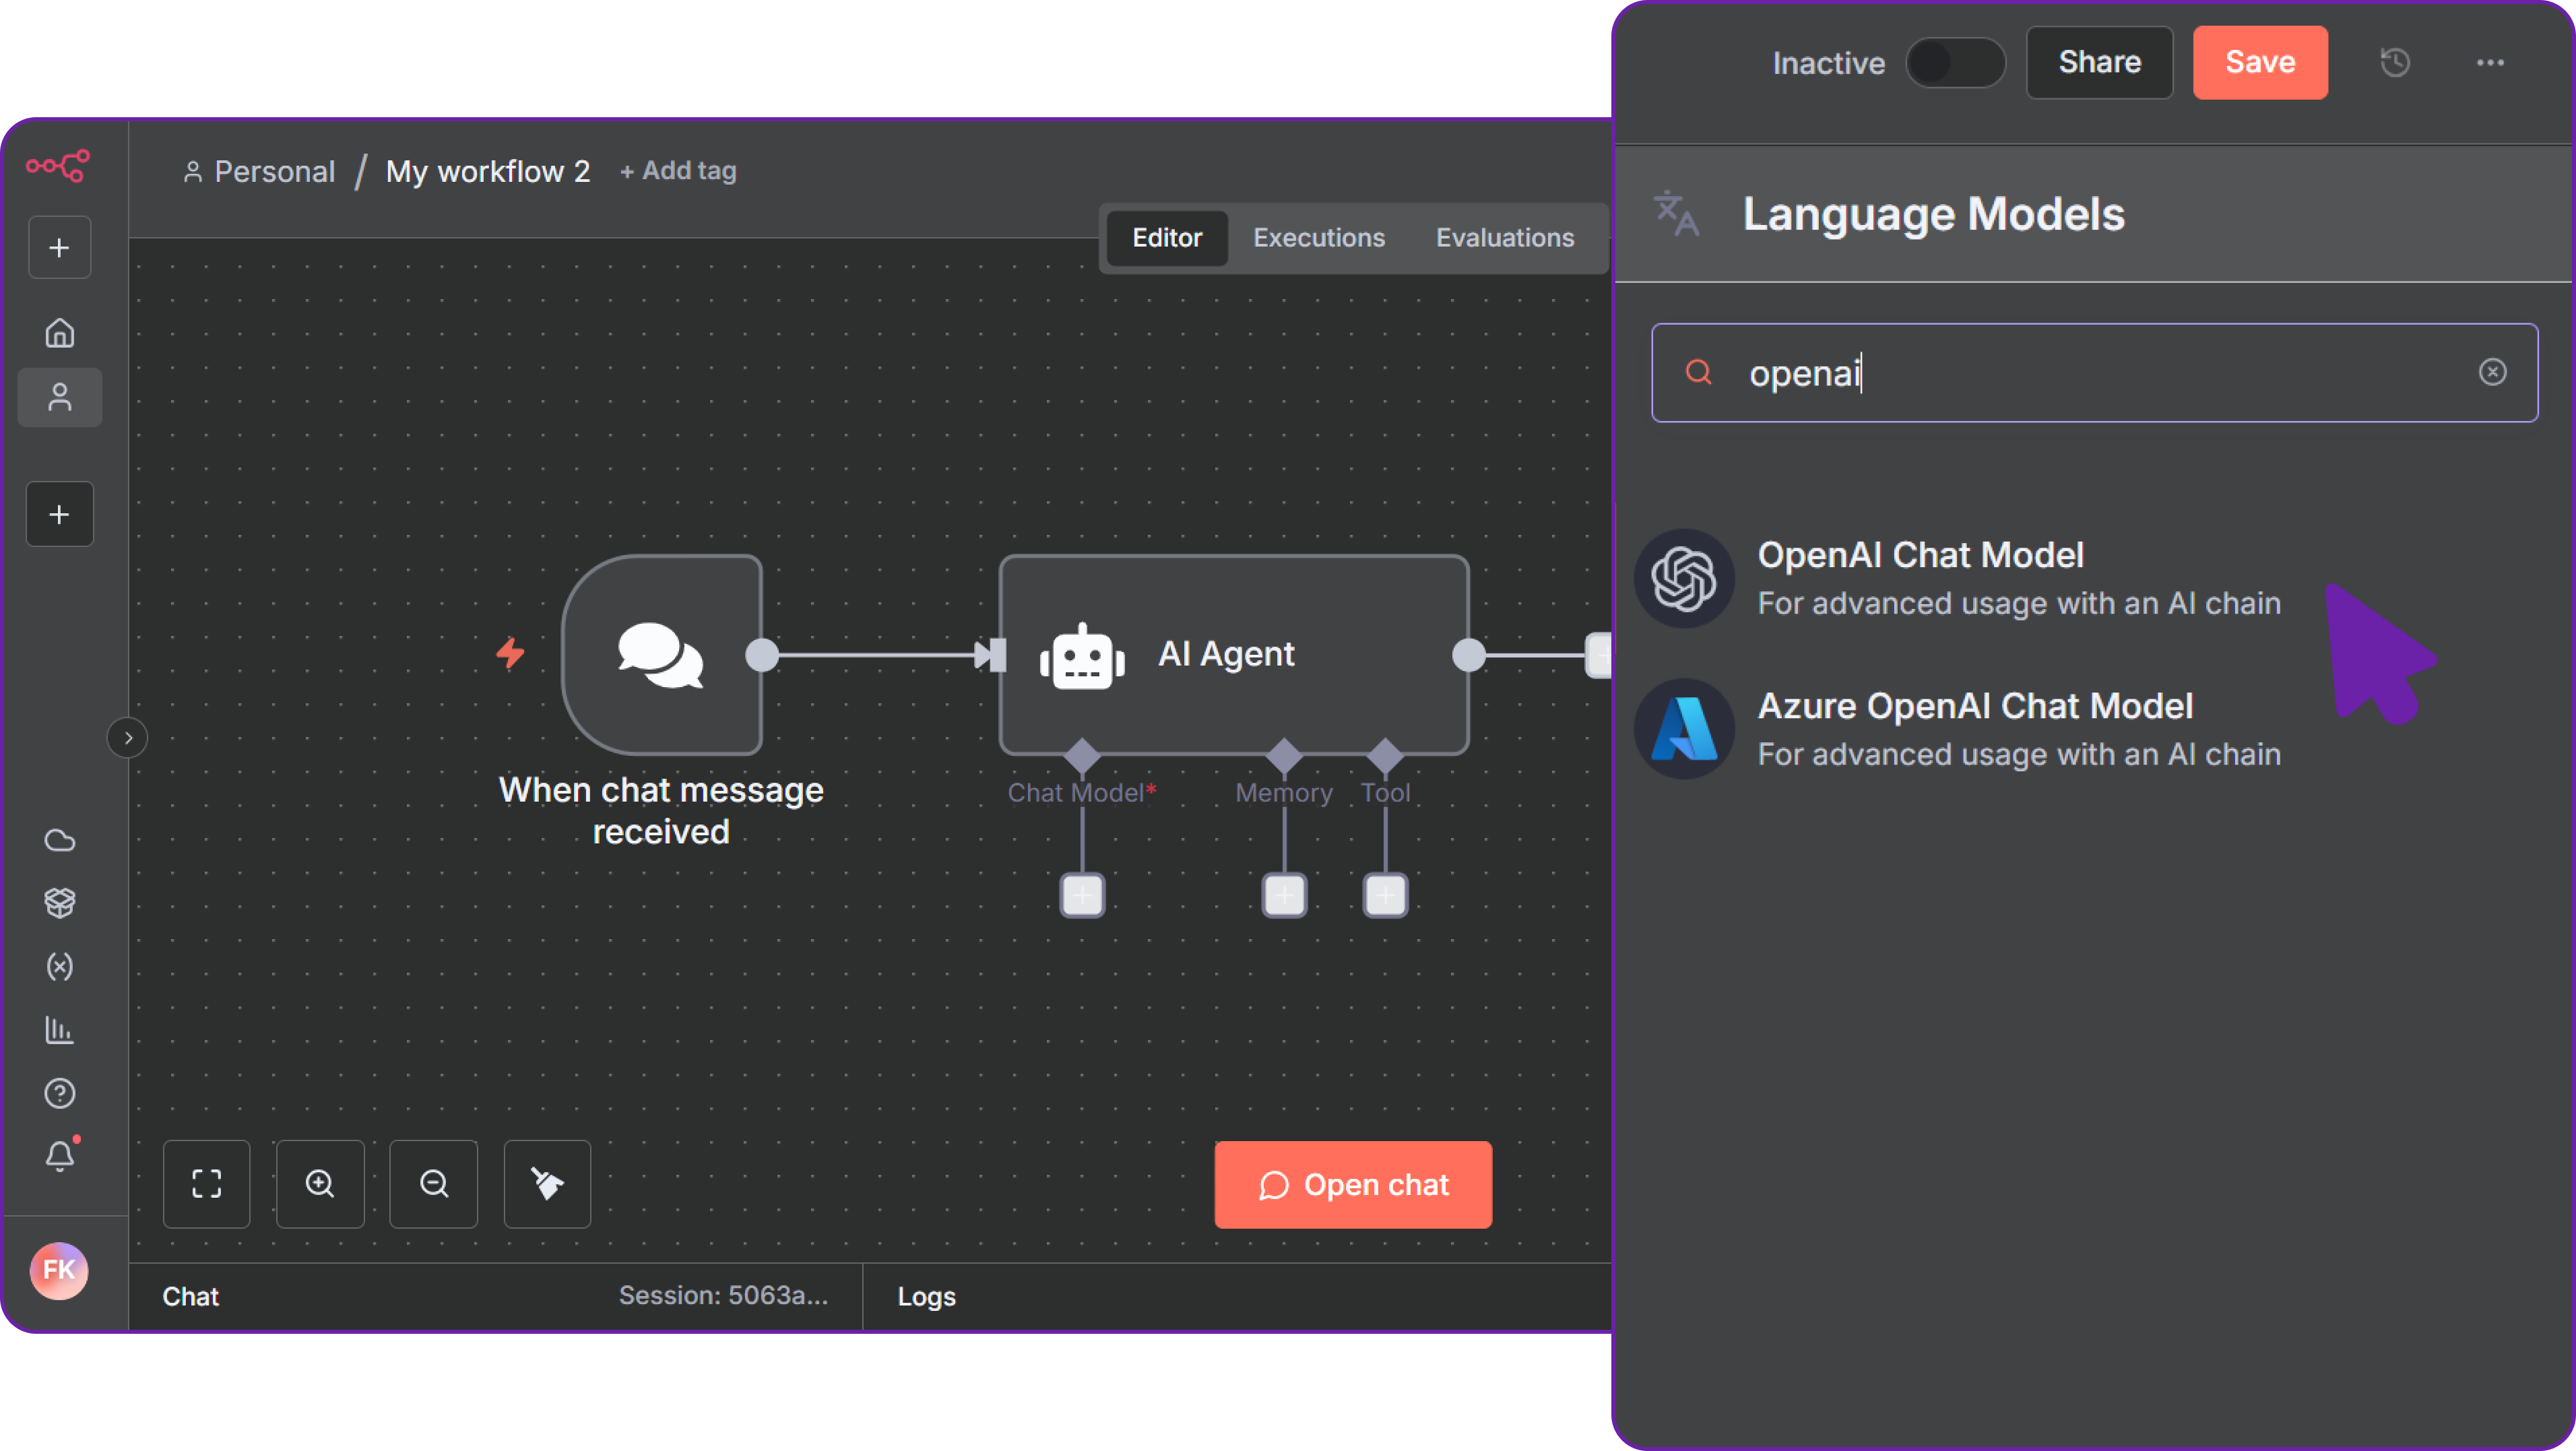
Since Hyperstack uses an OpenAI-compatible API, It can easily be integrated here.
Step 7: Configure OpenAI-Compatible Credentials
When prompted, click Create New Credential and fill in the fields using the information from your Hyperstack account:
- API Key: Your Hyperstack-generated API key.
- Base URL: Your Hyperstack API endpoint URL (e.g.,
https://api.hyperstack.cloud/v1).
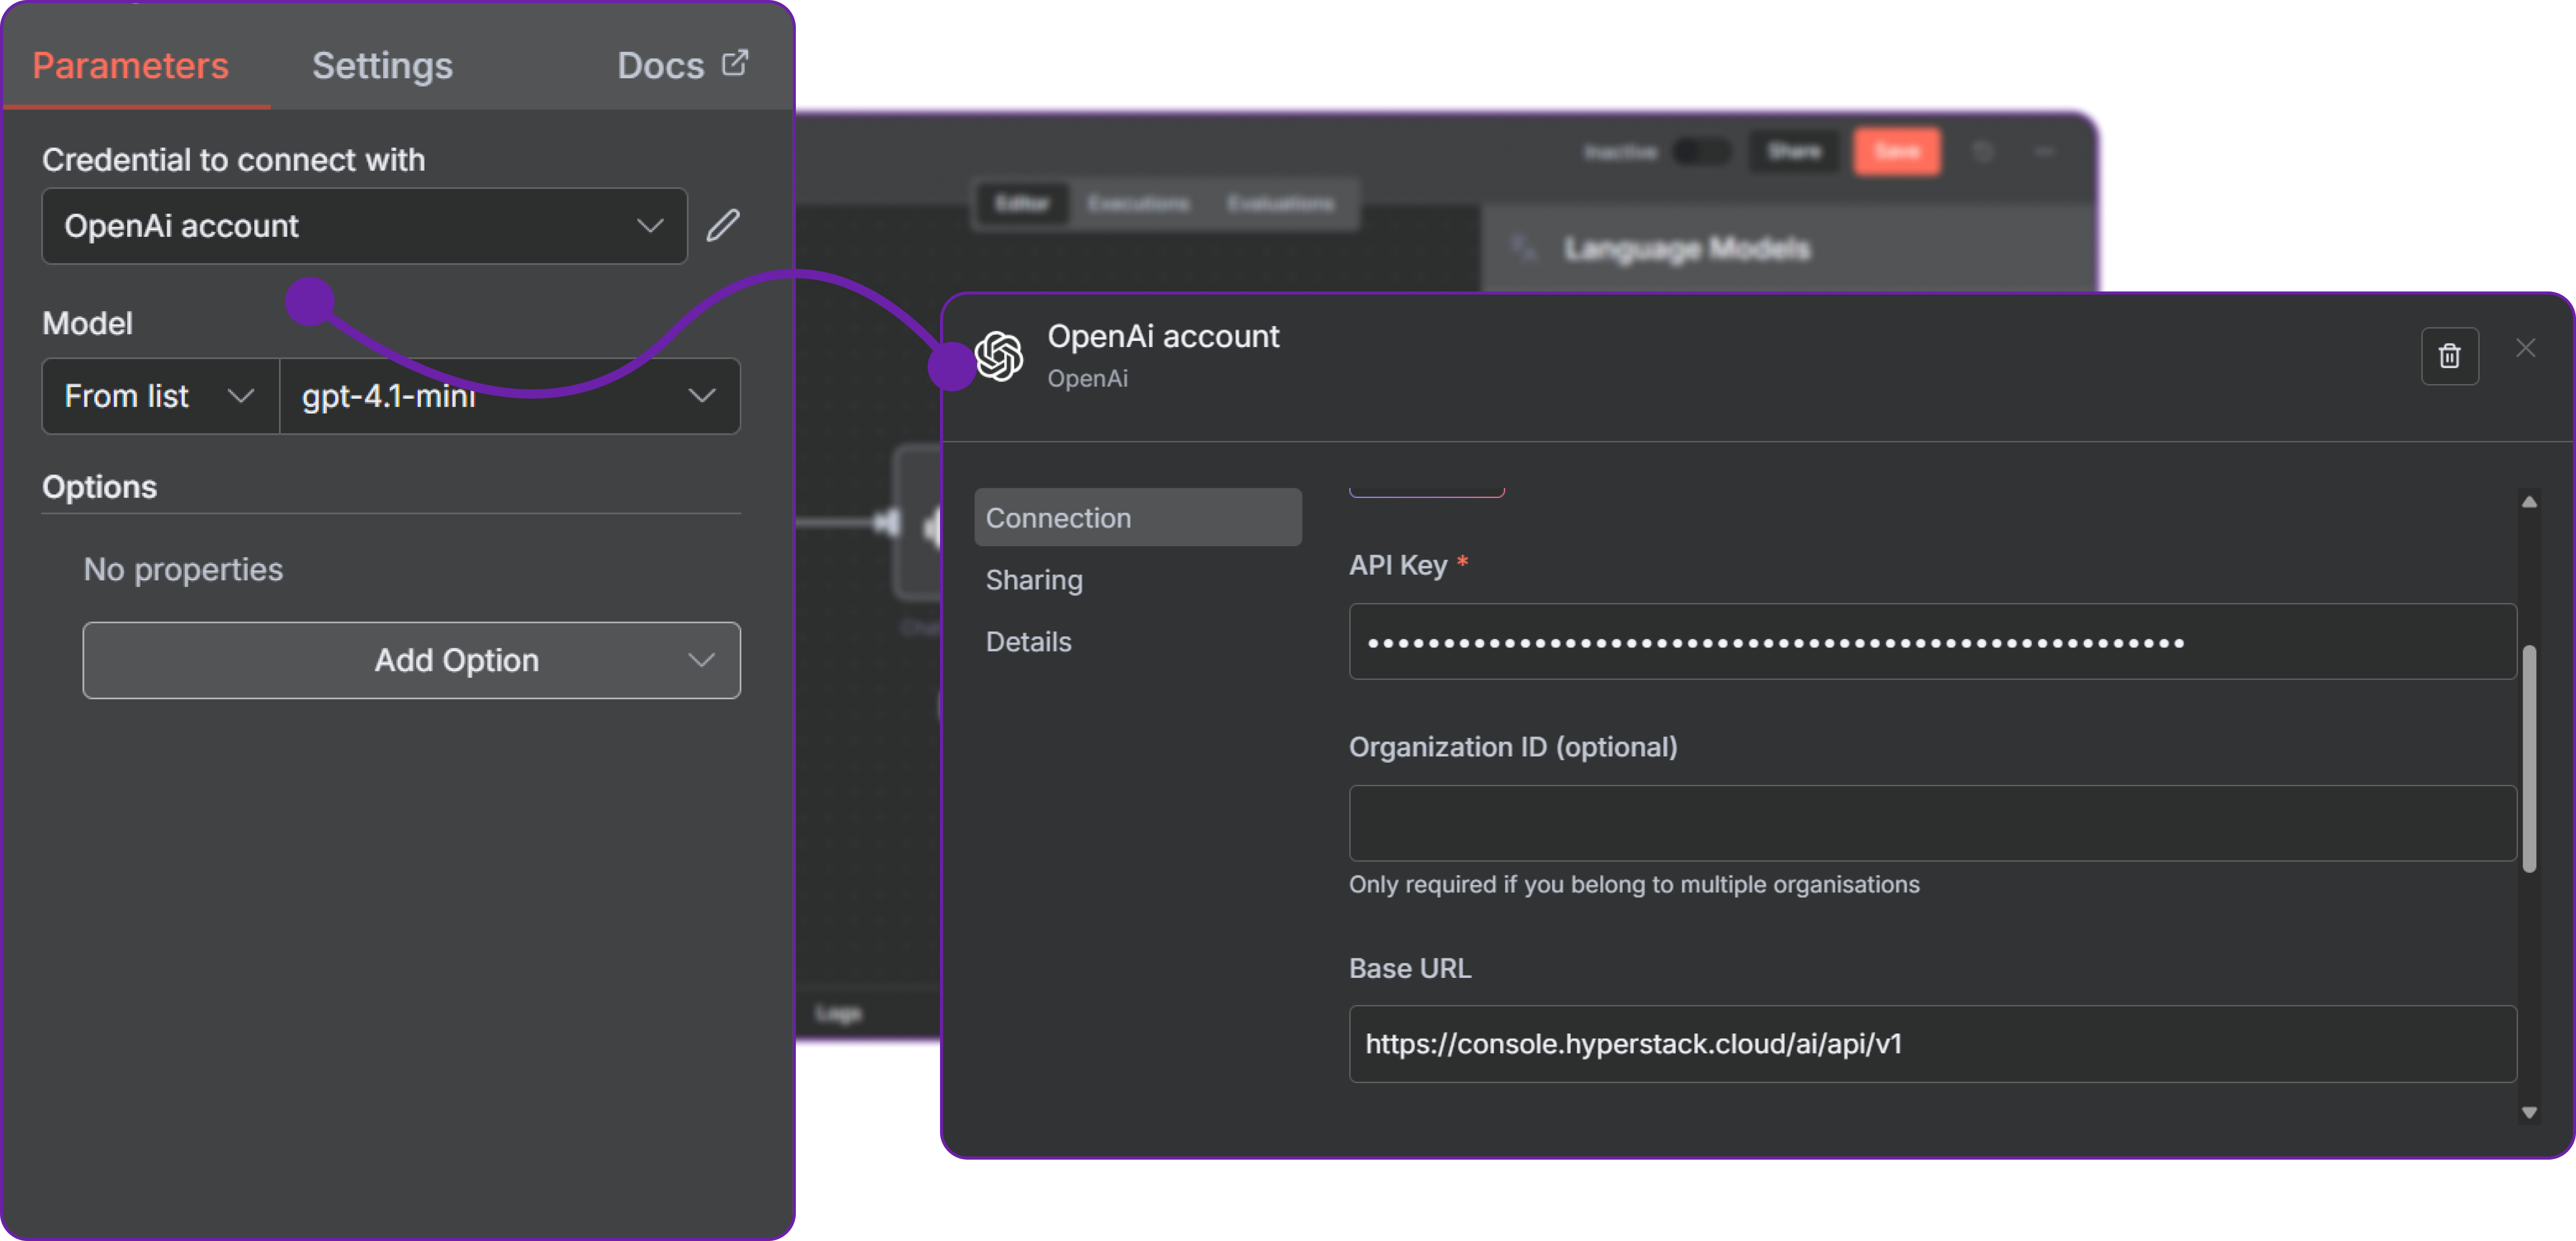
Simply save these credentials, it might throw error because by default it is trying to connect to openai api but we will fix that in the next step.
Step 8: Select the Hyperstack Model
Once credentials are configured, we need to specify which Hyperstack model to use which is also the reason of error we are seeing earlier.
We are going to use the openai/gpt-oss-120b model as an example, but you can choose any model available in your Hyperstack account.
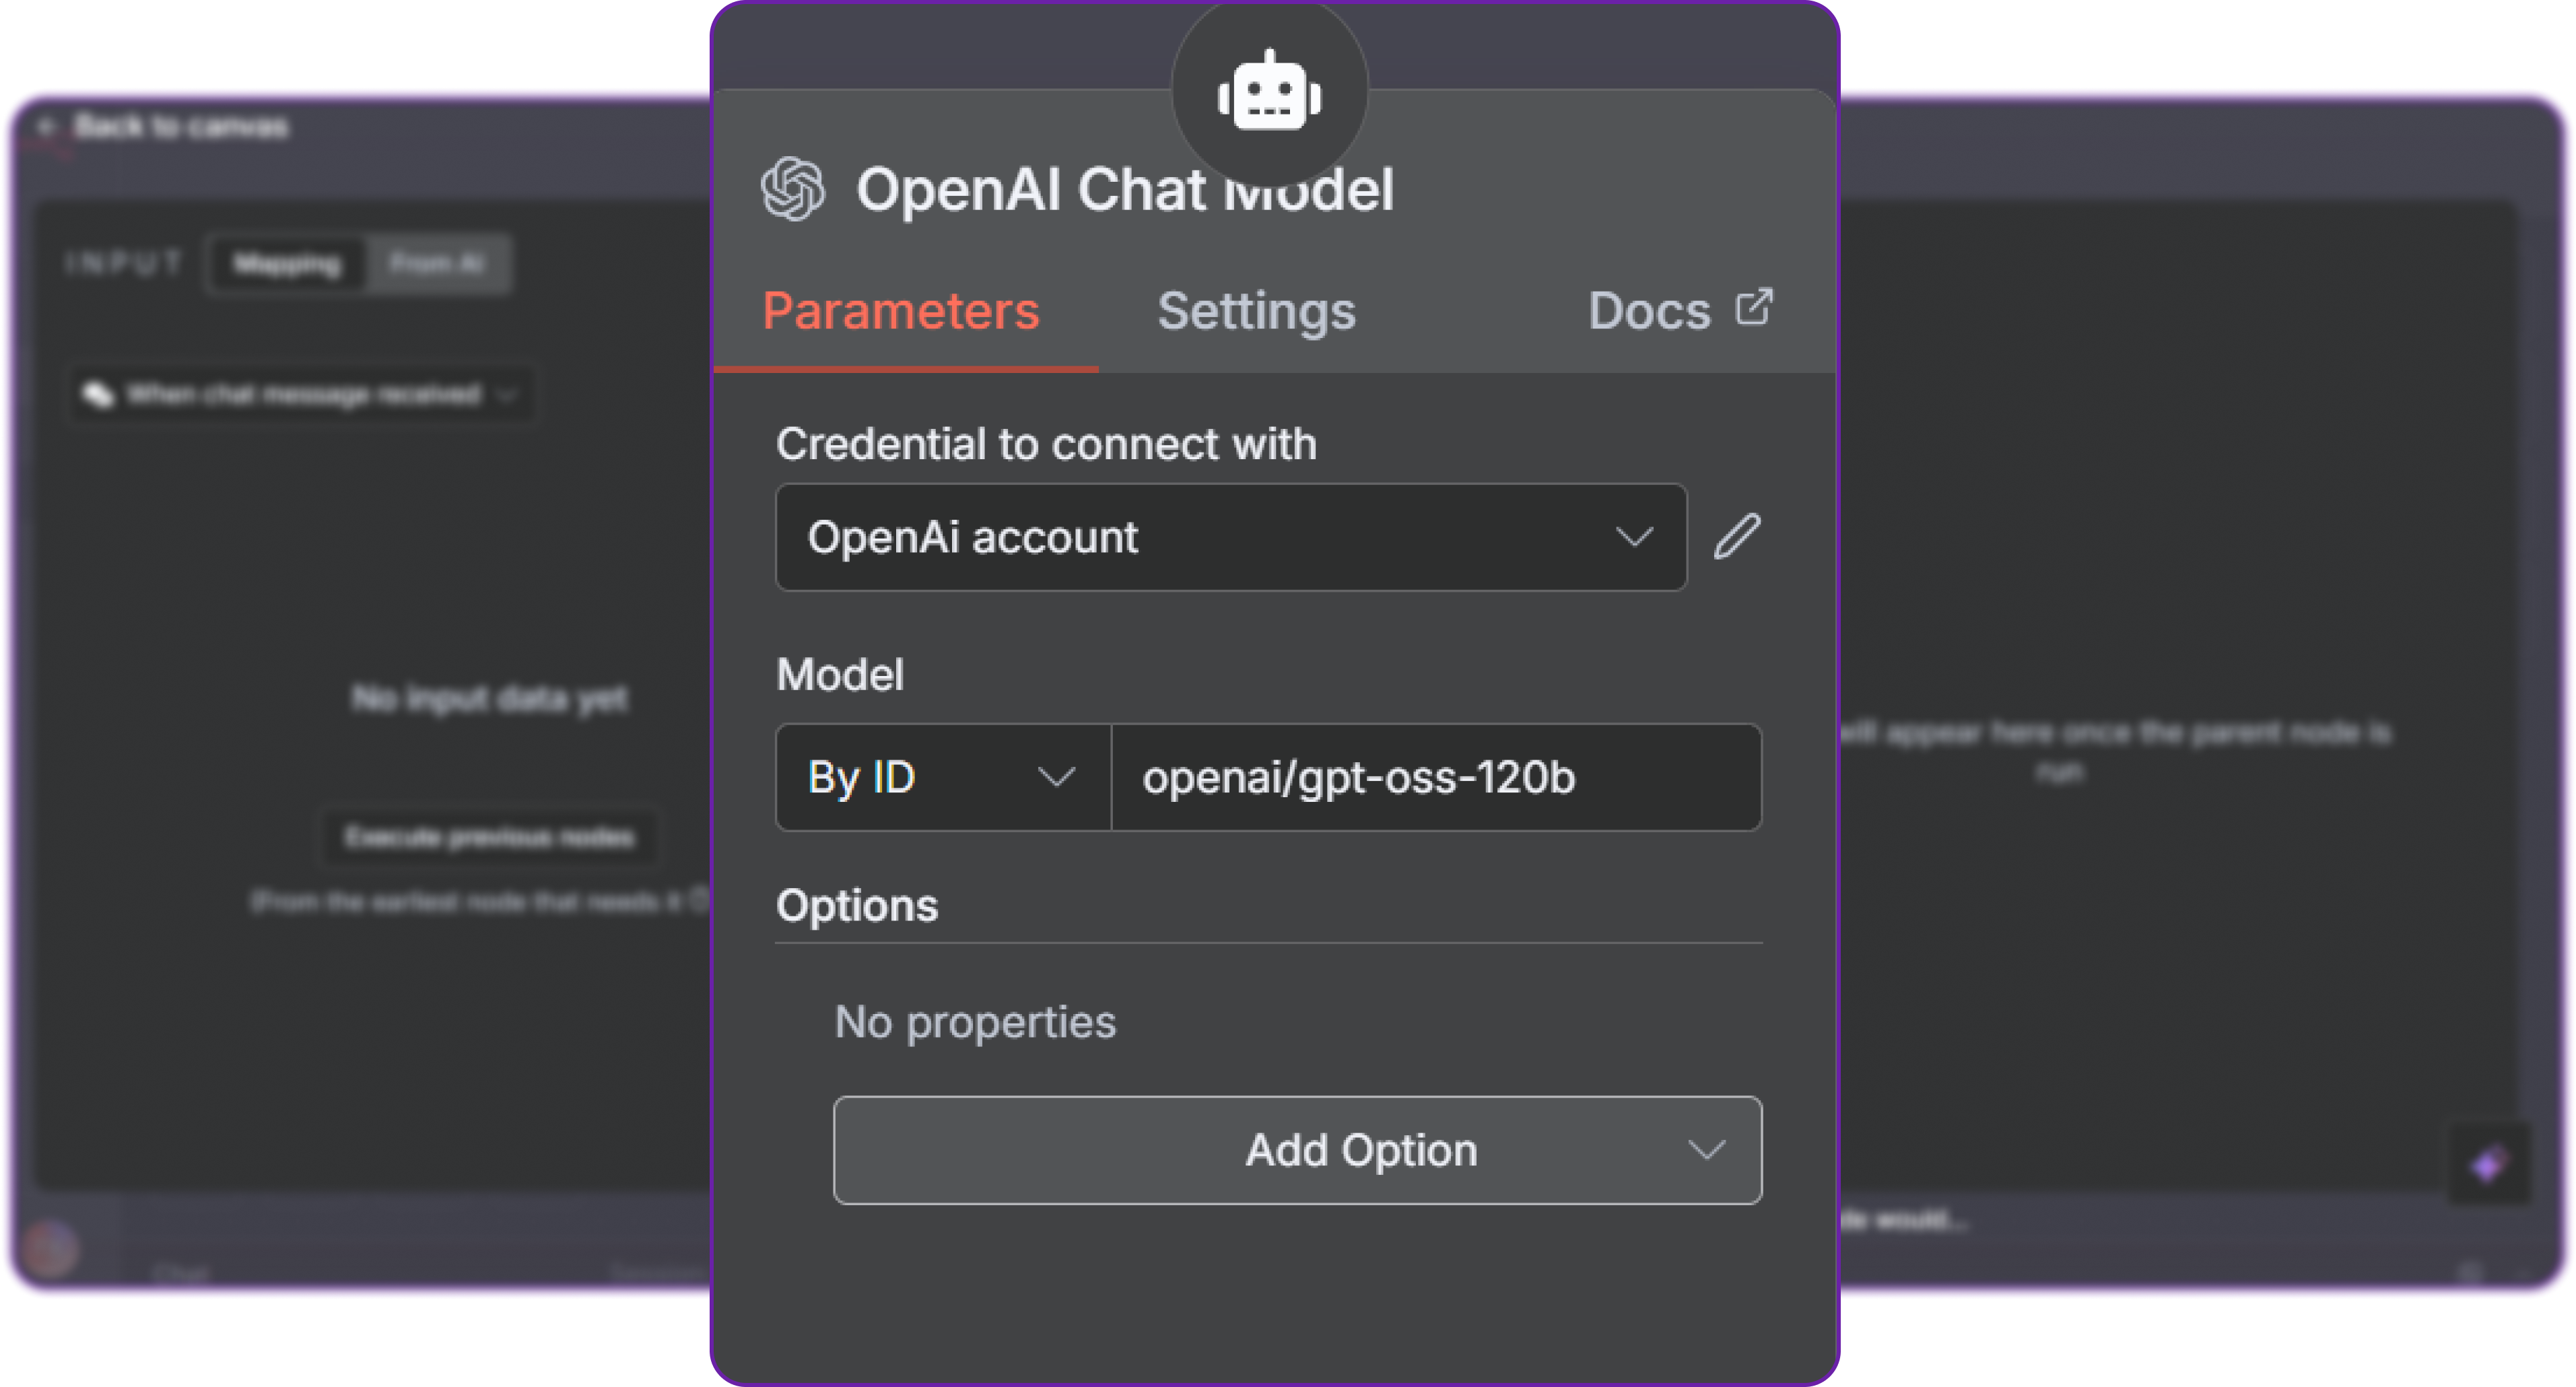
Once that is done, you should see the final configuration of the AI Agent Node.
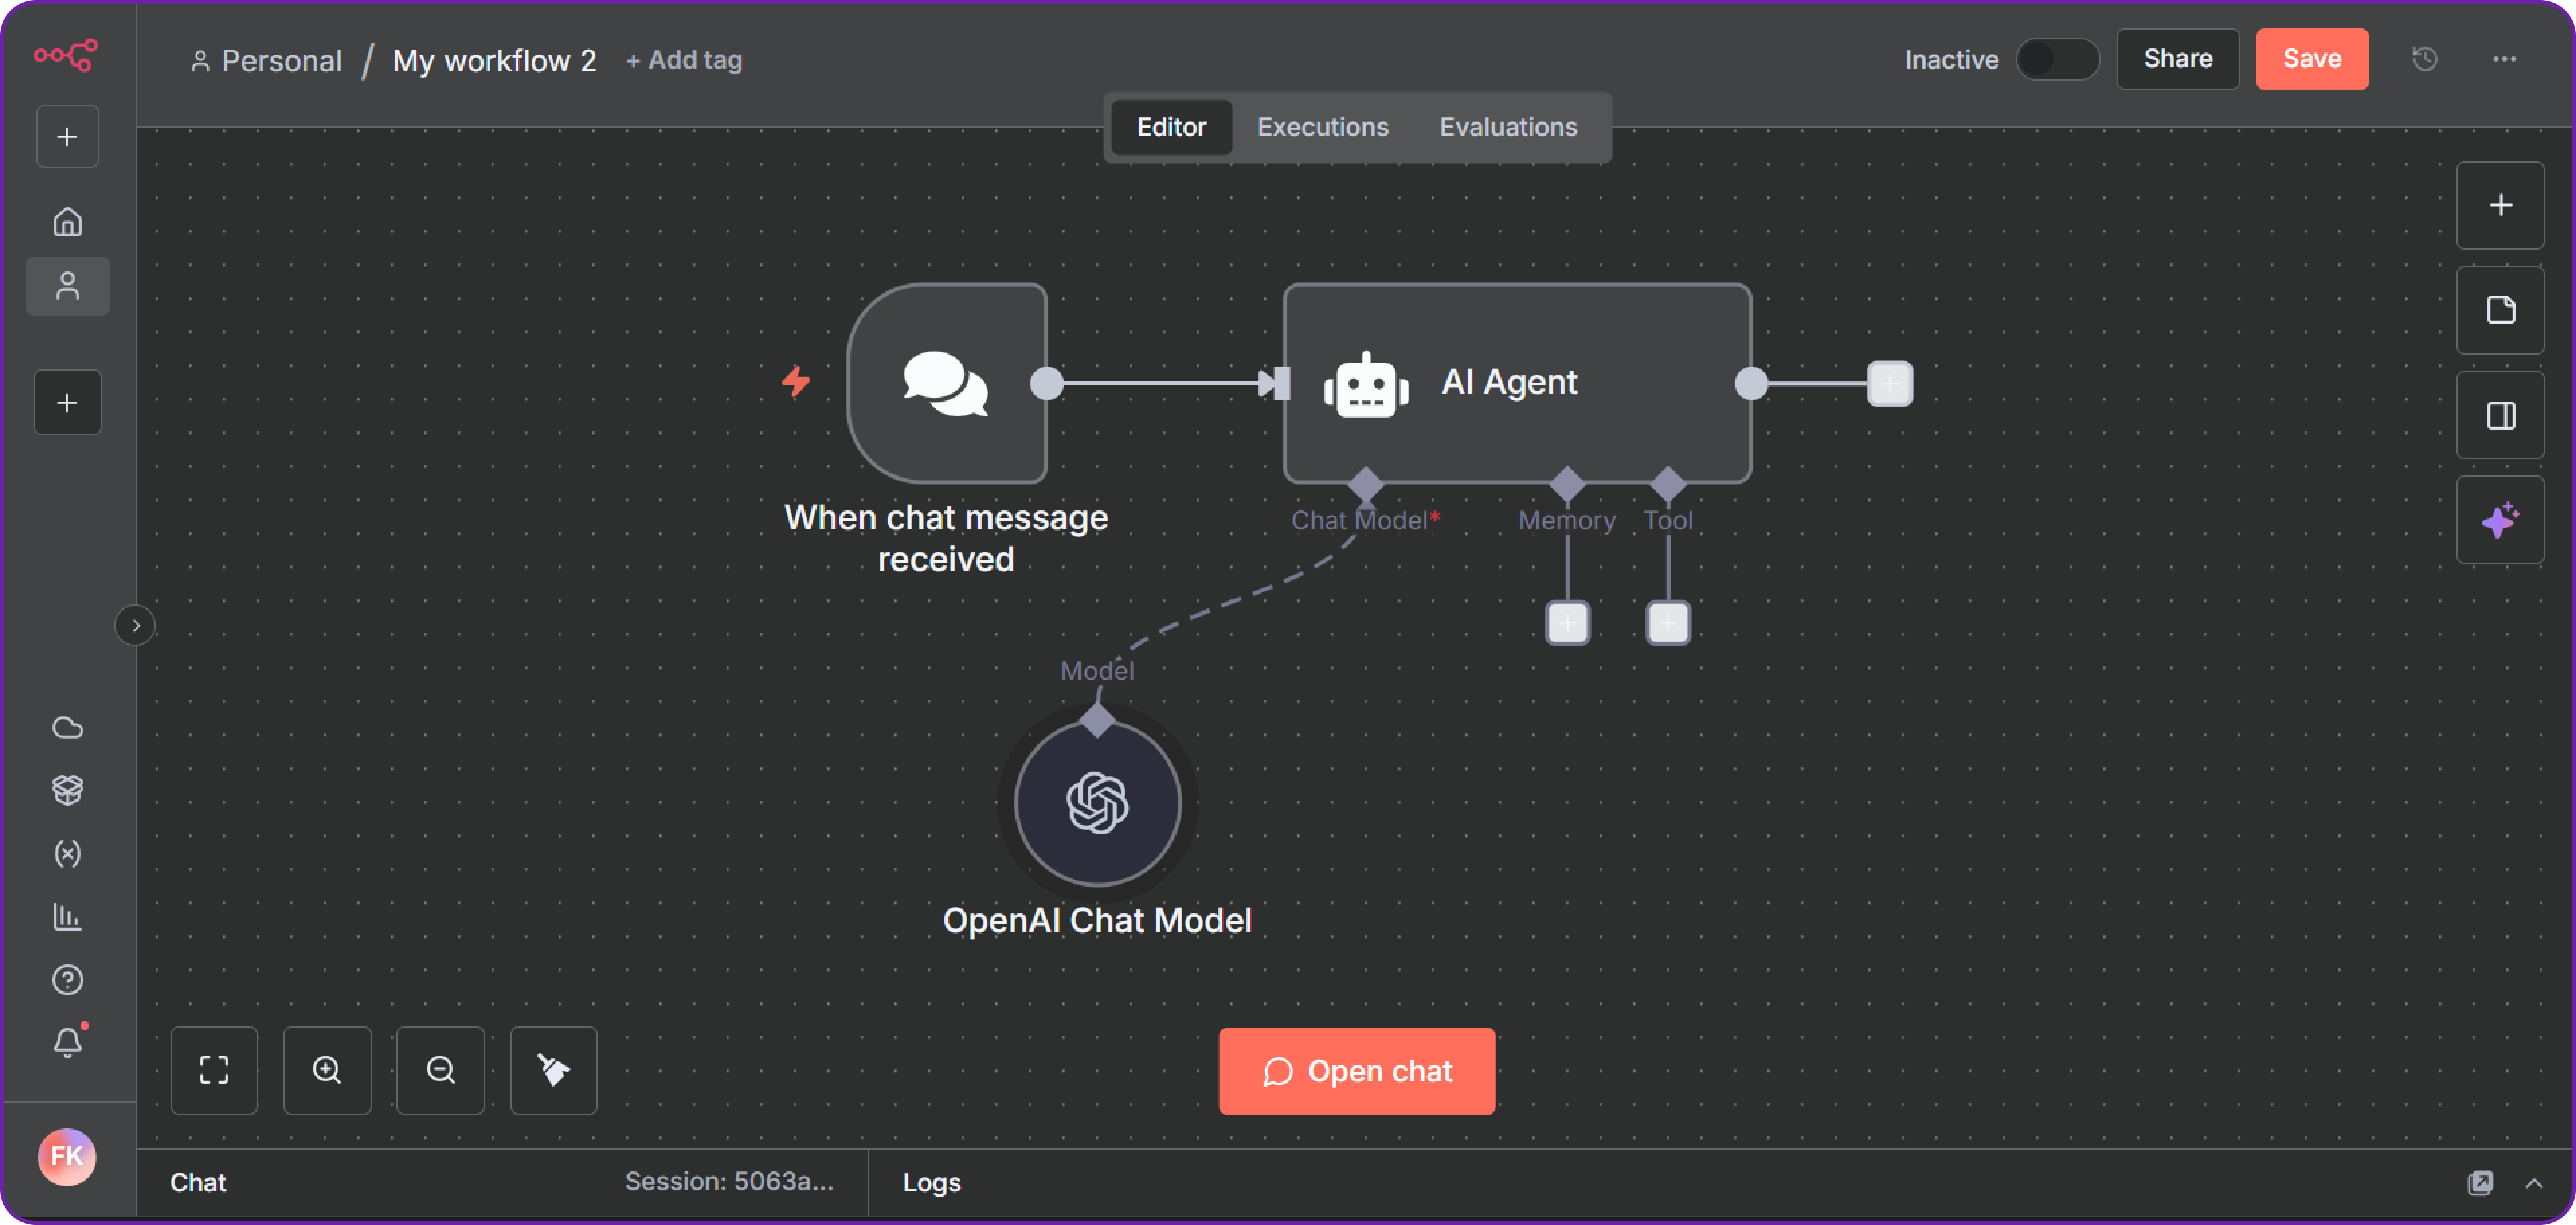
Step 9: Test the Workflow
Now that everything is set up, it’s time to test the workflow. You can simply click on the “Open Chat” button to start a chat session.
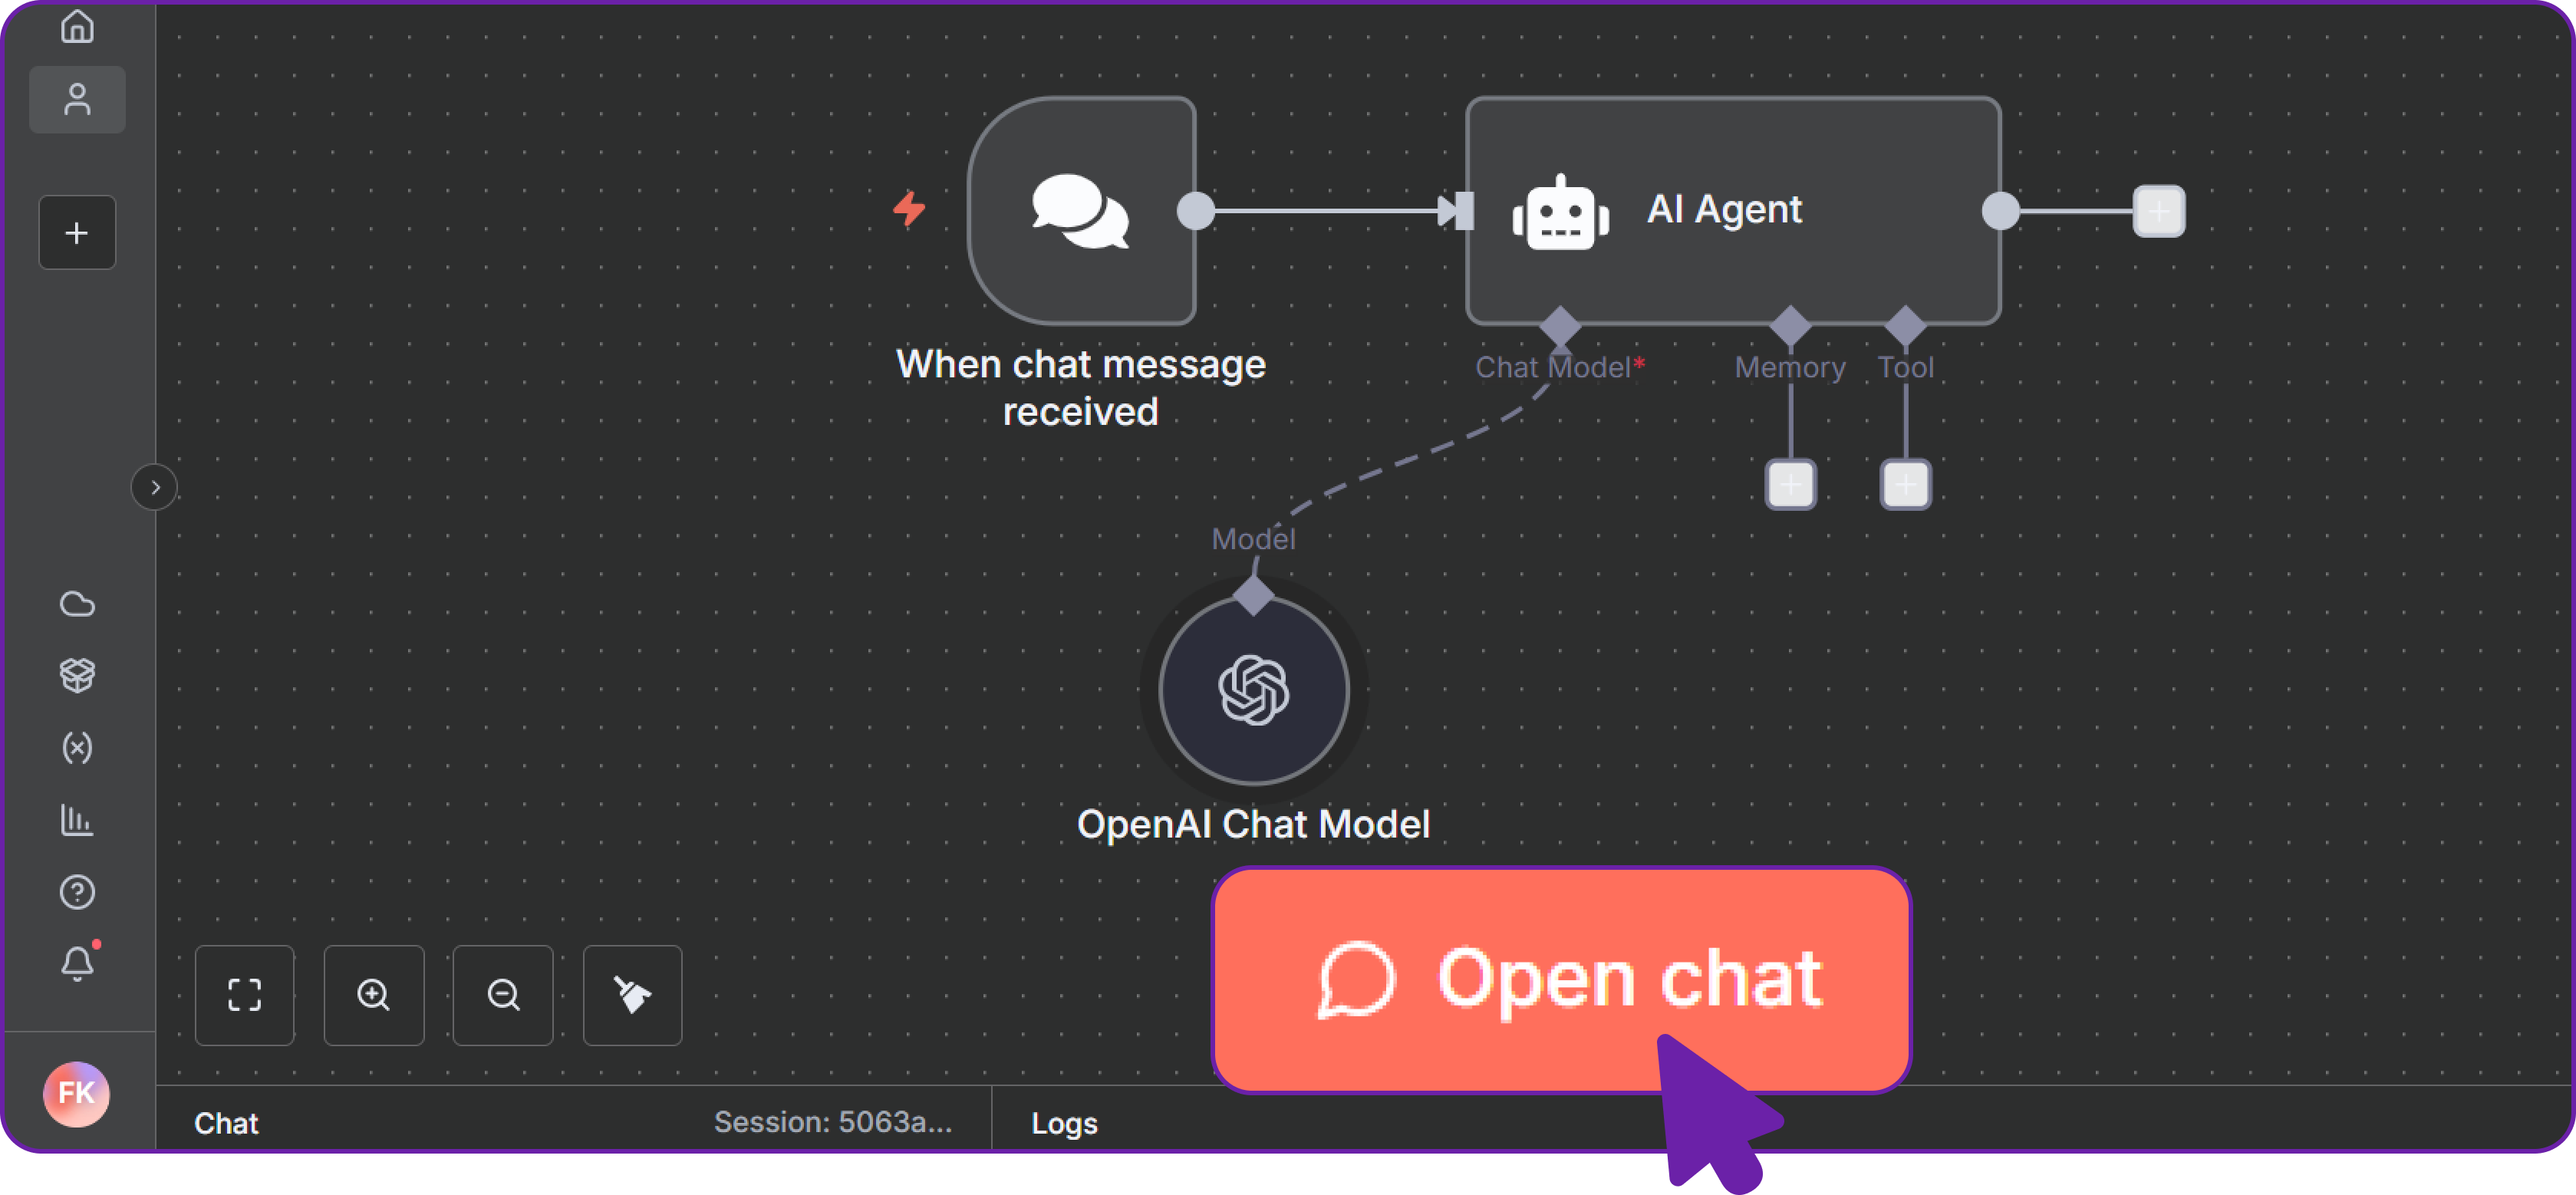
Now we can simply type a prompt like "hi" and see if we get a response from the Hyperstack model.
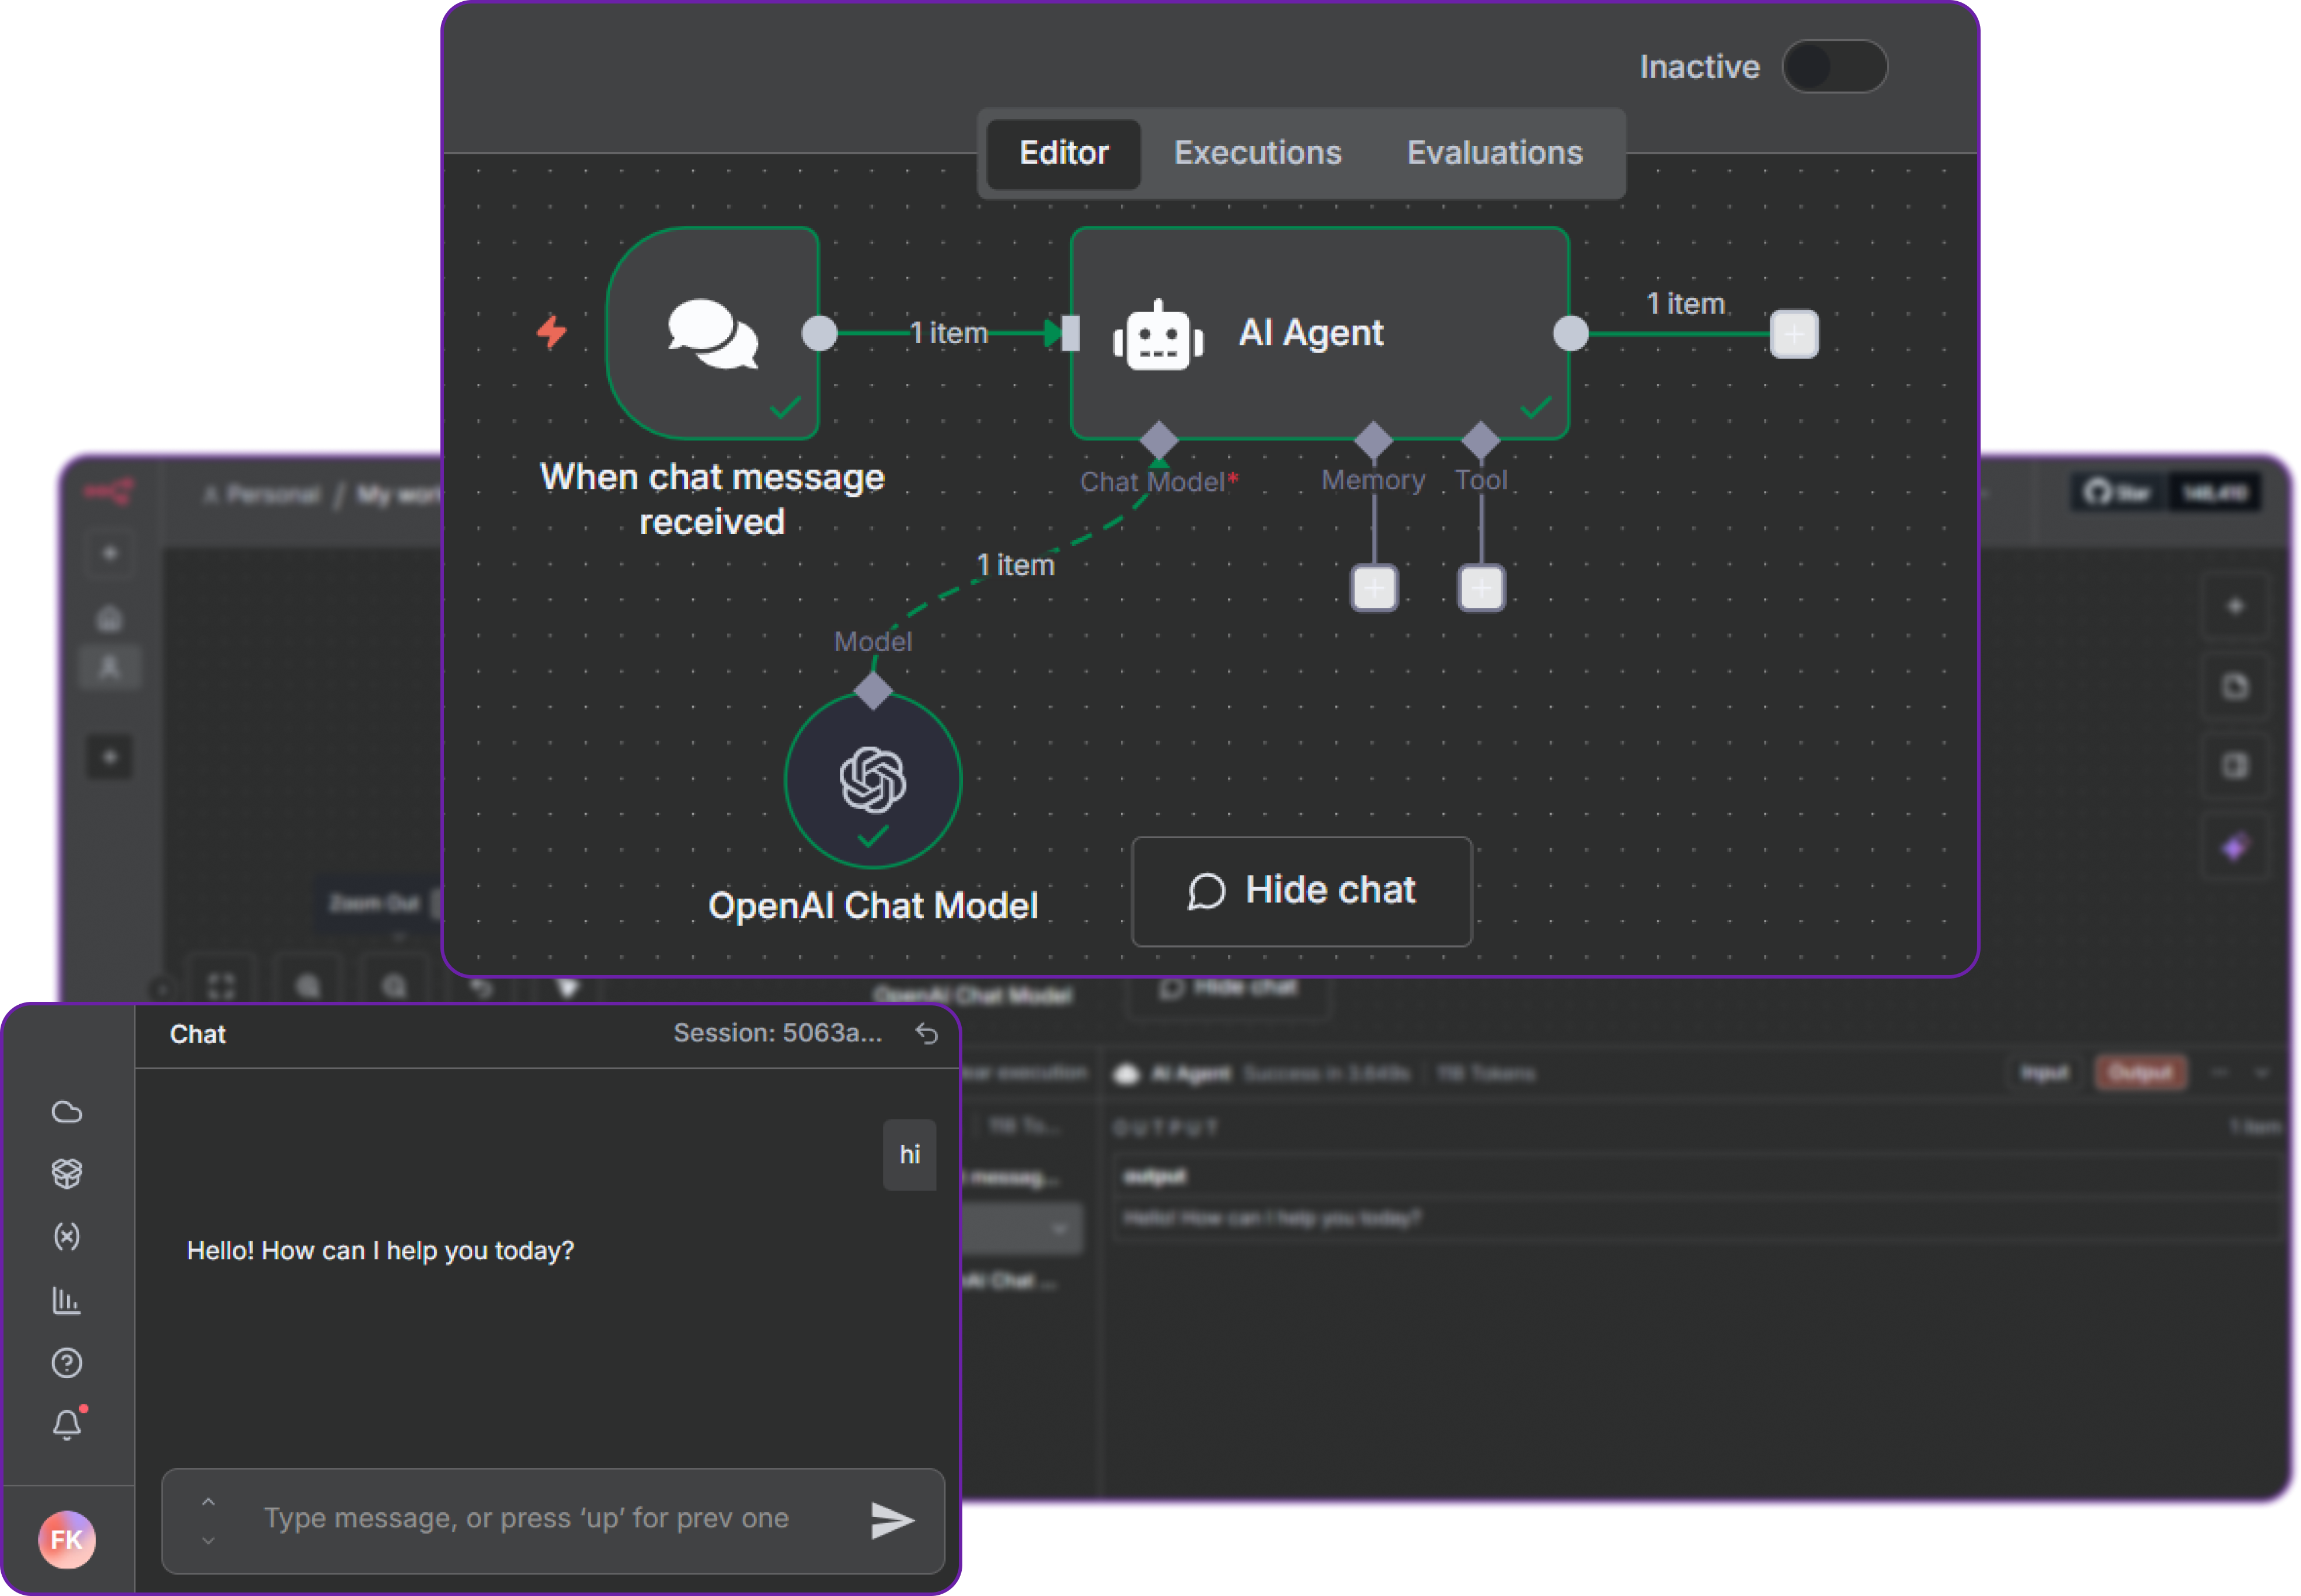
You can see that the workflow executes successfully and returns a response, the integration is confirmed.
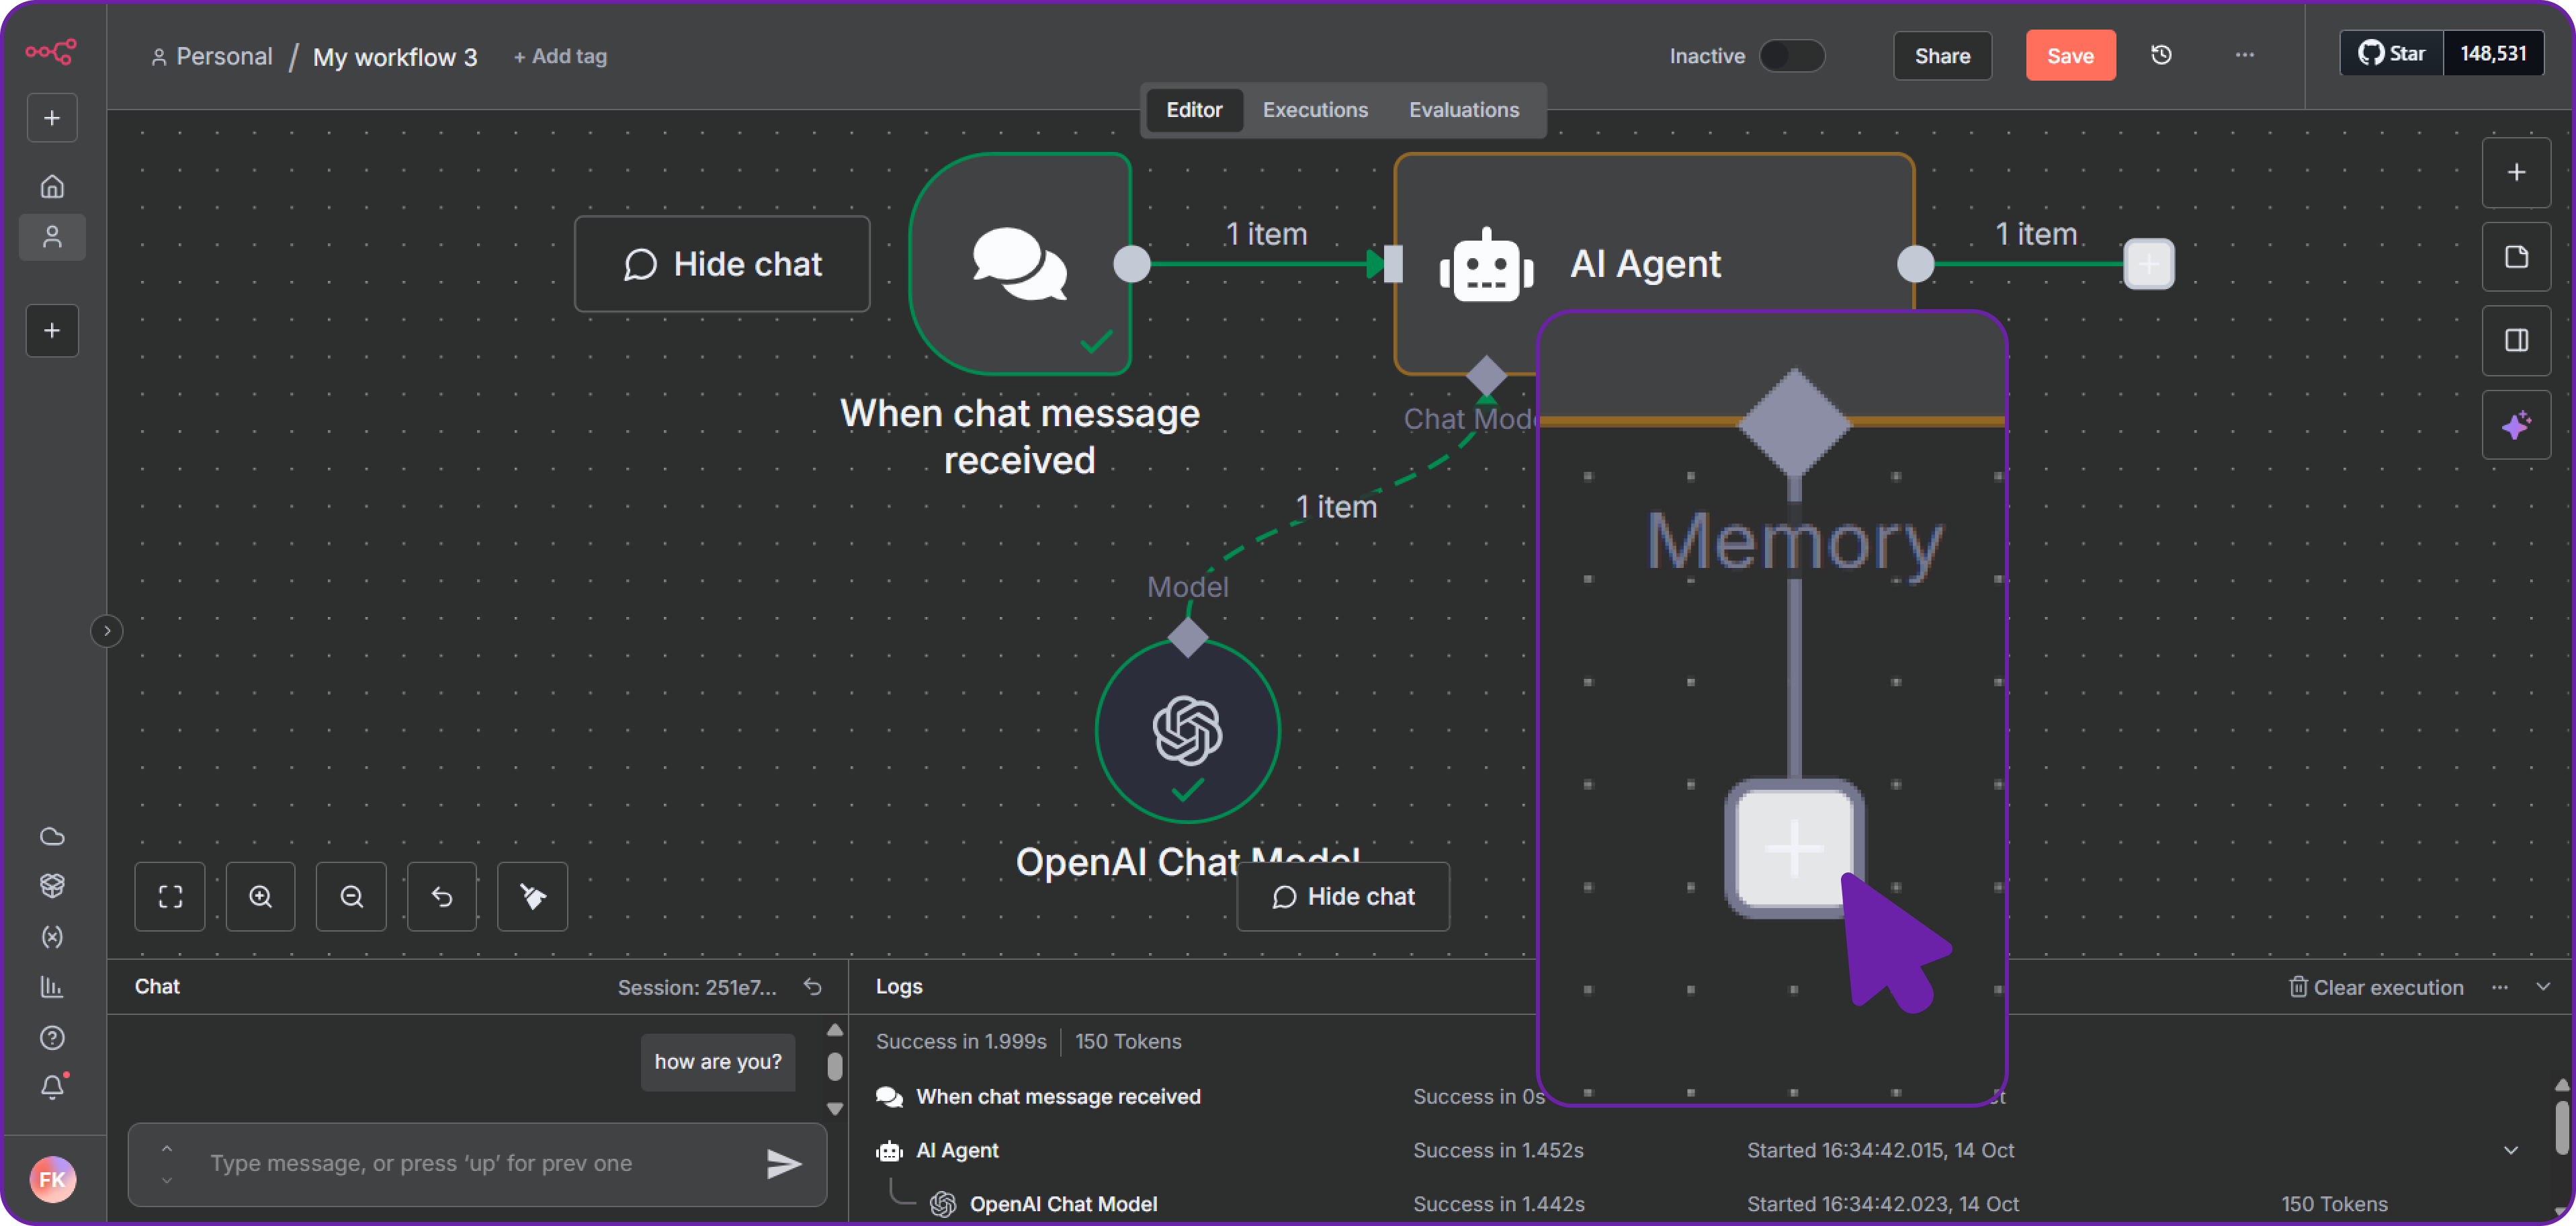
Step 10: Adding Memory to our Chat Workflow
Now that everything is working correctly we can now add memory to our chatbot, so it can remember previous messages.
Click on the "+" icon to add memory to our AI agent.
Now we will select the most simple n8n default memory structure, there are many other database support for the storage of memory.
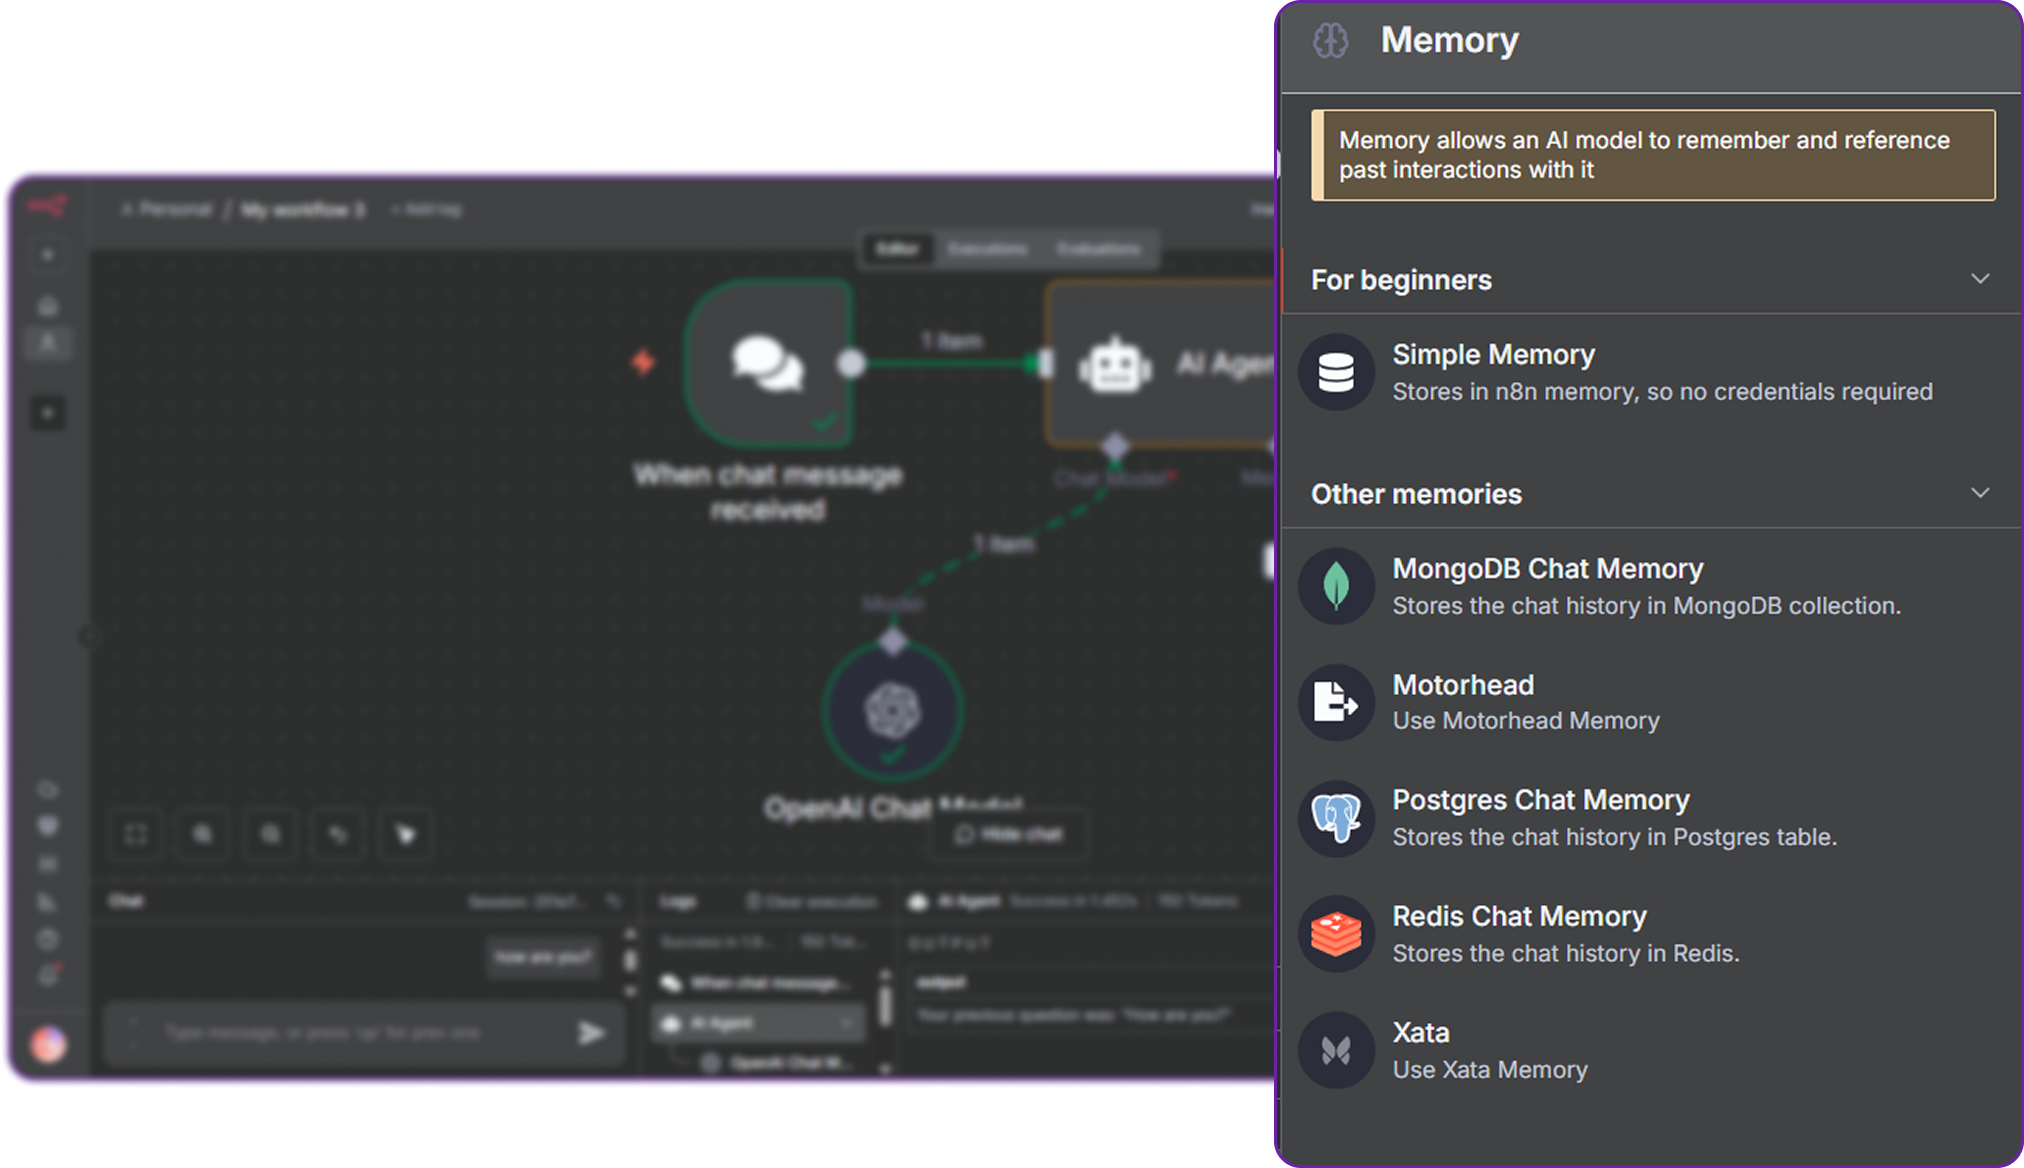
Now we need to set our context window to 5 which means the last 5 messages will be remembered by our bot and no more than that.
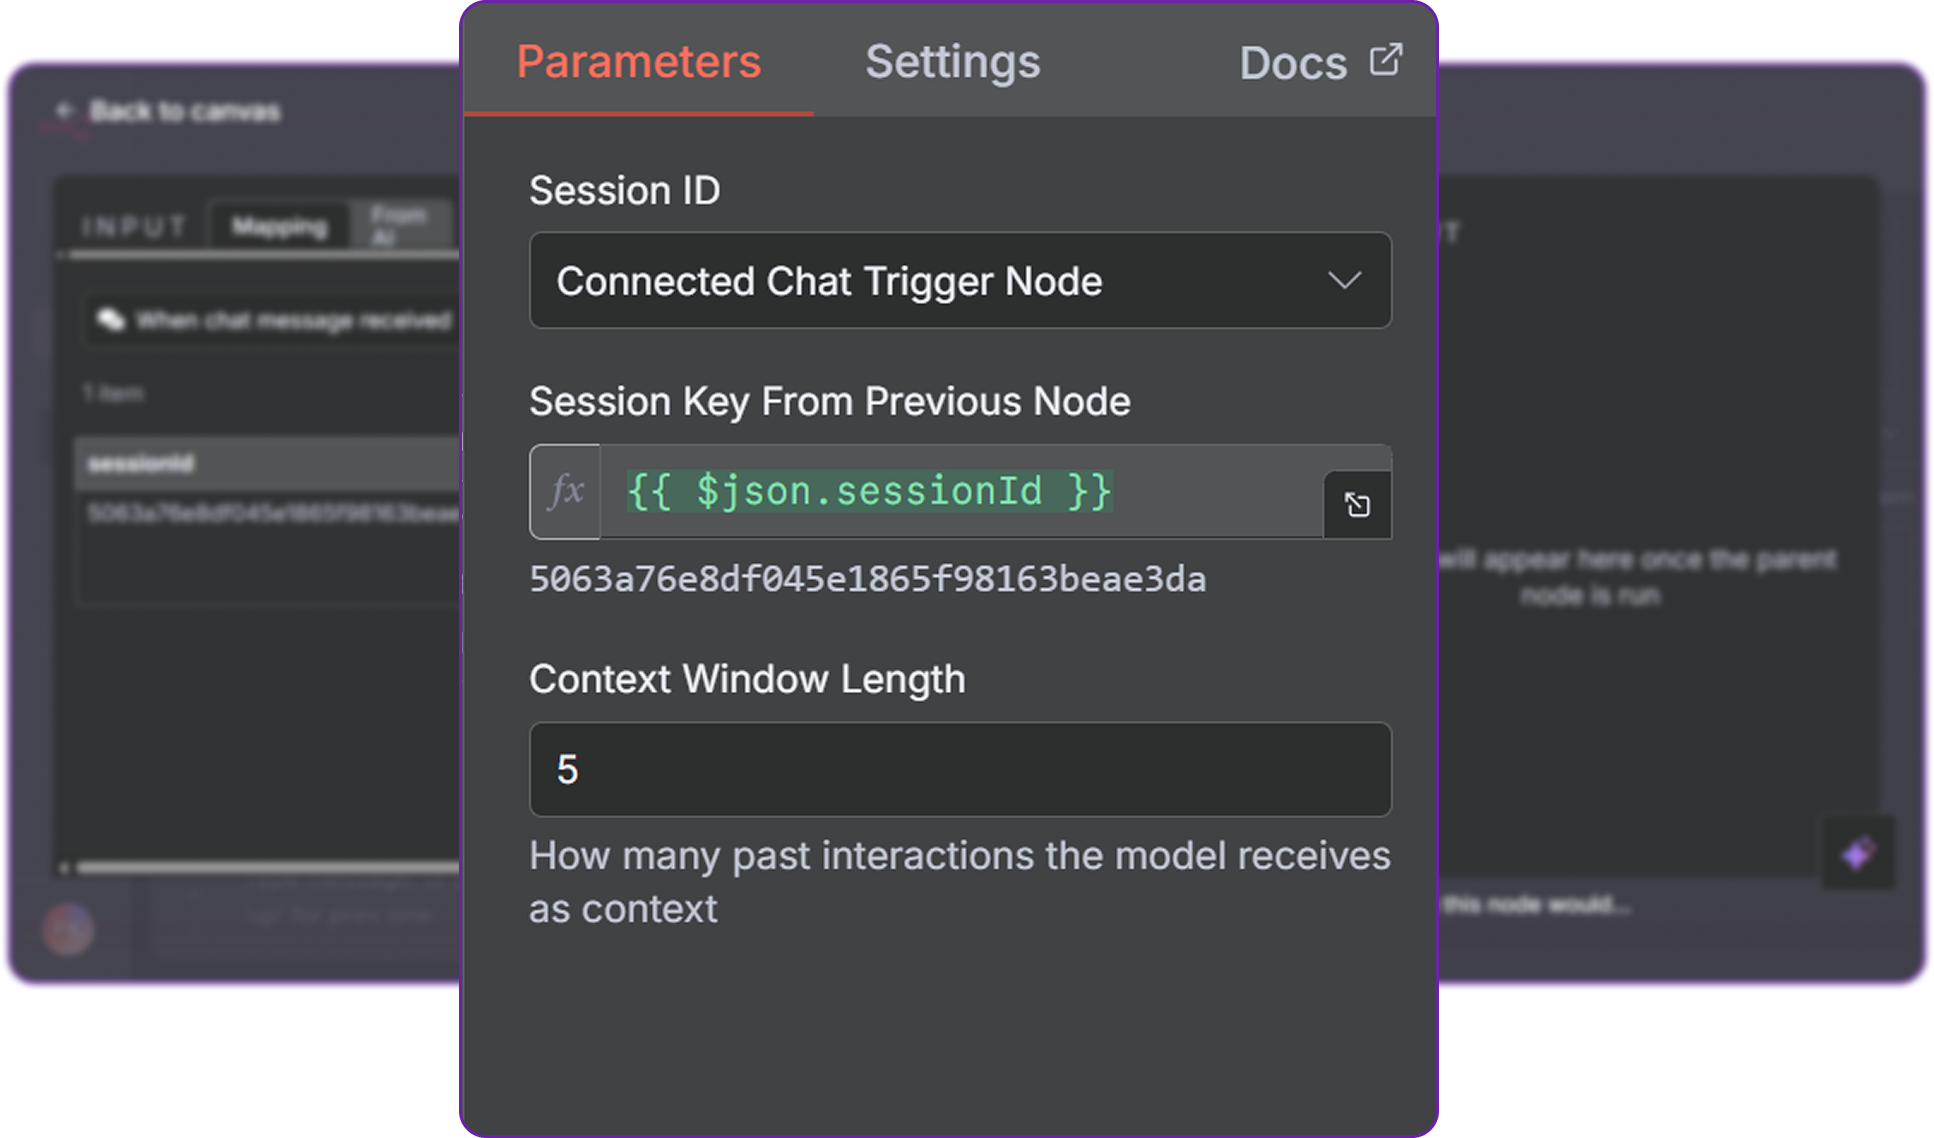
We will be selecting the simple memory type here, now we can check a simple message flow and see it is working correctly or not.
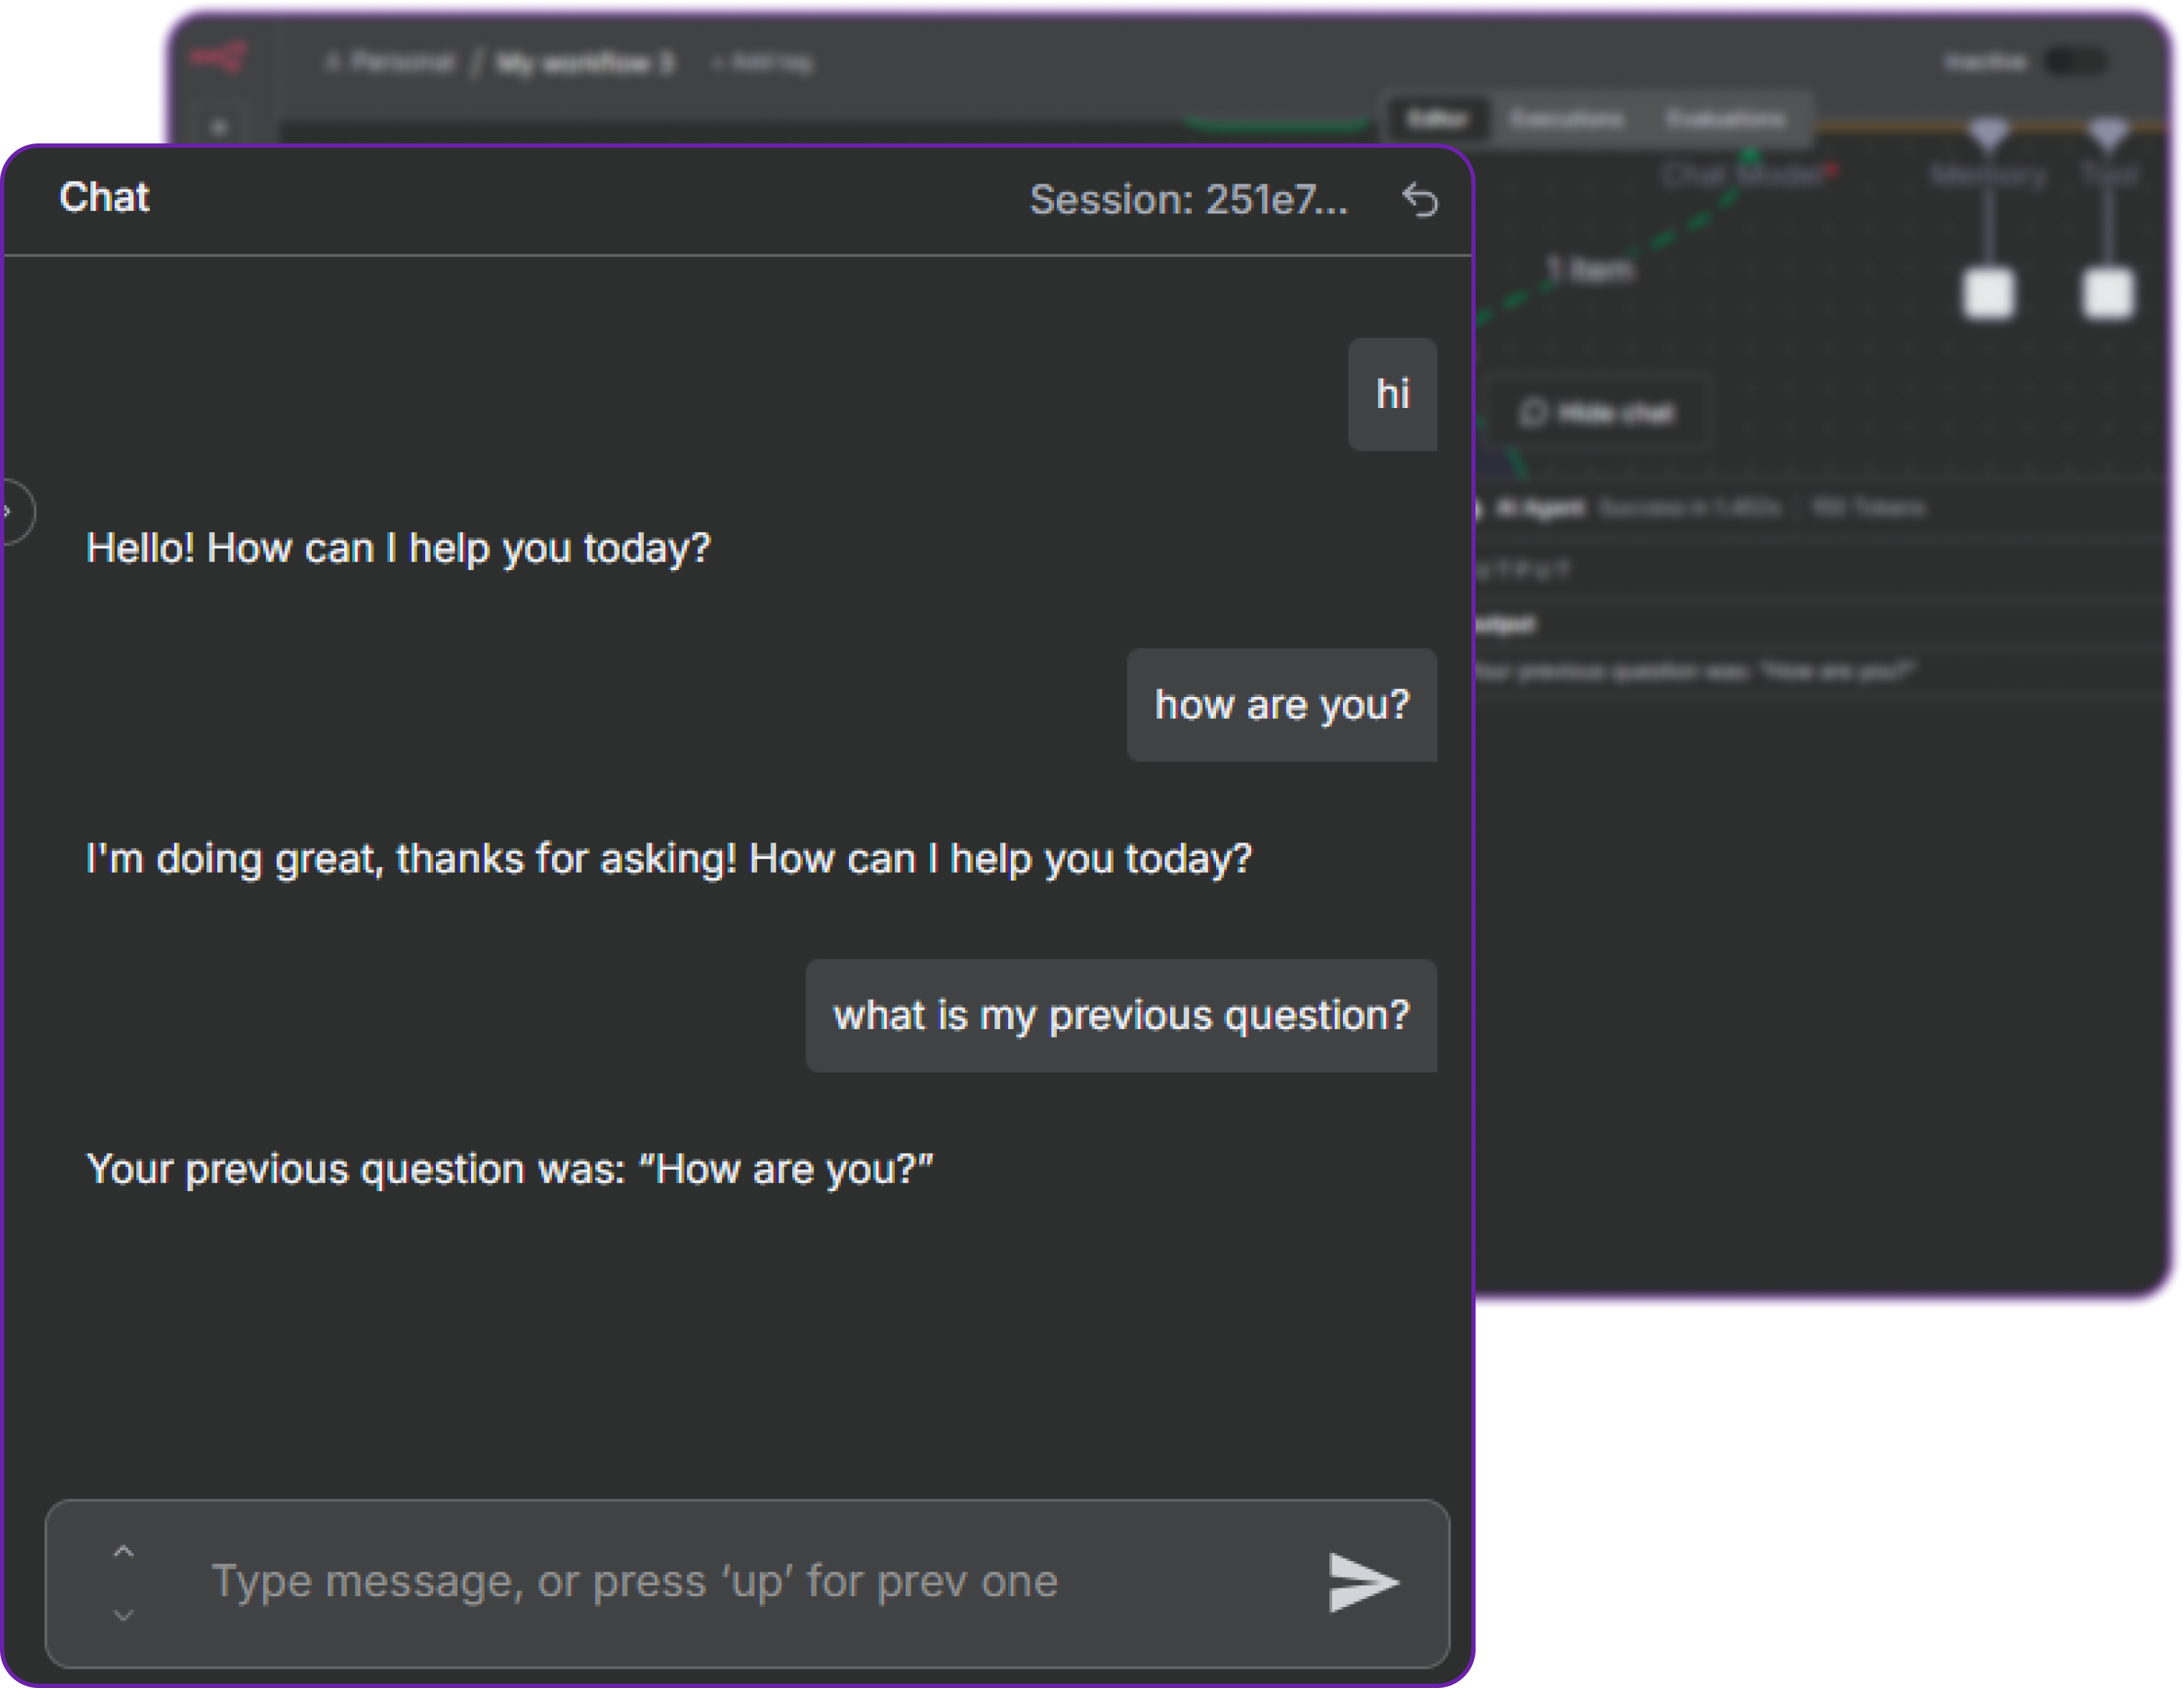
You can see now it remembers the previous messages which shows that our memory feature is also working correctly, which is great. You can explore a lot more features of n8n through their official documentation.
Monitoring and Next Steps
Hyperstack provides built-in monitoring tools to track usage, and costs of your API calls. Go to the Usage Dashboard in Hyperstack to see your consumption metrics.

We can monitor API usage along with tokens used, and also according to model chat and tool calling feature also.
Next Steps:
We can one step further by doing some additional steps:
- Fine-tune a model in Hyperstack and redeploy it via LiteLLM.
- Add multiple models to compare responses and latency.
- Use LiteLLM caching or load-balancing features for production workloads.
Conclusion
By integrating Hyperstack AI Studio with n8n, you can build AI-powered automation workflows that leverage large language models directly inside your automation environment.
This integration allows:
- Direct LLM inference through OpenAI-compatible APIs.
- Fine-tuned and customized model deployment.
- Seamless testing and evaluation of models before production.
- Cost-effective and secure automation pipelines.
To learn more about Hyperstack, you can visit thier documentation and for n8n, refer to the n8n documentation.
Frequently Asked Questions (FAQ)
Why integrate Hyperstack AI Studio with n8n?
Integrating Hyperstack with n8n allows you to use powerful AI models directly in your automation workflows. You can create intelligent tasks like chatbots, content generation, and data processing without writing complex code.
How does n8n connect to Hyperstack?
n8n connects to Hyperstack through its OpenAI-compatible API. You only need to update the base URL and API key in the AI Agent node, no custom setup or additional plugin is required.
Can I use multiple models in one workflow?
Yes, you can add multiple AI Agent nodes in the same workflow. This allows you to test or combine different Hyperstack models for various steps or tasks in a single automation.
What if my Hyperstack API key changes?
You can easily update your credentials inside n8n. Once updated, all workflows using that key will automatically switch to the new one without breaking.
Does n8n store AI responses or data?
n8n only stores data if you configure it to. You can choose to log, save, or forward the output to databases, APIs, or other systems based on your workflow design.
Can I use my fine-tuned Hyperstack model in n8n?
Yes. After fine-tuning a model in Hyperstack, just copy its model ID and use it in the n8n AI Agent node. It will work the same way as a default model.
How can I track API usage and costs?
You can monitor your API calls, token usage, and costs directly from the Hyperstack Usage Dashboard. It provides clear insights into your model’s activity and performance.
Can my chatbot remember previous conversations?
Yes. You can add a memory node in n8n to let your chatbot remember the last few messages, creating more natural and context-aware interactions.
Is this setup secure for production?
Yes. Running n8n in Docker with environment variables for sensitive data and using Hyperstack’s secure API ensures a safe and production-ready setup.
What are some common use cases?
You can automate chatbots, summarize documents, generate text or code, classify data, or even build full AI assistants all powered by Hyperstack and managed visually in n8n.
Subscribe to Hyperstack!
Enter your email to get updates to your inbox every week

