
.png)
TABLE OF CONTENTS
Since the rise of AI agents, intelligent tooling plays an important role in improving productivity and code quality. As engineers, we are constantly looking for ways to integrate AI into our workflow not as a novelty, but as a core development assistant.
Two tools that make this integration seamless are Cursor and Hyperstack AI Studio. Cursor gives us a powerful AI-driven coding environment, while Hyperstack provides the backend infrastructure and model customization capabilities to power those intelligent experiences.
In this blog, we’ll first discuss what Cursor is and why it matters, then introduce Hyperstack AI Studio, explain why it’s the perfect match for Cursor, and finally outline the integration steps.
Understanding Cursor
What is Cursor?
So, cursor is an AI-powered code editor designed to make programming faster, smarter, and more intuitive. Built on top of the familiar VS Code architecture, Cursor introduces native integration with large language models (LLMs), allowing developers to communicate with their codebase using natural language.

Cursor isn’t just another autocomplete tool, it’s a context-aware coding partner. It reads and understands your entire project structure, enabling deep code navigation, reasoning, and refactoring. Whether we want to generate boilerplate, document functions, or debug complex logic, Cursor provides a chat-like interface and inline suggestions to accelerate every step of the workflow.
Let's look at some of Cursor’s standout features:
- Contextual understanding: Cursor reads our project context and uses it for smarter code suggestions and chat responses.
- Natural-language coding: We can simply type a command like “add pagination to this API route” or “write unit tests for this class”, and Cursor generates the implementation.
- Multiple AI modes: Including Chat, Composer, and Agent modes for flexible interaction with the code.
- Seamless integration: Compatible with OpenAI’s API and any custom model endpoints that follow the same API schema.
- Privacy control: We can choose our own model backend (e.g., OpenAI, Anthropic, or Hyperstack) to keep proprietary code secure.
Why use Cursor?
We use Cursor because it bridges the gap between natural-language reasoning and software engineering. Instead of switching between documentation, IDE, and browser windows, we can work conversationally inside our code editor.
Some key reasons Cursor stands out:
- Productivity boost: It handles repetitive coding tasks, freeing us to focus on architecture and problem-solving.
- Smarter refactoring: Its LLM-based reasoning helps clean up legacy code or migrate frameworks safely.
- Rapid prototyping: Ideal for quickly testing new ideas or generating scaffolding for new services.
- Custom model support: With the Pro plan, we can connect any OpenAI-compatible API endpoint, including our own fine-tuned LLMs hosted on Hyperstack.
- Team collaboration: Consistent model behavior across teammates ensures predictable responses and shared understanding.
In short, Cursor transforms the way we write and maintain software. But to fully unlock its potential, we need a reliable, customizable AI backend and that’s where Hyperstack AI Studio comes in.
Introduction to Hyperstack AI Studio
What is Hyperstack AI Studio?
Hyperstack AI Studio is a complete generative AI platform built for developers and enterprises to train, deploy, and scale large language models without managing infrastructure.
It provides everything we need to run inference, fine-tune models, benchmark their performance, and test them in an interactive playground, all through a single dashboard and API.

Hyperstack API is fully compatible with the OpenAI SDK, meaning we can integrate it directly into Cursor with minimal configuration. This allows us to power Cursor’s intelligent features using our own fine-tuned or custom models instead of relying solely on public APIs.
Hyperstack supports multiple open-source LLMs, including powerful models like openai/gpt-oss-120b, giving us the flexibility to balance performance, latency, and cost for different project needs.
Why we use Hyperstack AI Studio
We choose Hyperstack AI Studio because it gives us enterprise-grade model control with the simplicity of a hosted service. Below are some of the main reasons it stands out in an AI development stack:
- OpenAI-compatible API: Fully interoperable with existing SDKs and clients such as Cursor or LangChain.
- Model variety: Choose from a catalog of base models in different sizes for specific workloads.
- Custom fine-tuning: Train domain-specific LLMs on proprietary data for personalized responses.
- Fast benchmarking: Built-in evaluation frameworks to measure performance after fine-tuning.
- Interactive playground: Test and iterate on your models before connecting them to production tools.
- Scalable inference: Serve models efficiently with low-latency GPU infrastructure.
- Secure & private: Keep data isolated while benefiting from managed compute environments.
- Flexible deployment: Export endpoints that can be plugged into any compatible client, including Cursor.
In our workflow, Hyperstack acts as the model layer, while Cursor is the application interface. Together, they form a powerful ecosystem where we can fine-tune a model in Hyperstack, deploy it as an API, and immediately start using it inside Cursor for real development tasks.
Integrating Cursor with Hyperstack AI Studio
Now that we understand what Cursor and Hyperstack AI Studio are, let’s walk through the step-by-step process of connecting them.
Step 1: Install Cursor
To get started, we need to download and install the Cursor editor.
- Visit the official site of Cursor.

- Click on Download it will redirect you to the download page.

- Once downloaded, run the installer and follow the on-screen setup steps.
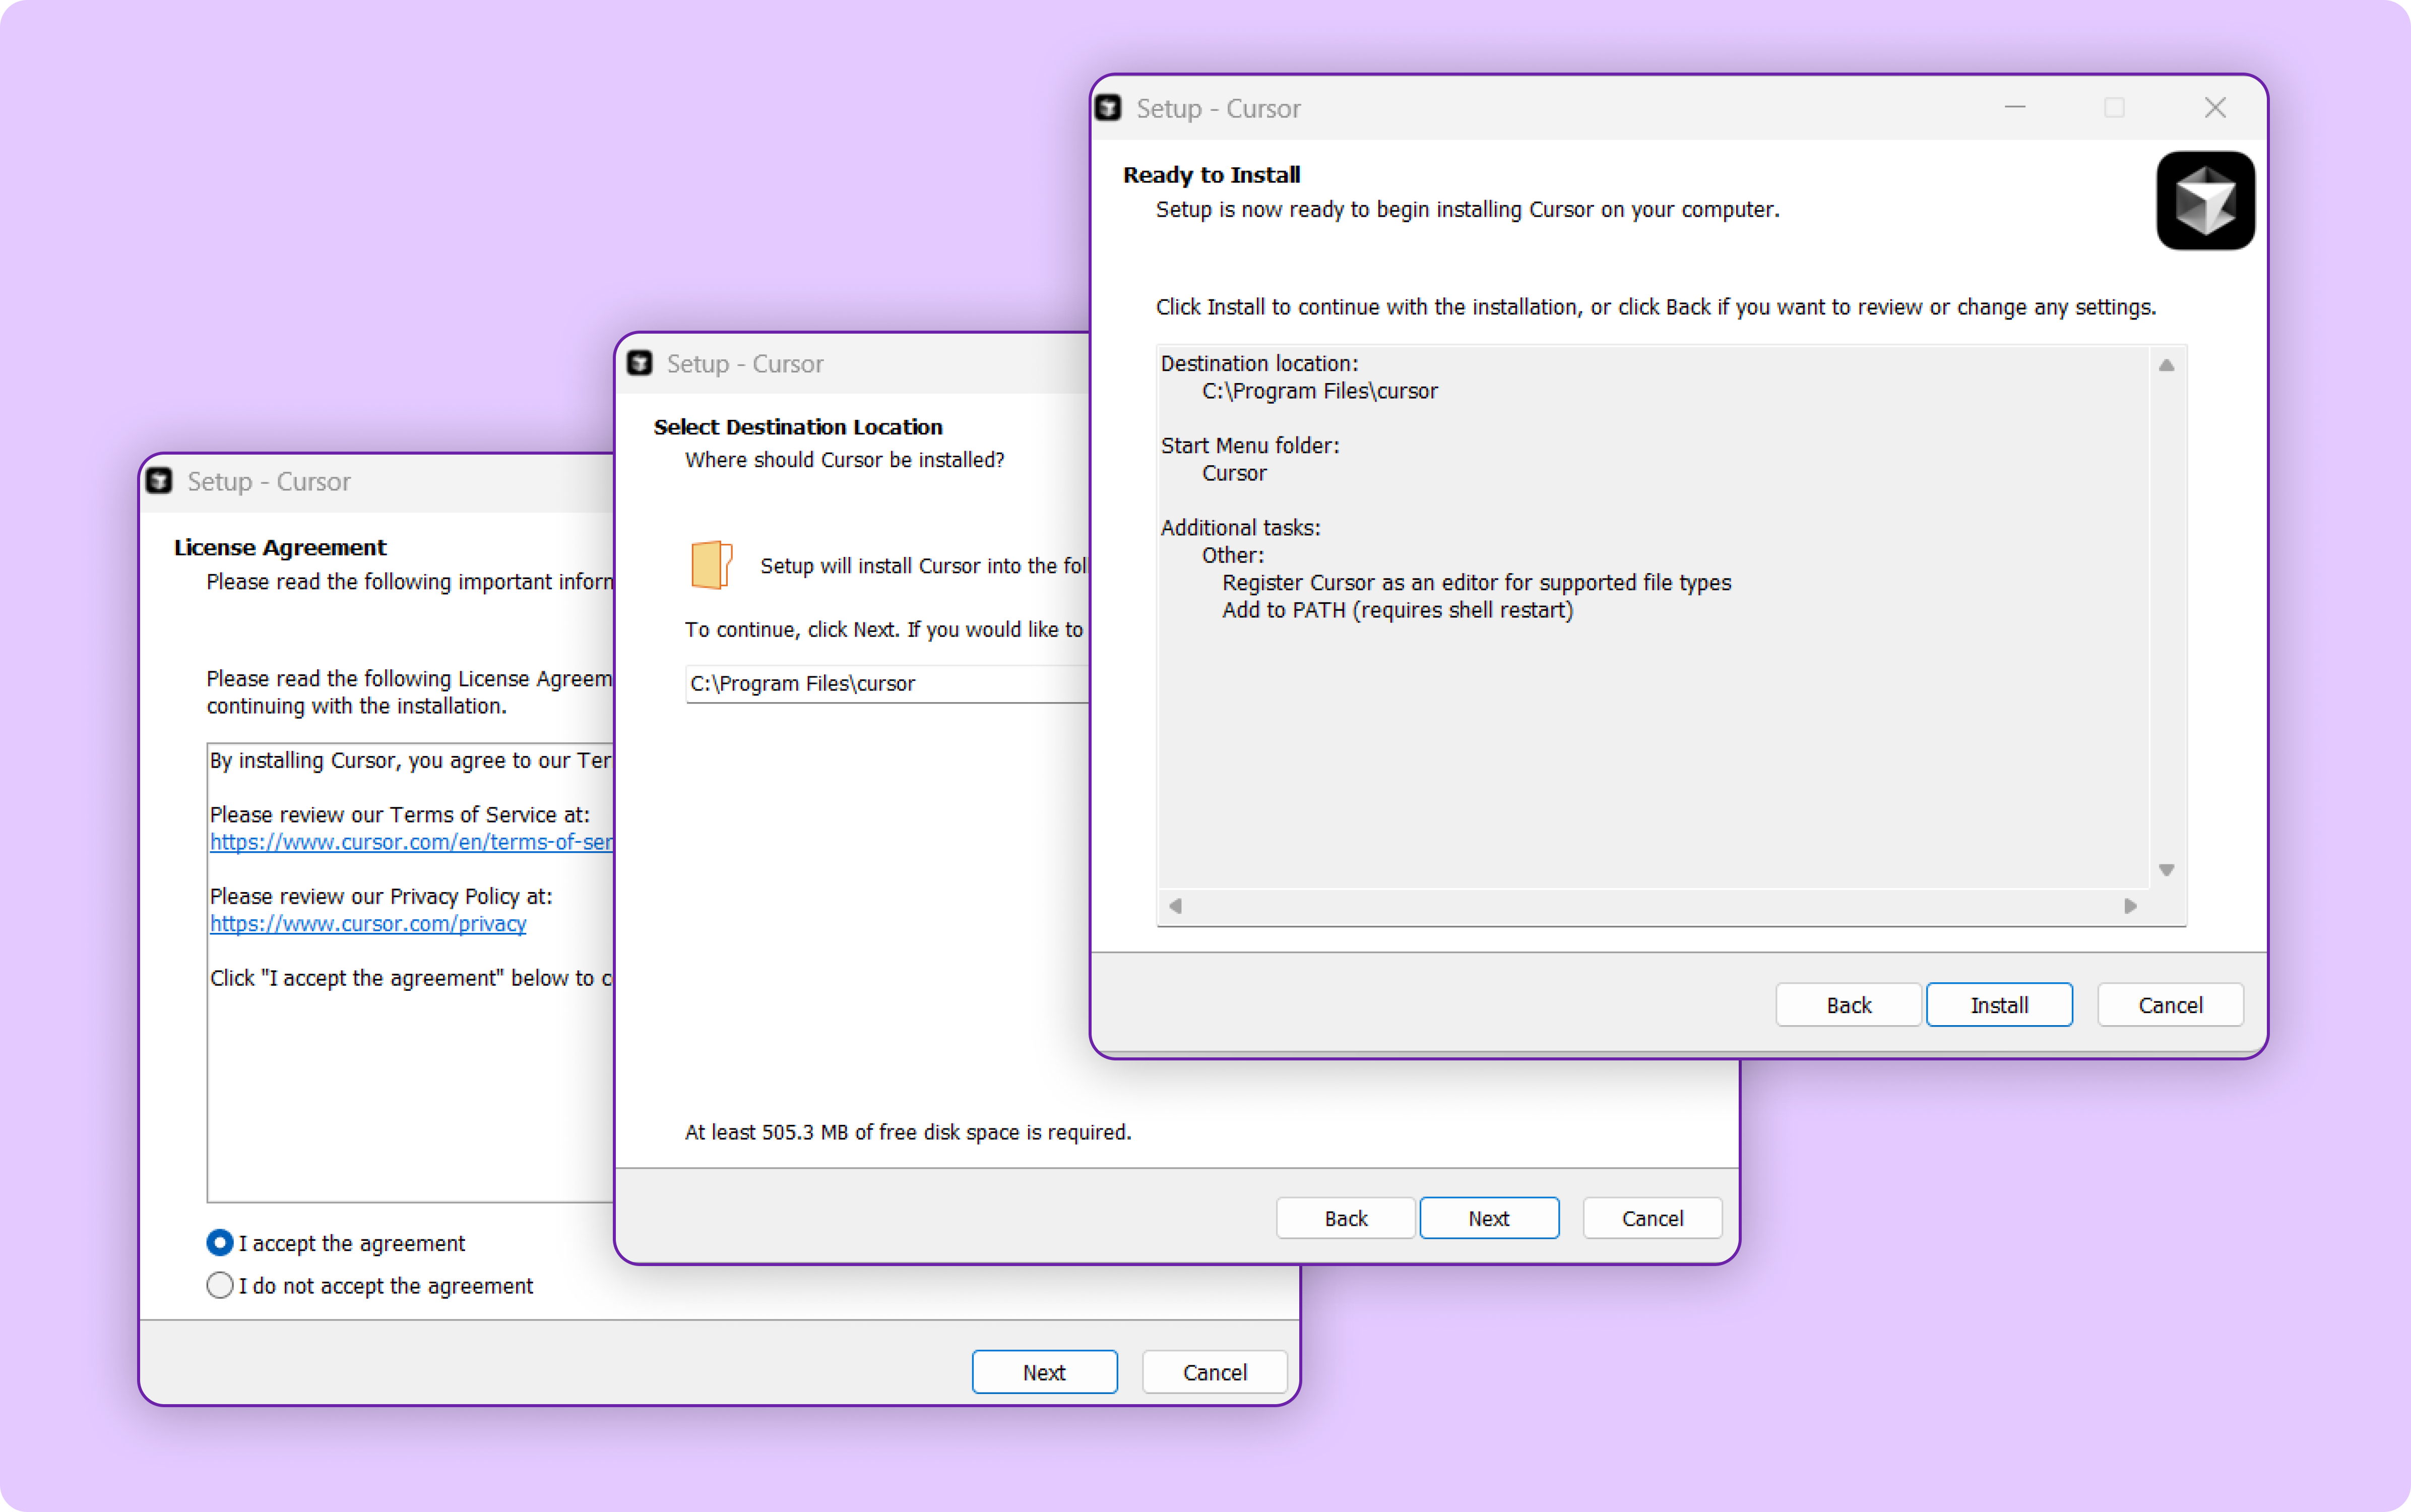
- Accept the license agreement and complete installation.
After installation, we can launch Cursor from our applications menu or desktop shortcut.
💡 Tip: Make sure you’re on a Pro Plan or trial version, since custom model endpoint support is only available in those tiers. Check plans here.
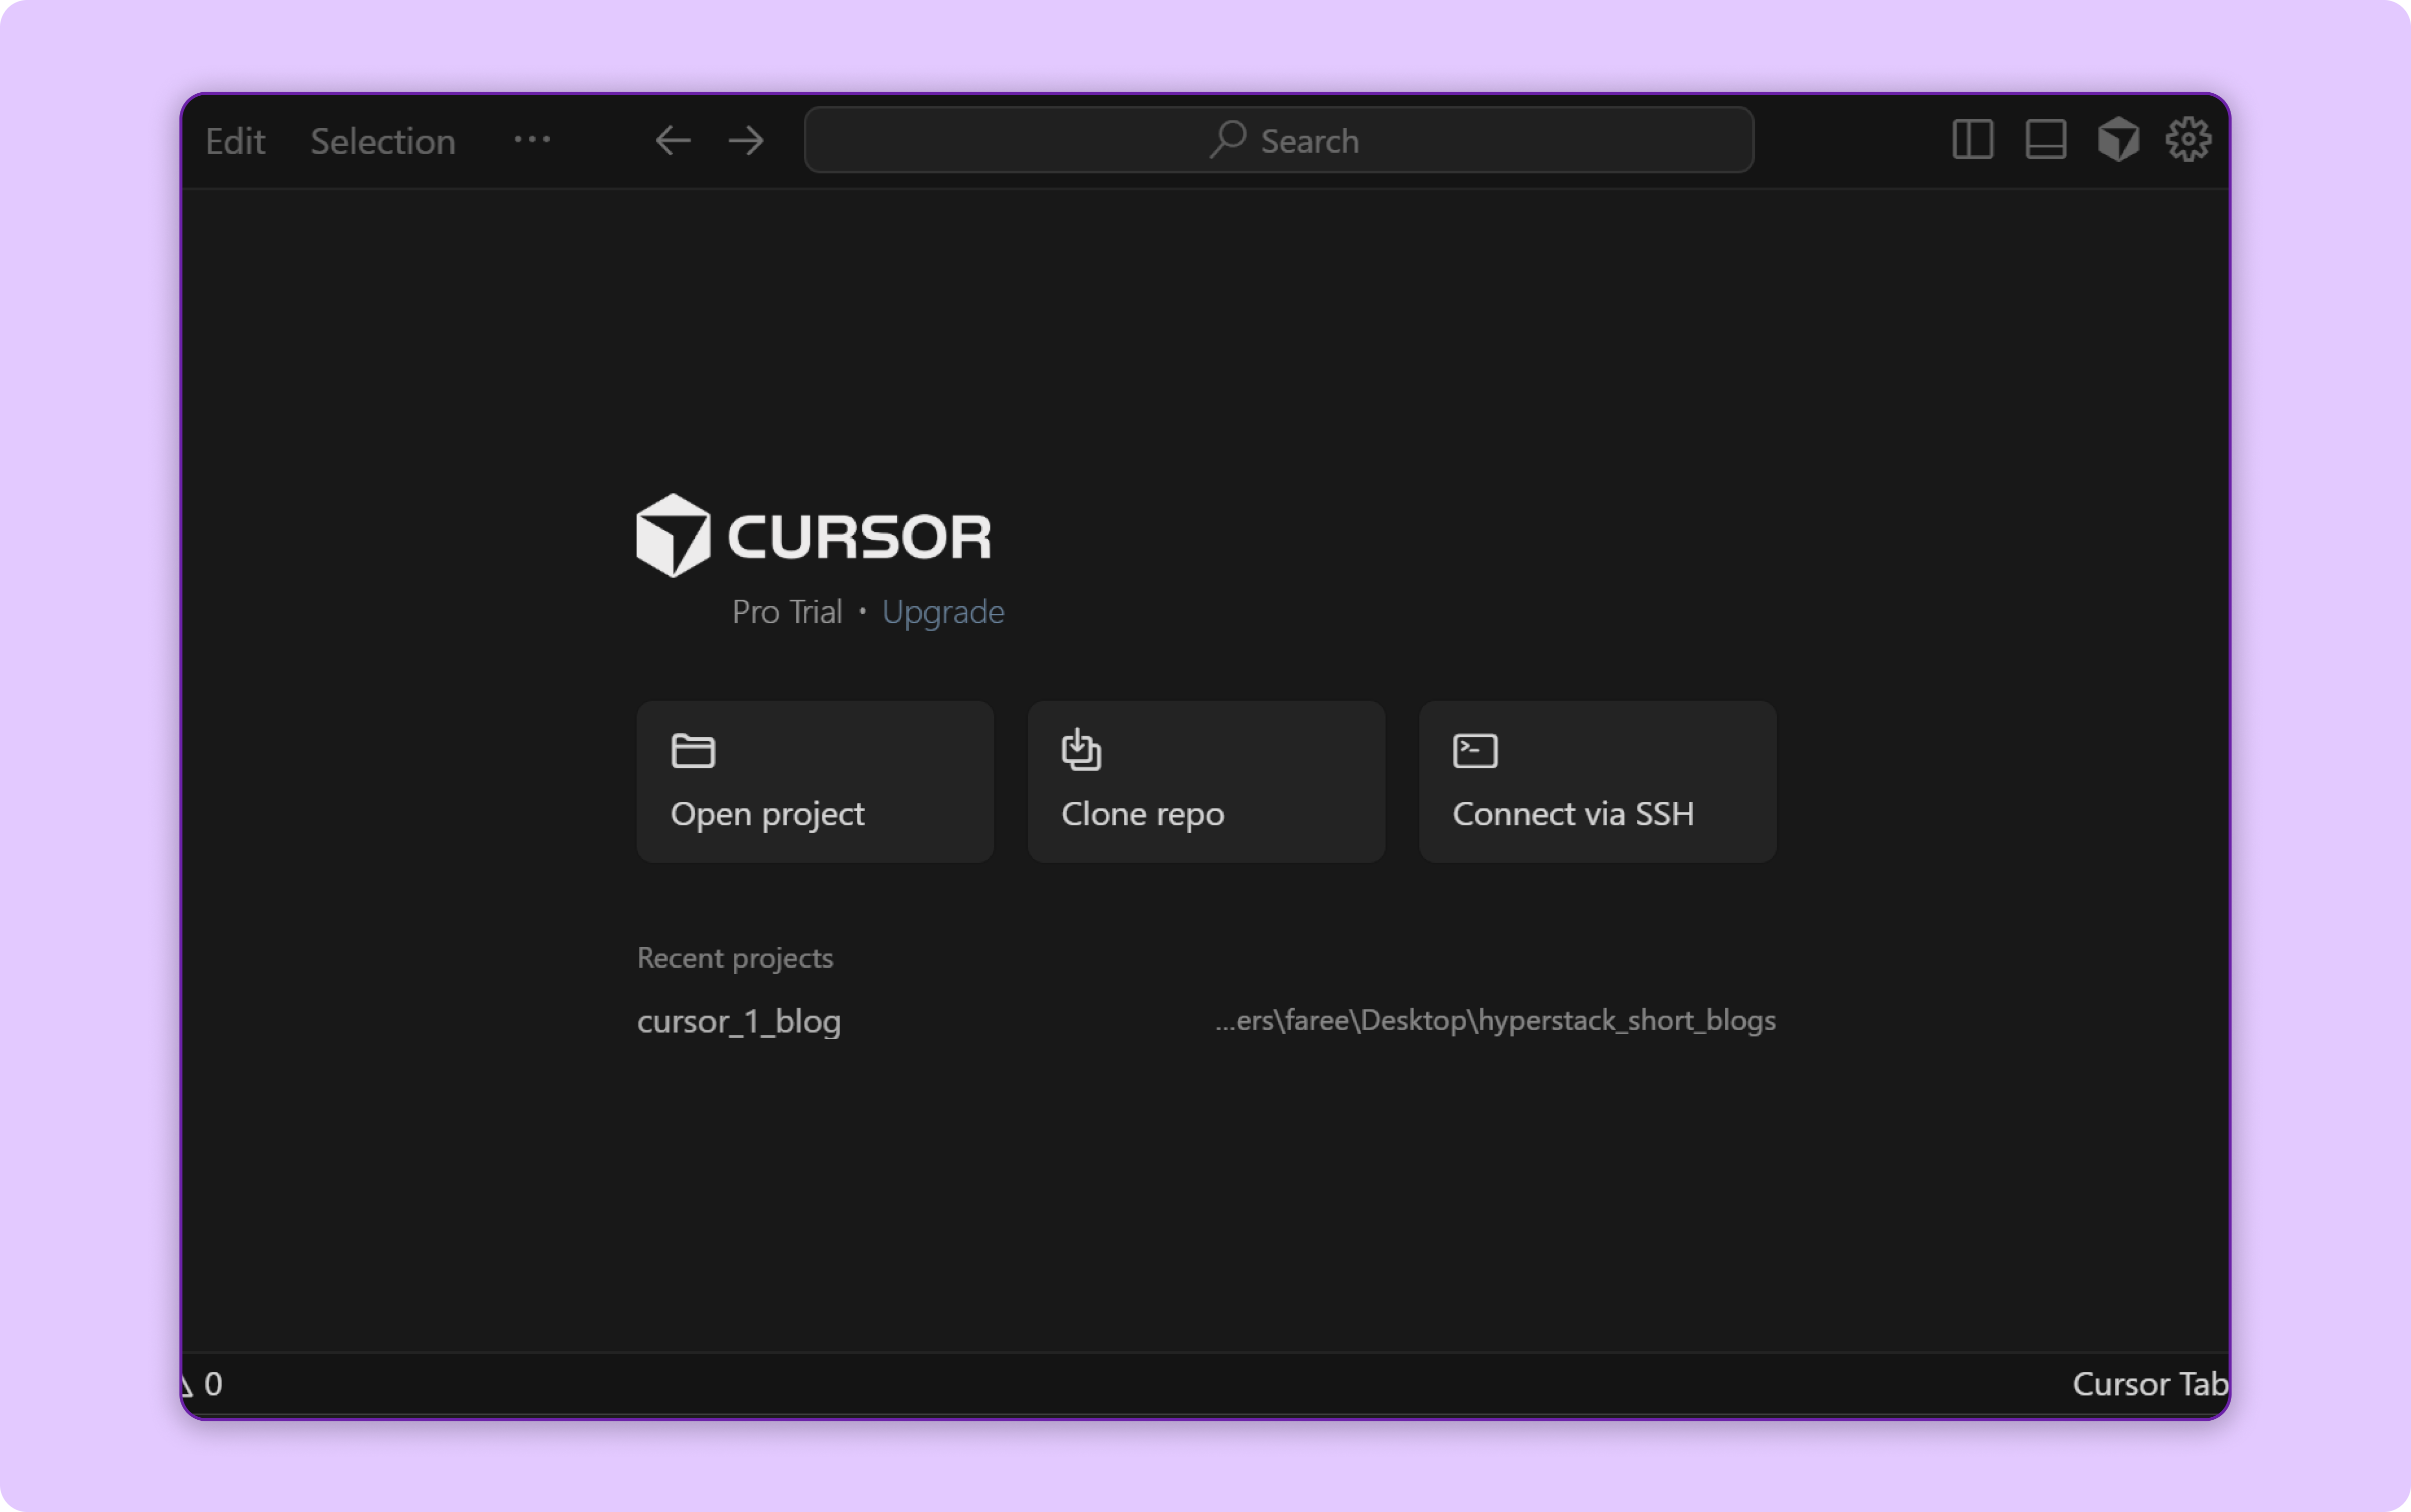
Once opened, you will see the Cursor home screen.
Step 2: Add Custom Model Endpoint in Cursor
Next, click on the Settings icon ⚙️ located in the top left corner of the Cursor window.
![]()
In the Settings panel, look for the Models section.
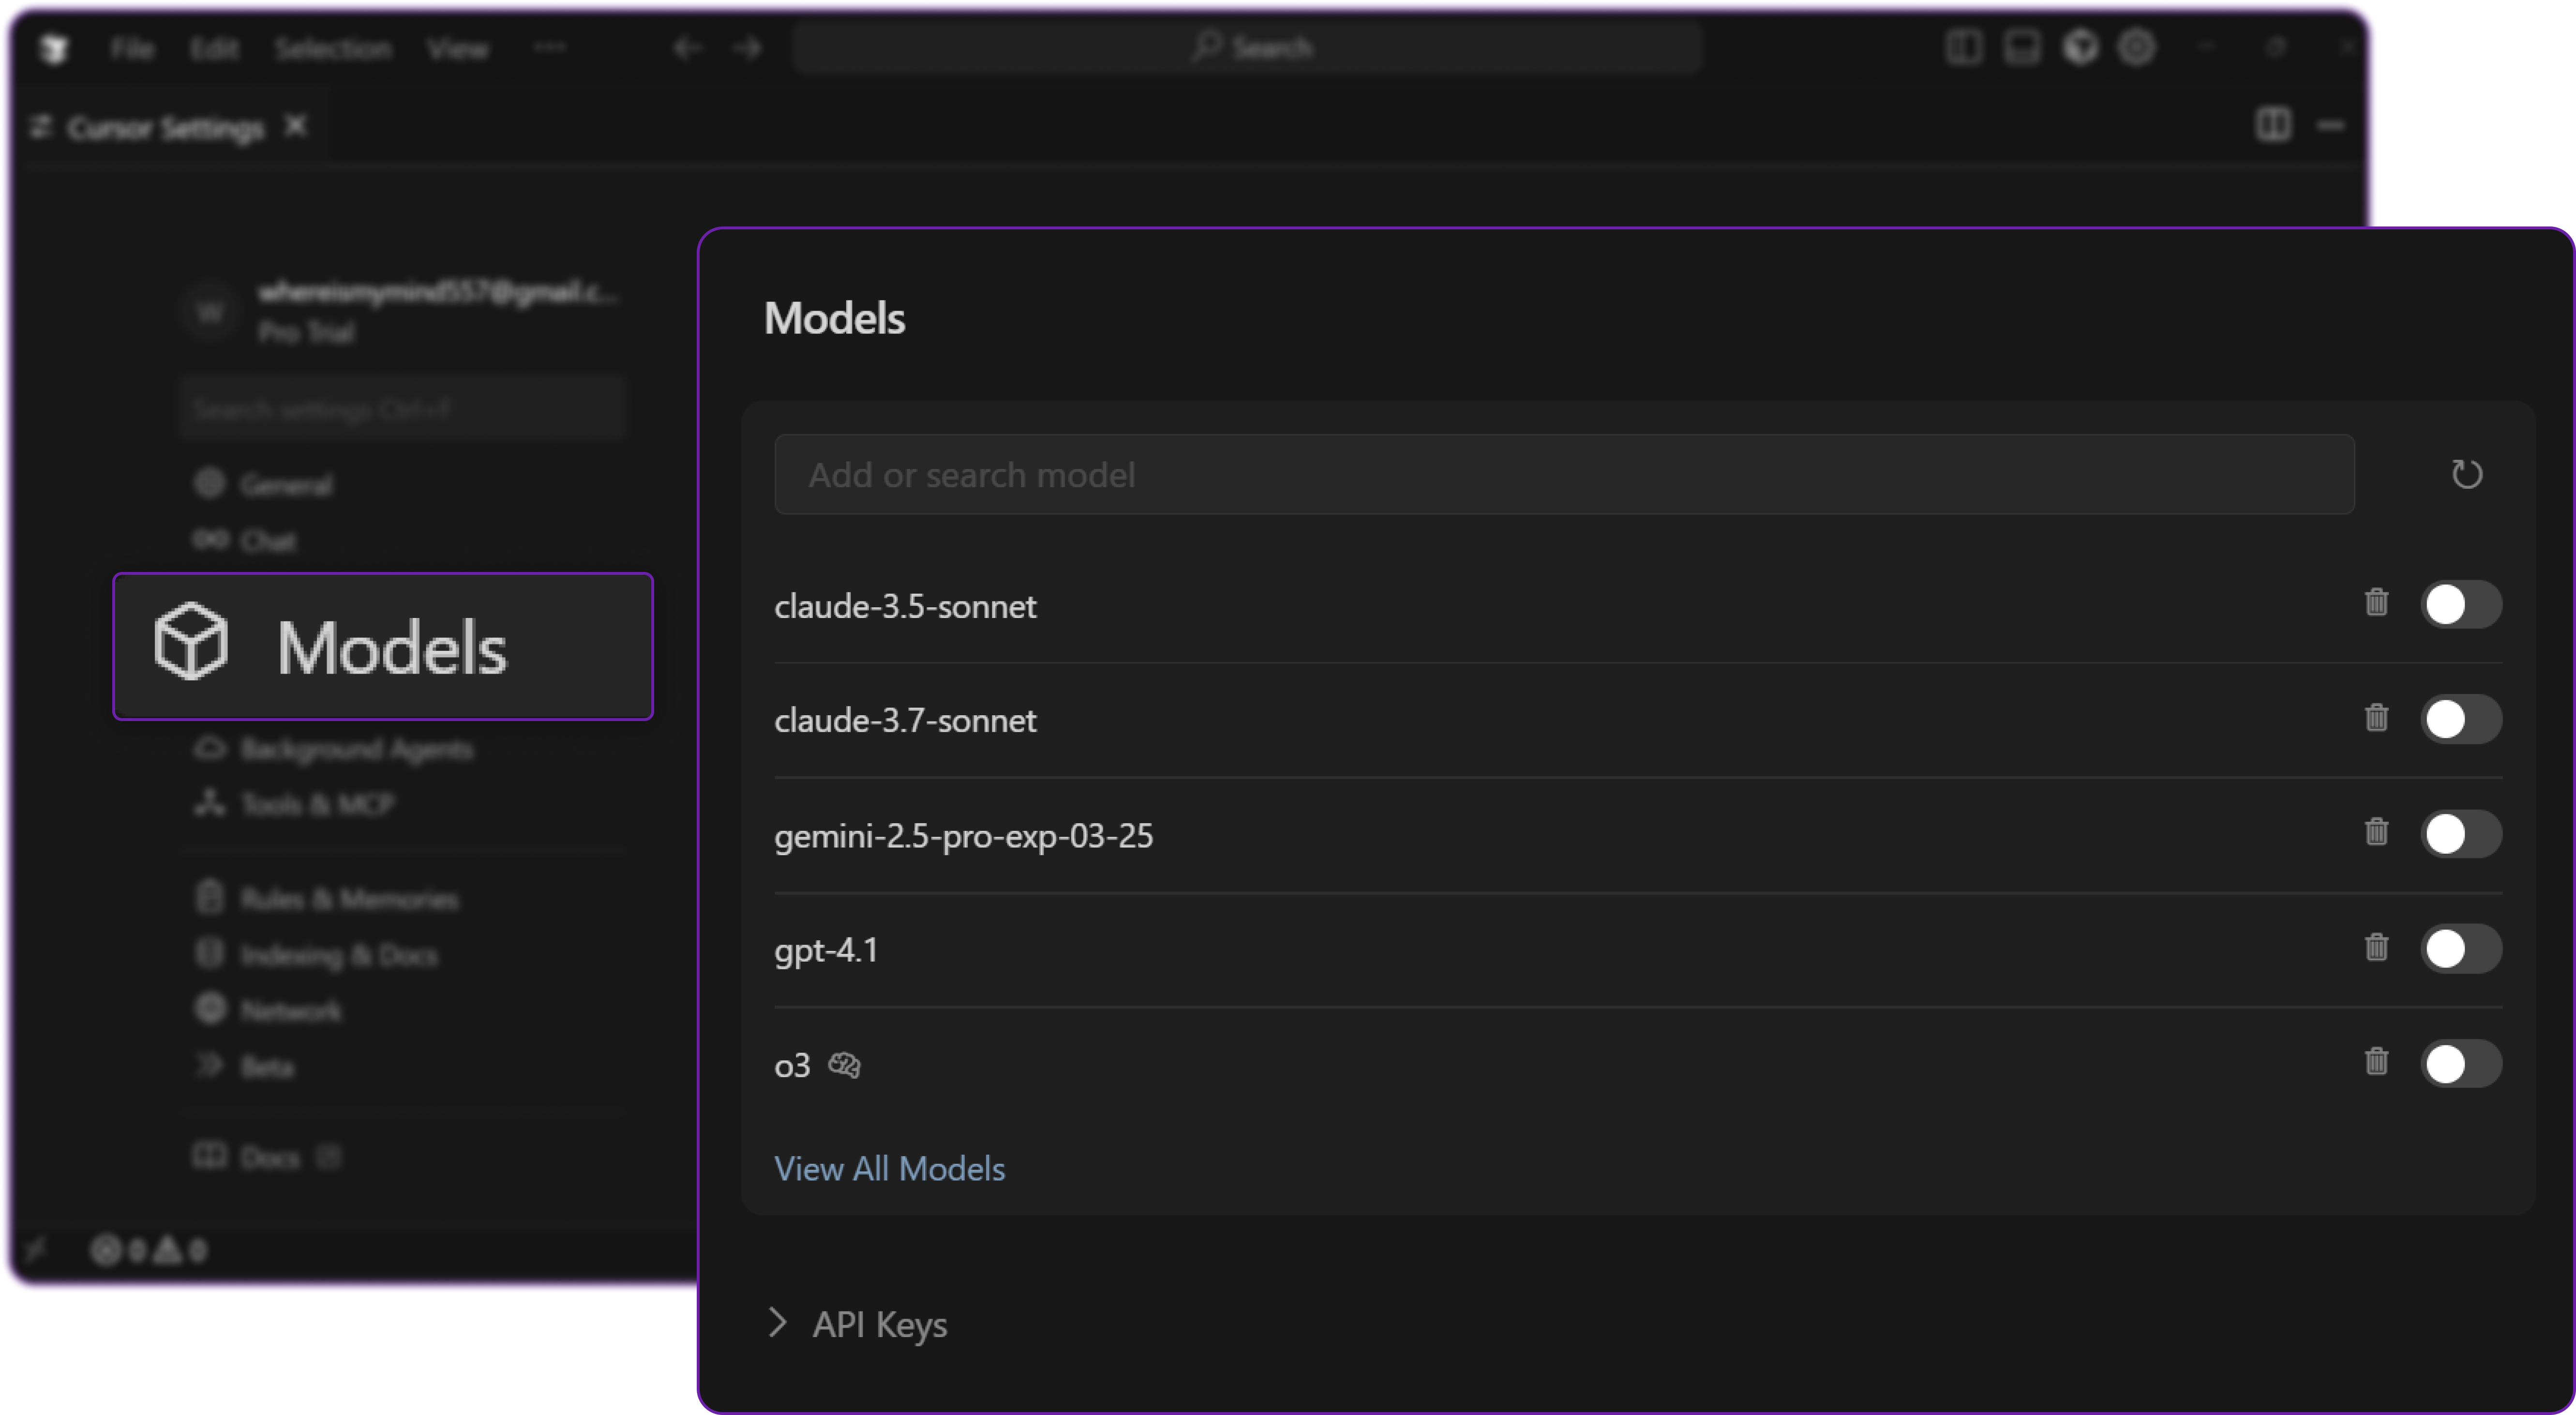
Here, we can see the list of supported models (e.g., GPT-4, Claude, etc.) and also we can add custom model endpoints which are hosted elsewhere like locally or on Hyperstack.
Step 3: Configure Custom Model Endpoint
To connect Hyperstack, we need to provide Cursor with:
- The Base URL of the API endpoint
- The Model name (e.g.,
openai/gpt-oss-120b) that we are going to add as a custom model - The API Key generated from the Hyperstack console
In the Models section, locate the Custom Model or OpenAI Compatible API field where we can define a new model.
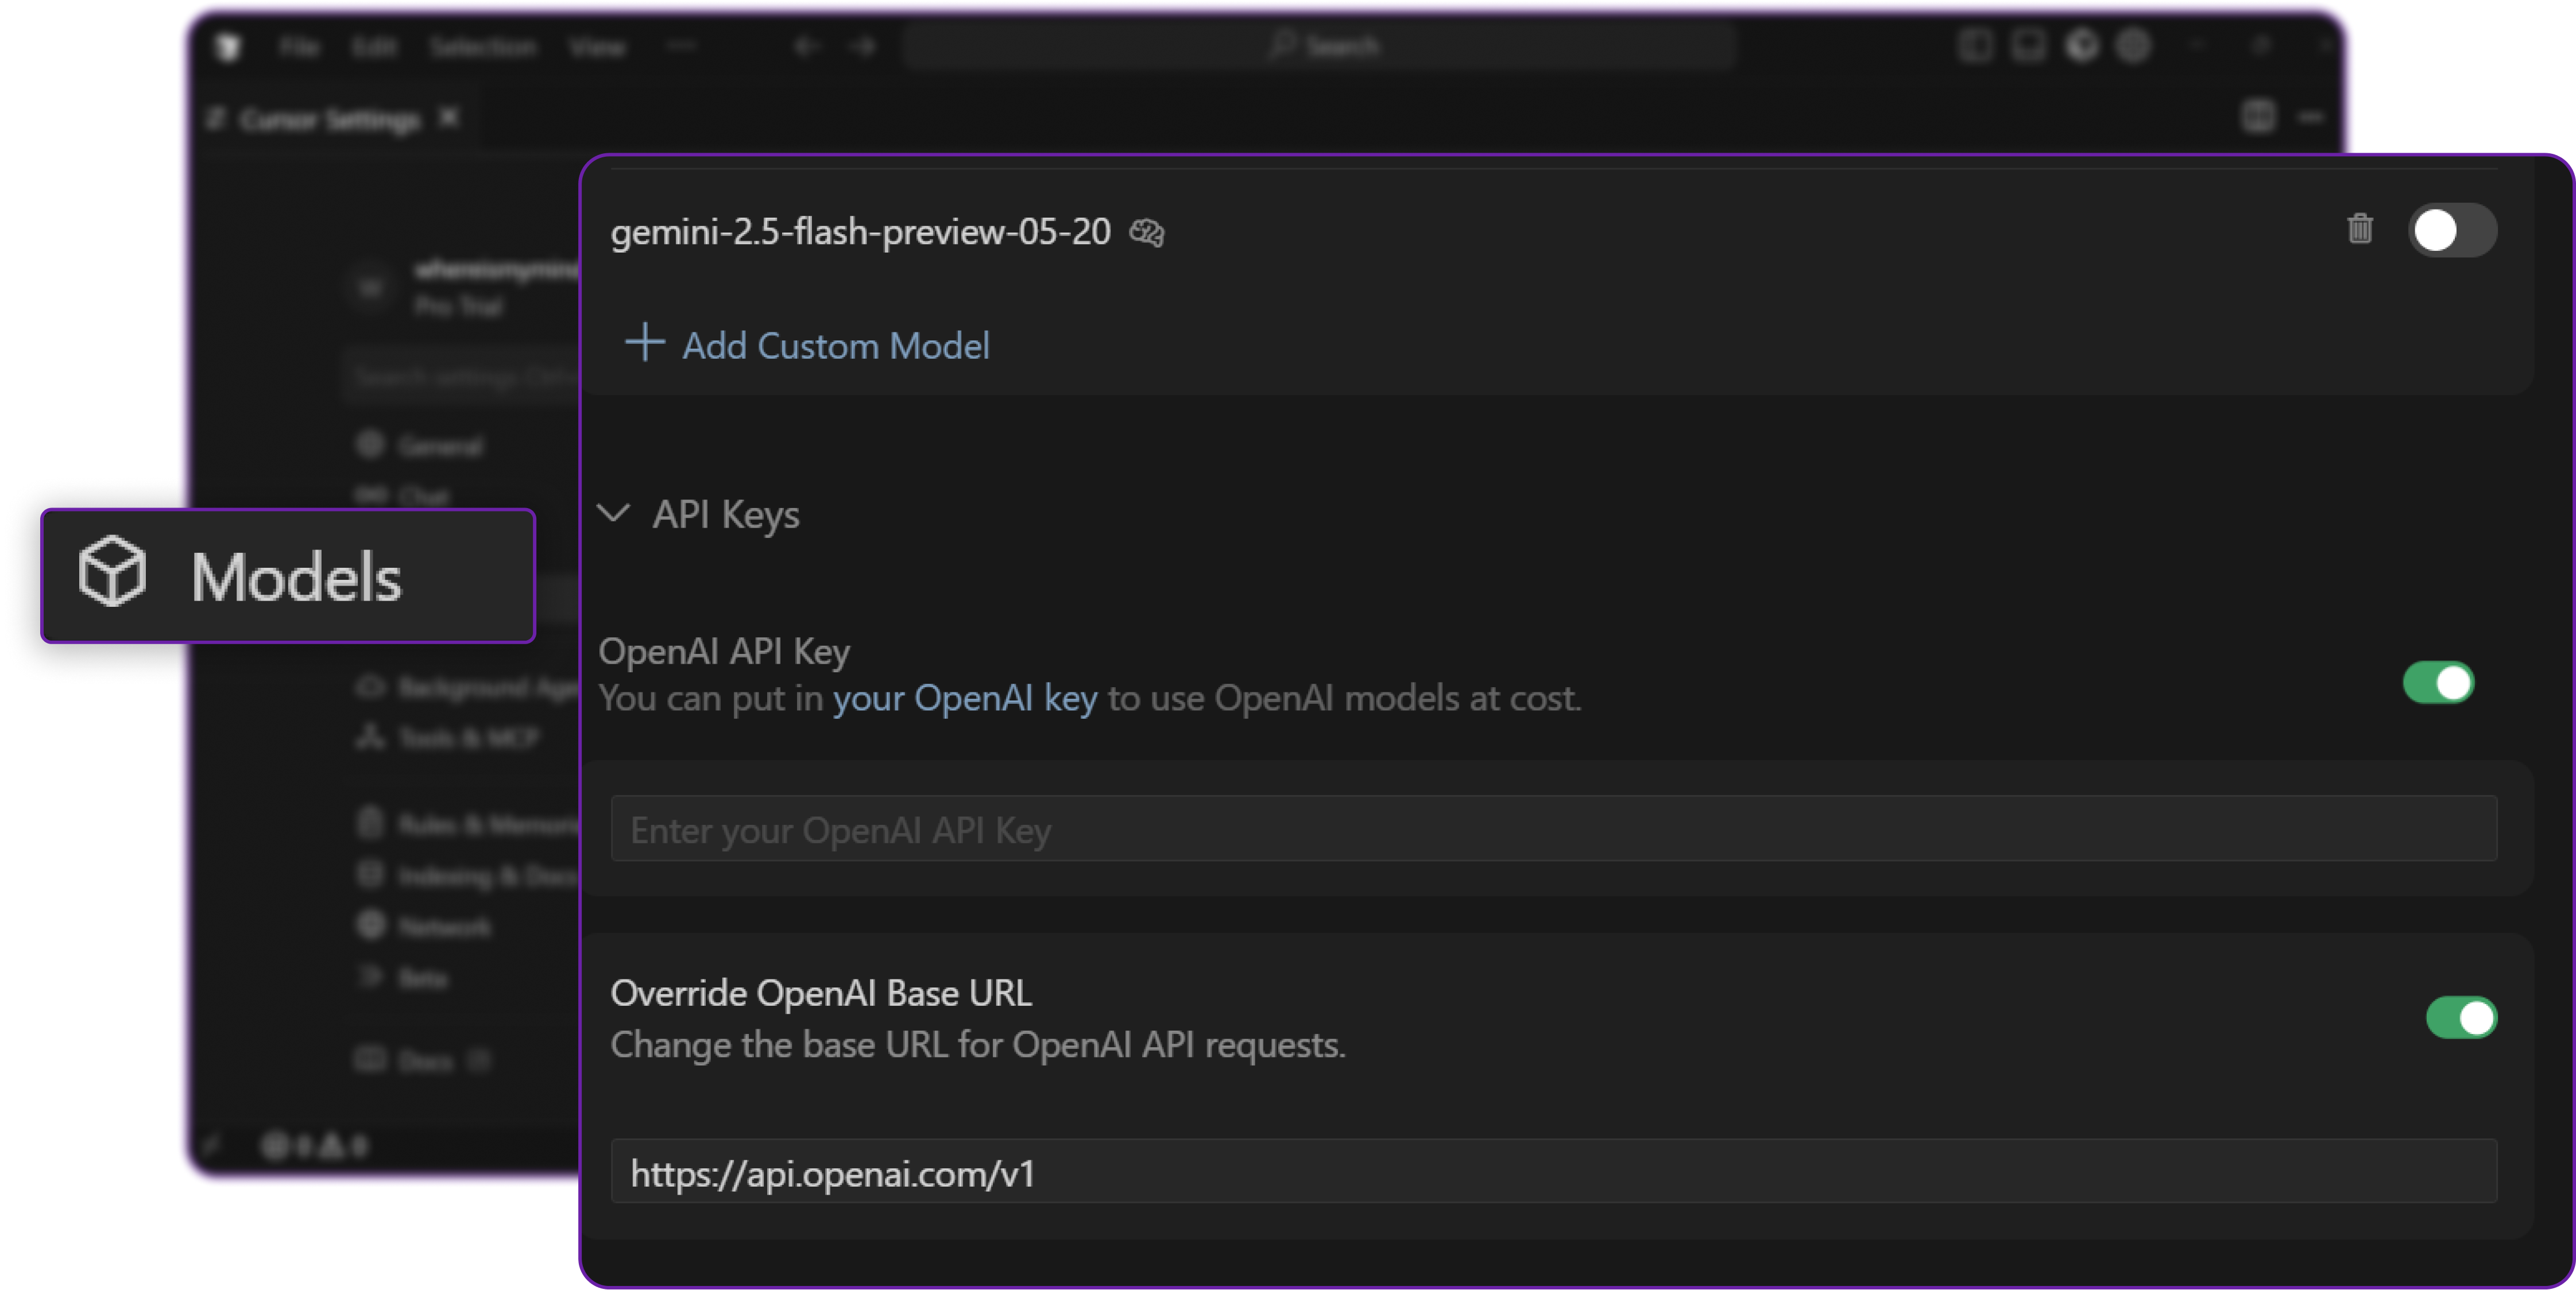
Make sure to make the OpenAI Compatible API option enabled.
Step 4: Retrieve Hyperstack API Details
- Go to the Hyperstack Console and log in with your credentials.
- Navigate to the AI Studio Playground to explore available models before integration them with Cursor.
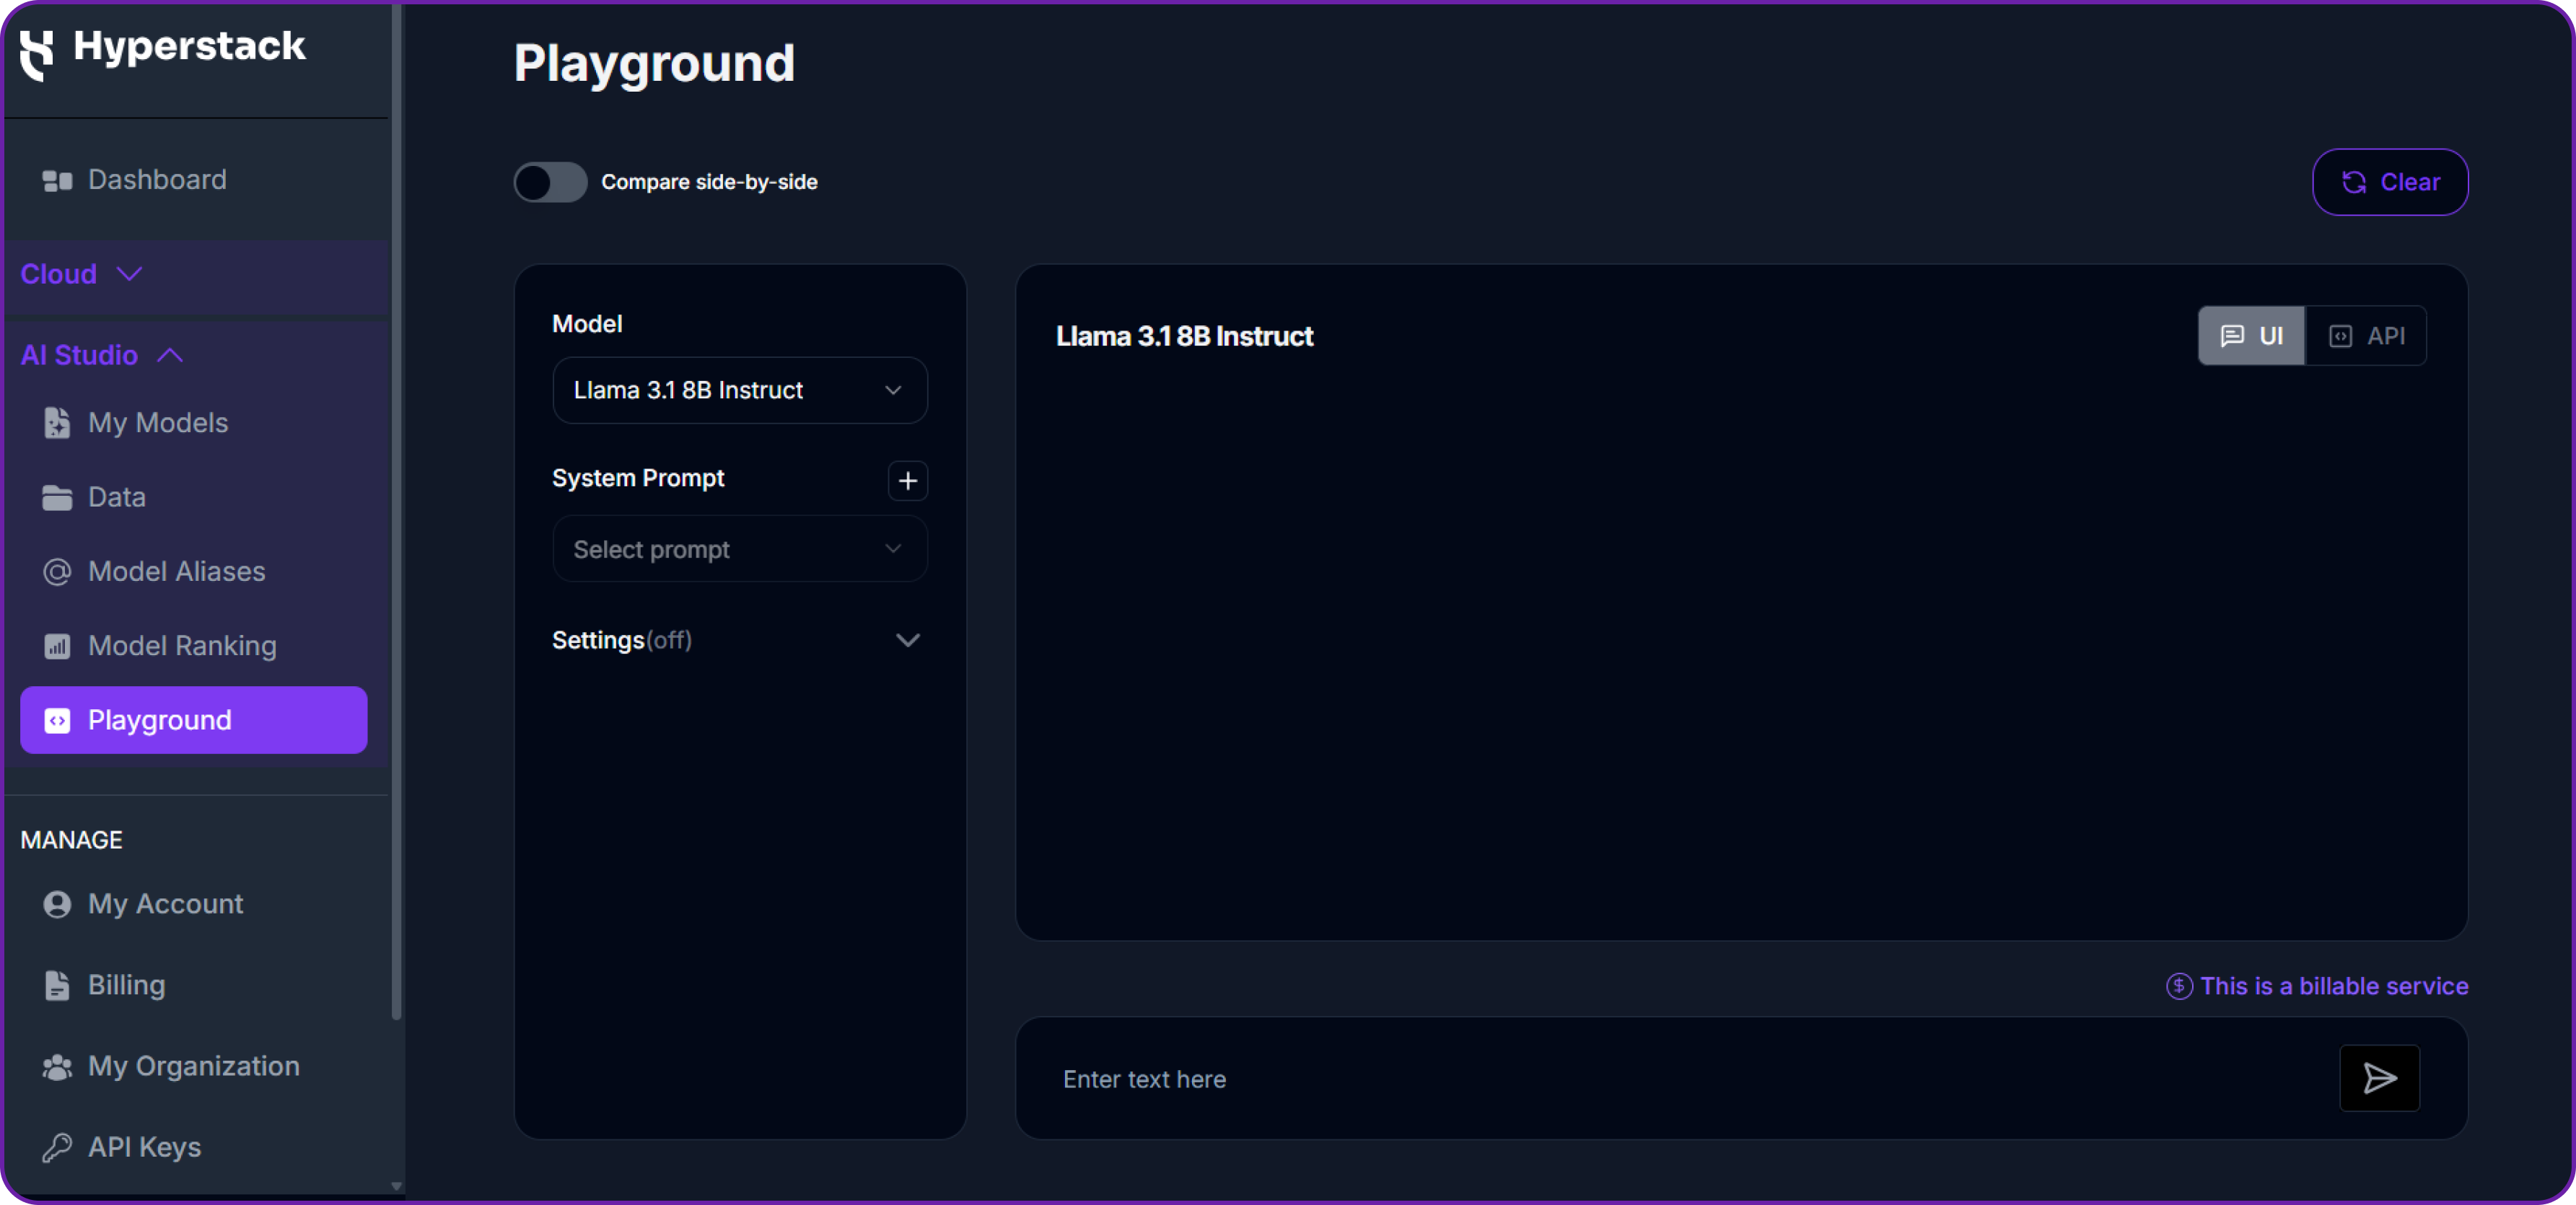
In the playground, Select your desired model after quick testing it on the interface. We are going with openai/gpt-oss-120b for this integration.
Then click on the API section to get the Base URL and Model ID.
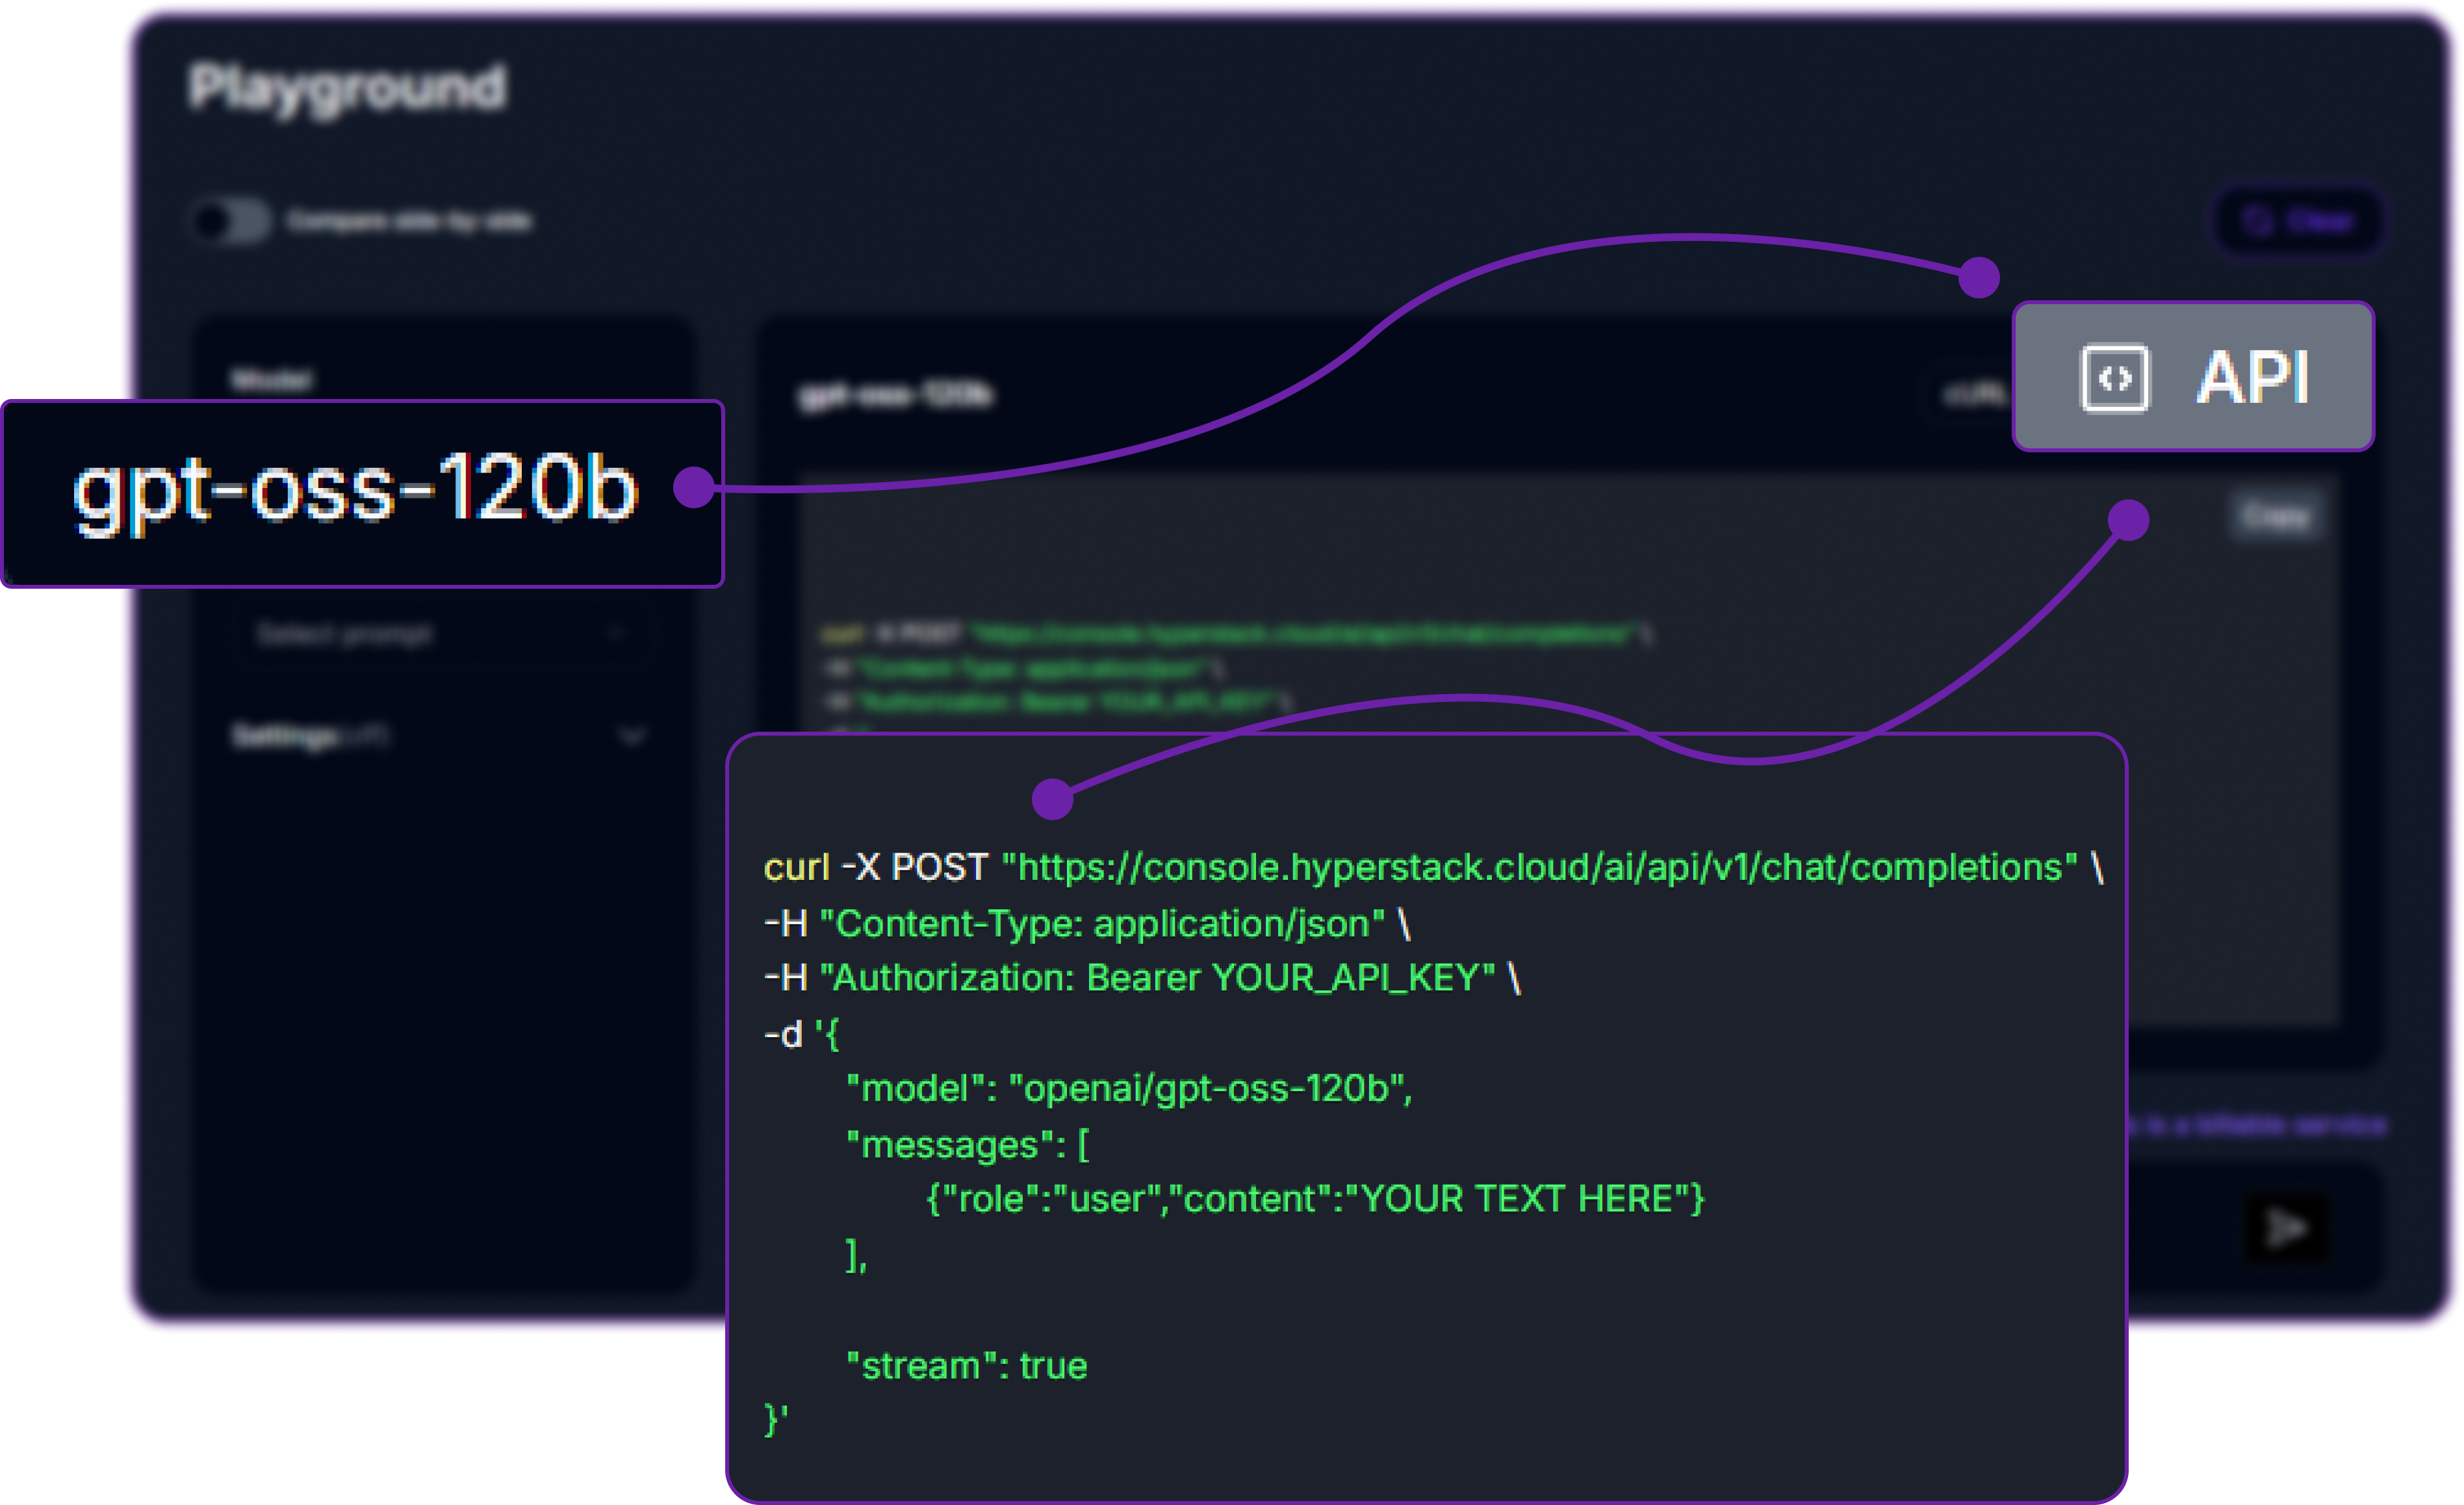
You can check the available models on their base model documentation page. You can copy the model id and base url from here, we will need it in the next step.
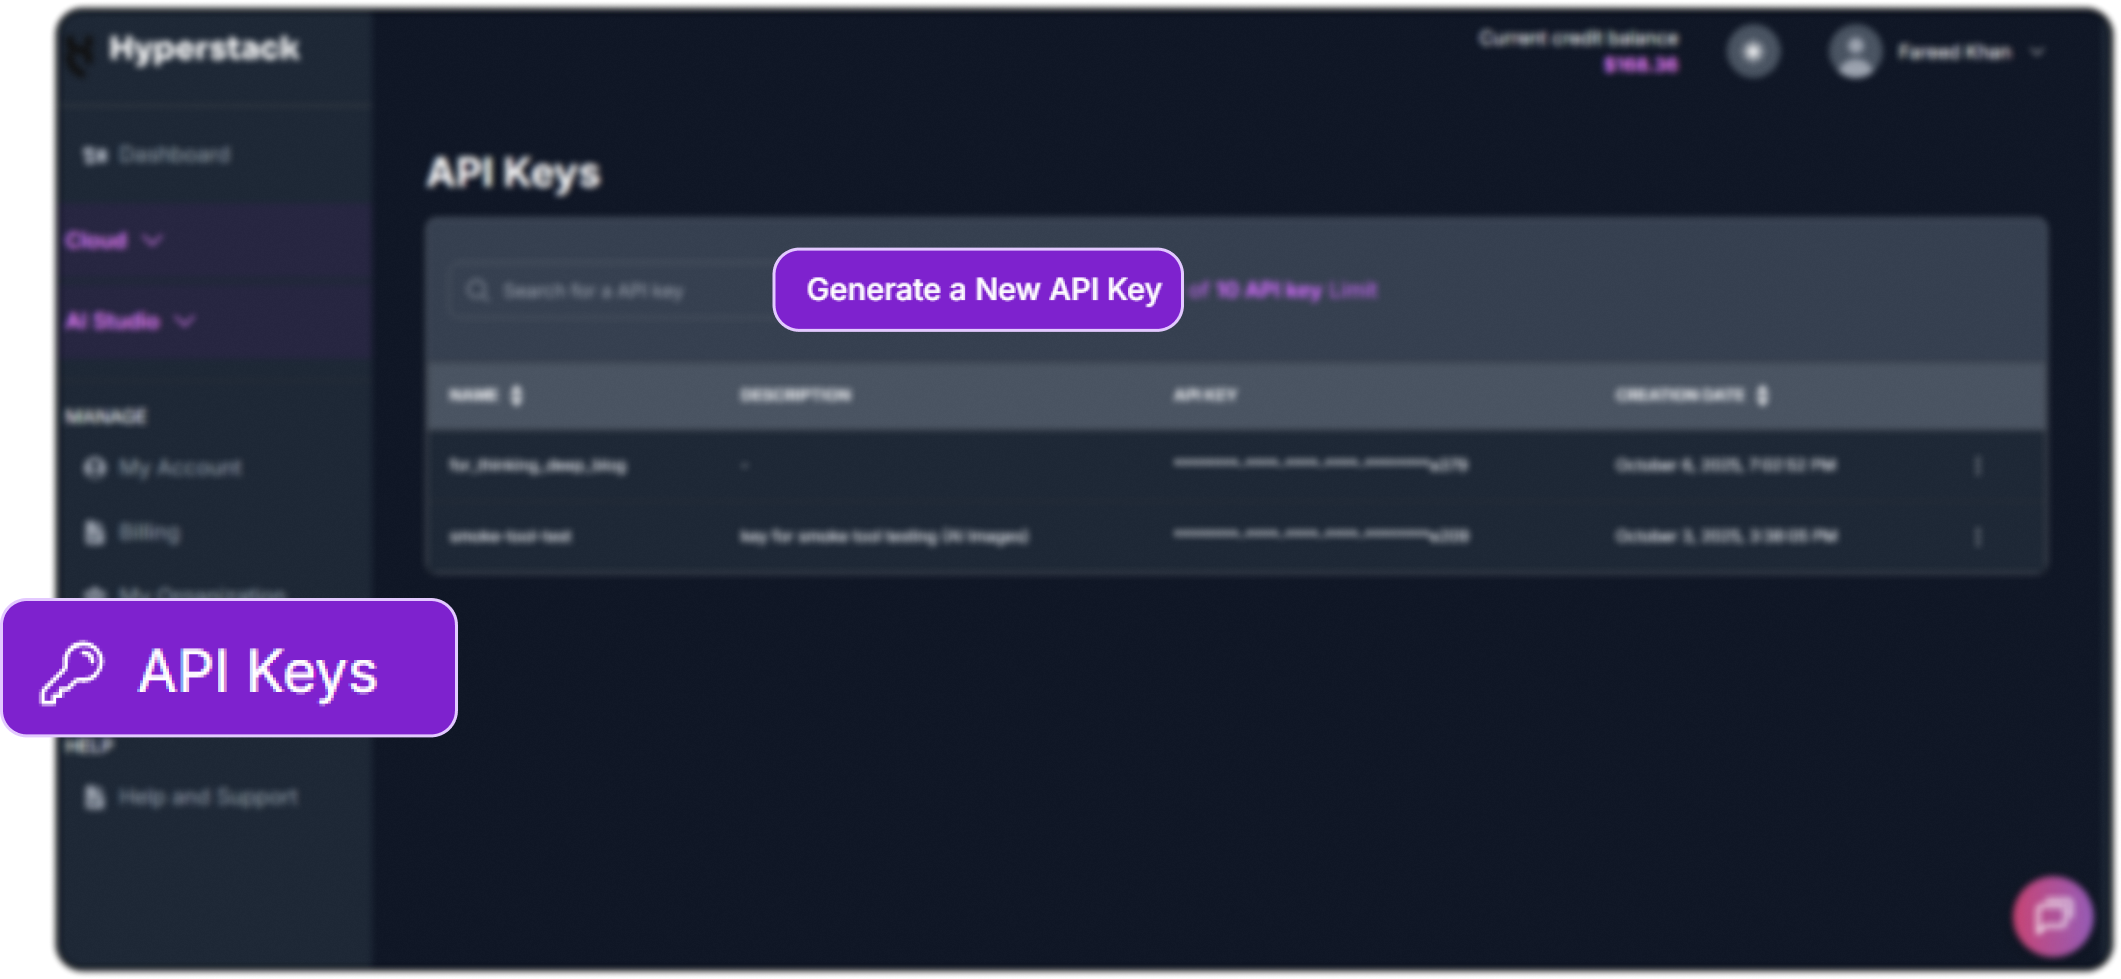
Step 5: Generate an API Key
To authenticate, we will need a valid API key from Hyperstack AI Studio.
-
Go to the API Keys section in the Hyperstack console.
-
Click Generate New Key.
-
Give it a name (e.g.,
cursor-integration-key). -
Copy the generated key, we will use it in Cursor.
Step 6: Add Hyperstack Model to Cursor
Return to Cursor’s Model Settings panel and configure as follows:
- Base URL → Paste the Hyperstack endpoint (e.g.,
https://api.hyperstack.cloud/v1) - Model Name → Enter
openai/gpt-oss-120b - API Key → Paste your generated Hyperstack API key

Once done, configuration will be saved automatically.
Cursor will now treat Hyperstack’s API as a valid model endpoint identical to how it communicates with OpenAI or other providers.
Make sure to make all configuration active.
Step 7: Test the Integration
We can now test our connection to confirm that everything is working properly.
- In Cursor, press Ctrl + Shift + P (or Cmd + Shift + P on macOS).
- Search for and select “Open Chat”.
- From the model selector, choose
openai/gpt-oss-120b.
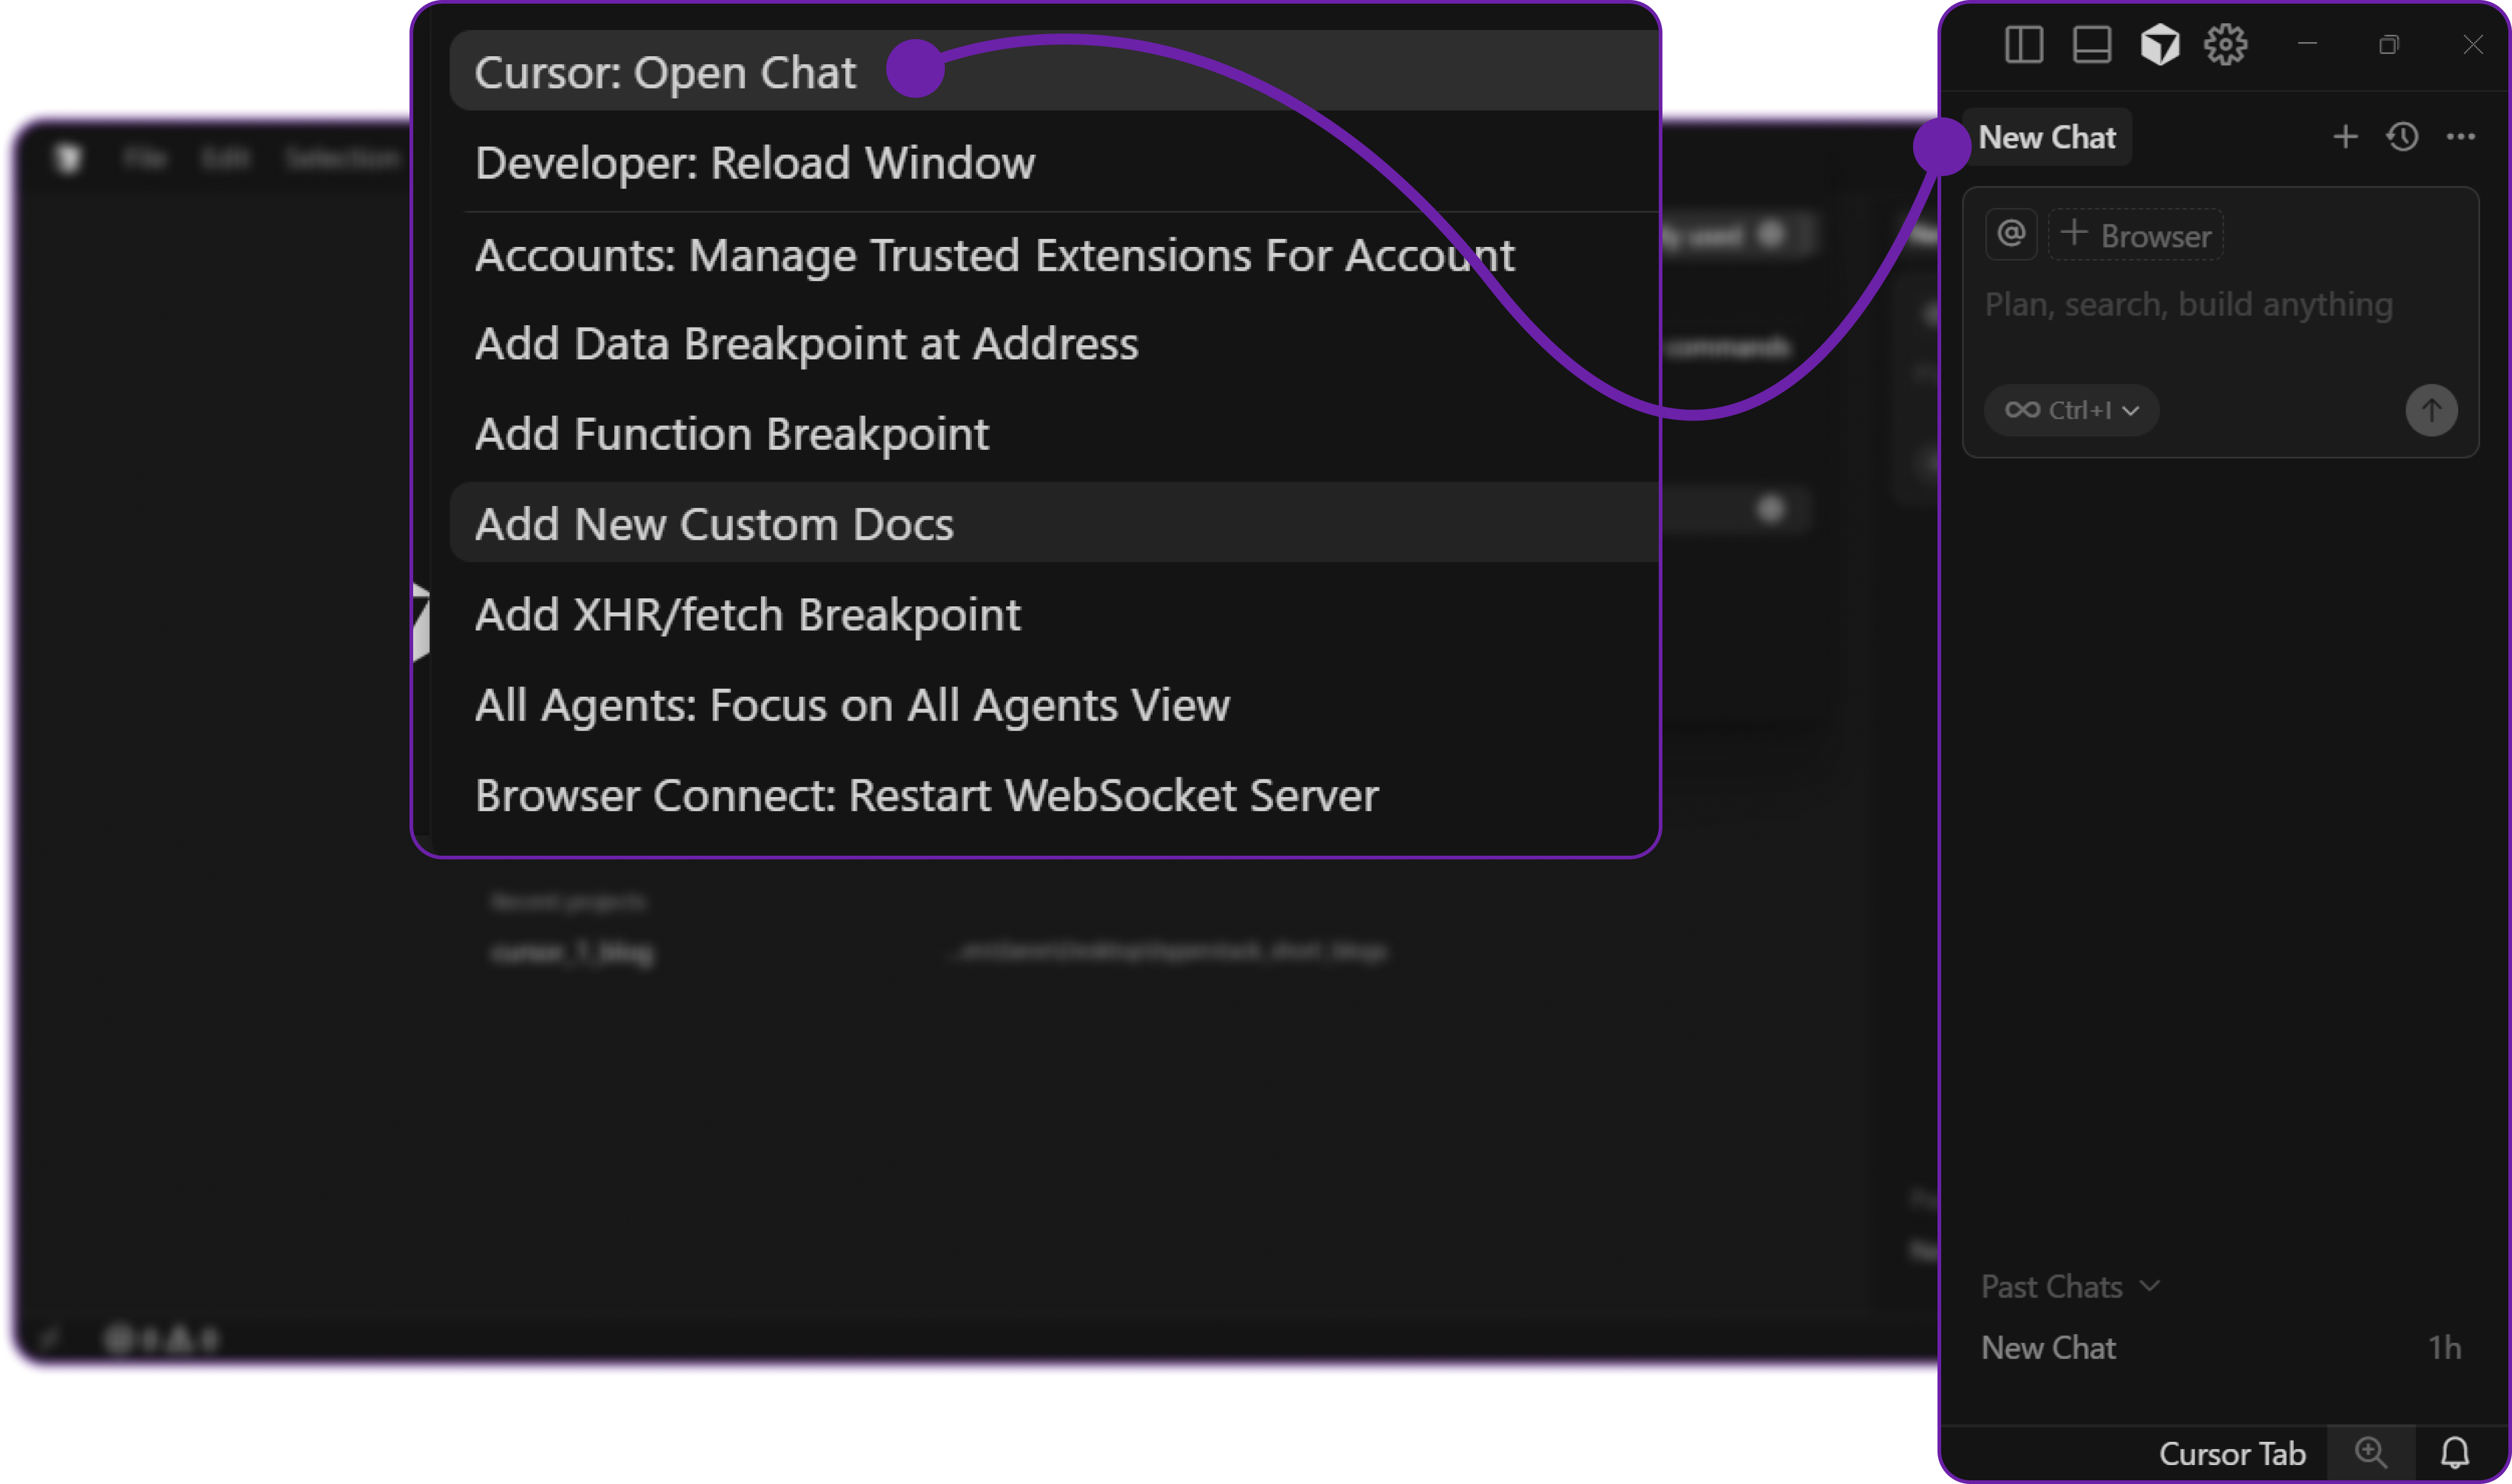
- Select type
ask, since we want to ask a question to the model. Make sure theopenai/gpt-oss-120bmodel is selected. Let's ask a simple questionHito verify the connection:
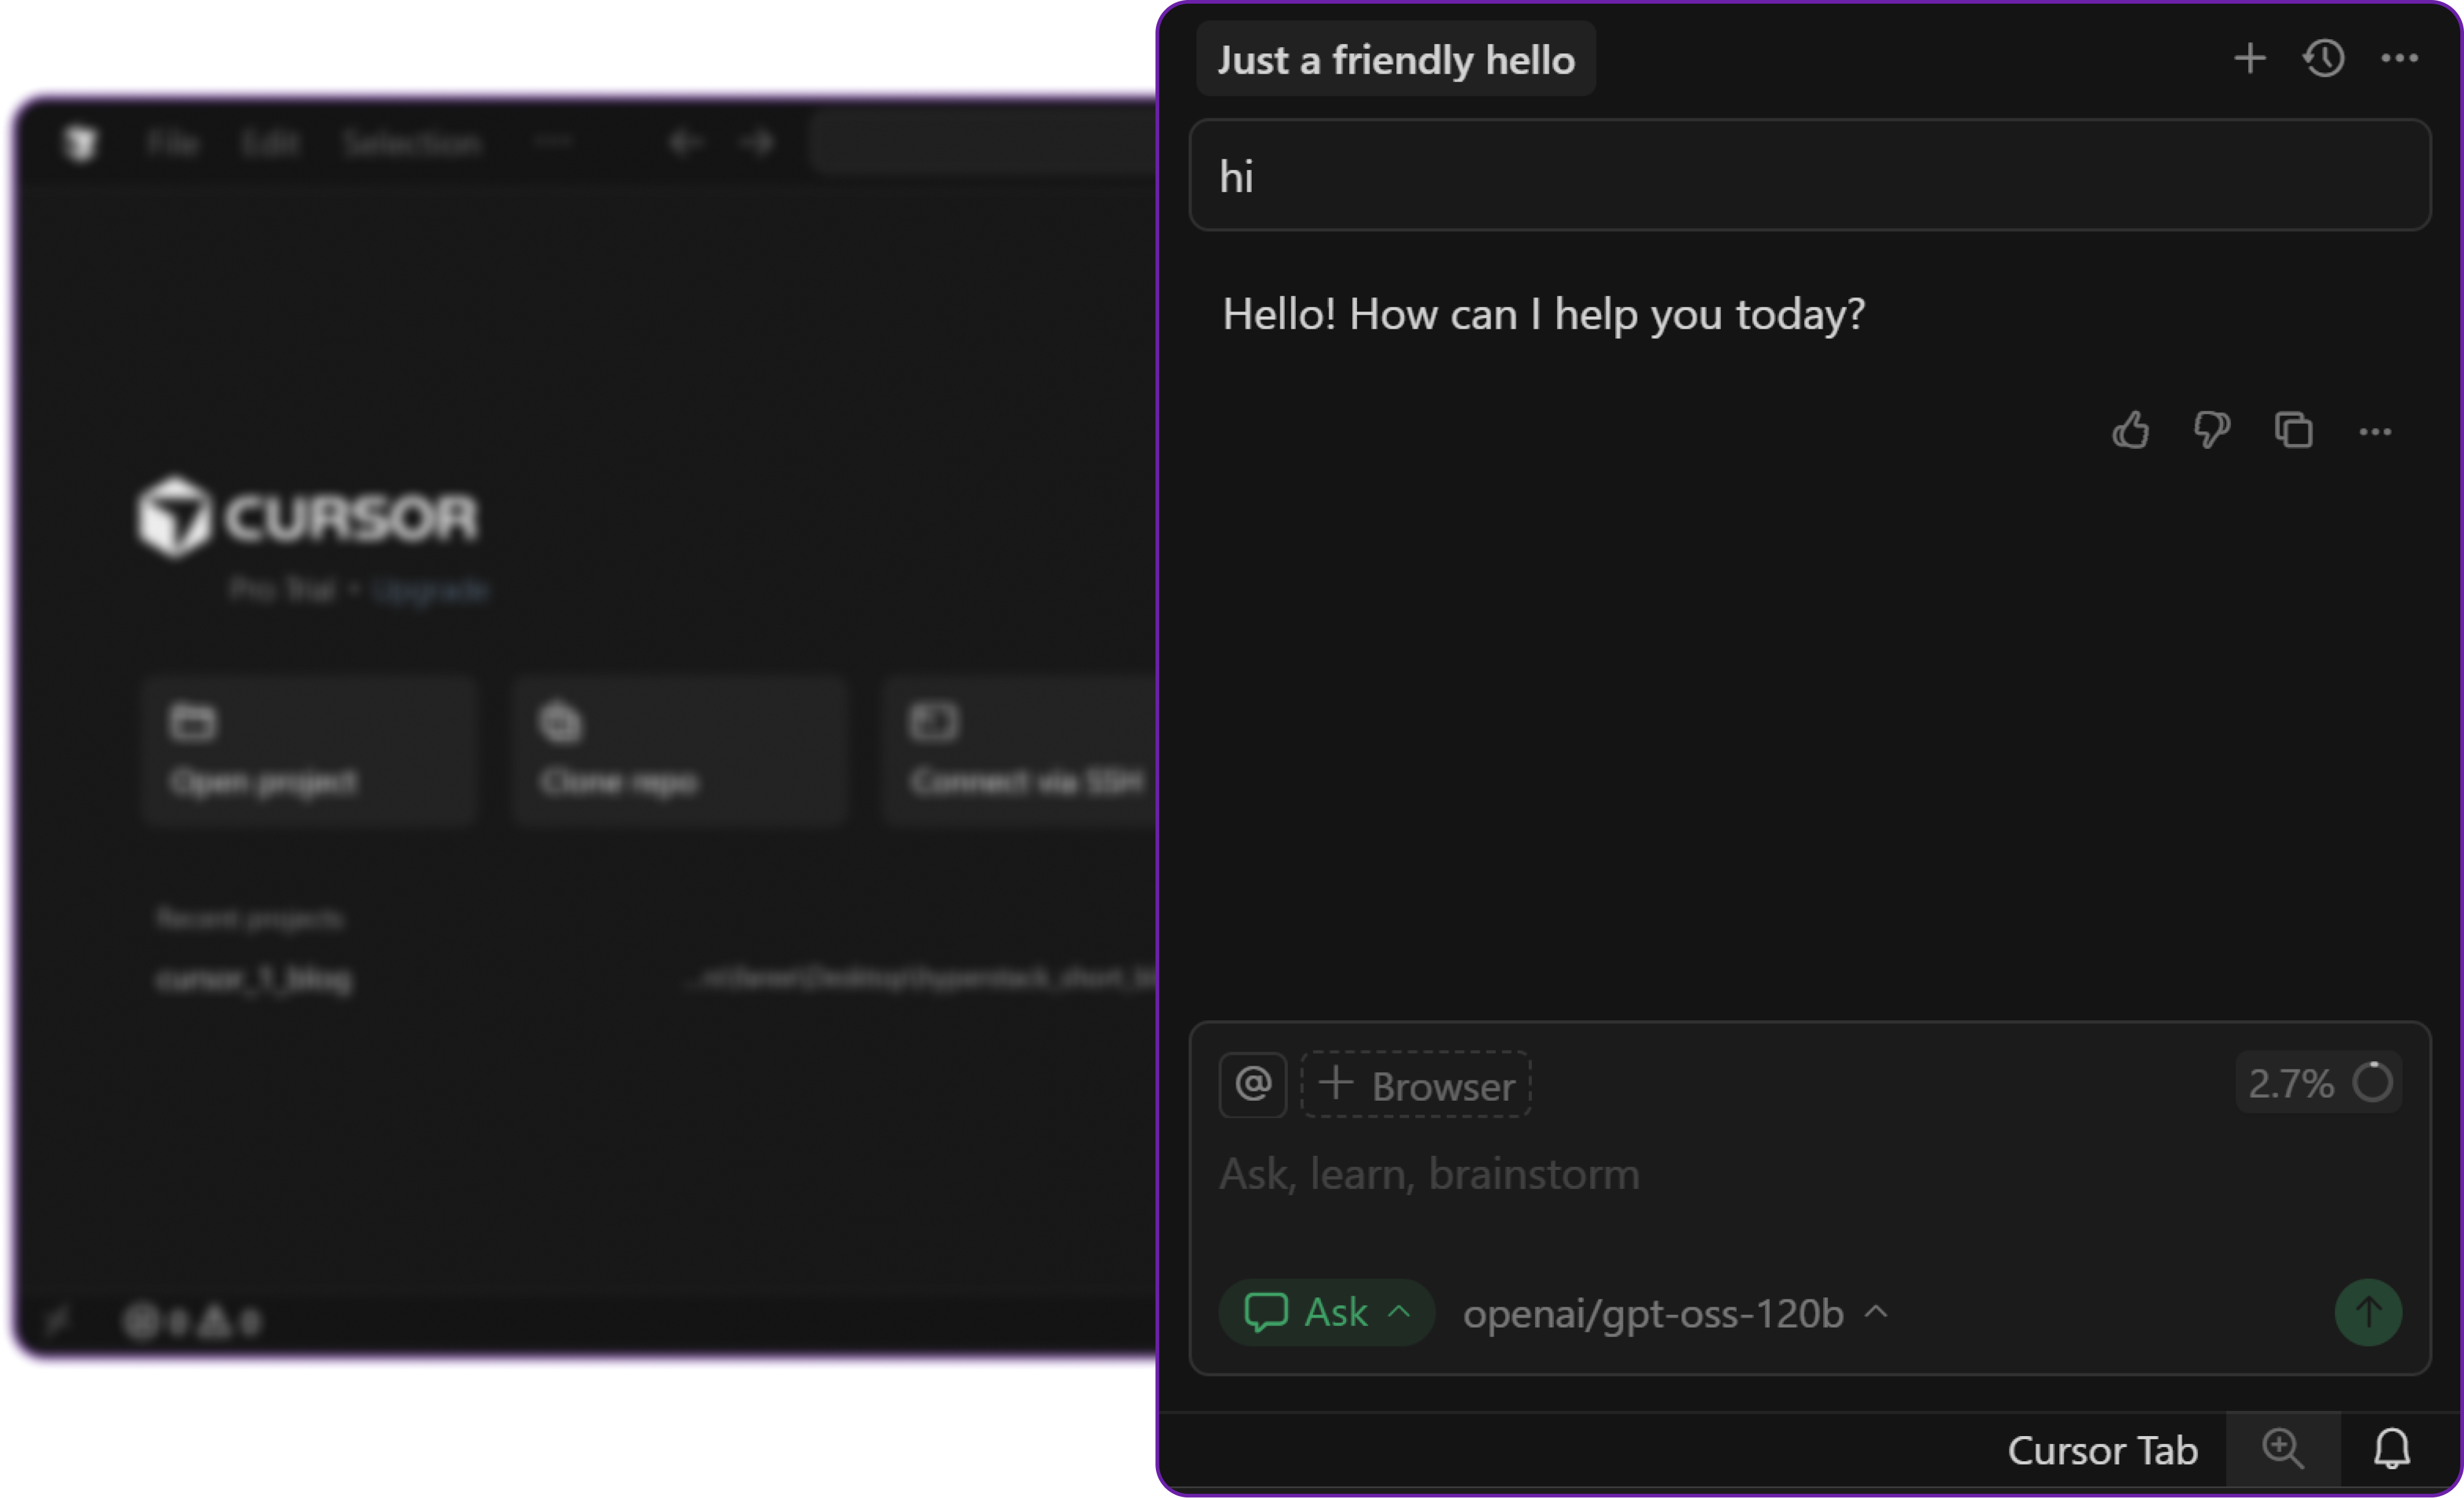
If you receive a valid response, your integration is working correctly. Cursor is now communicating with your Hyperstack-hosted model.
Step 8: Testing Code Generation
Now that we have confirmed the connection, let’s test a more practical coding task.
Open the terminal in Cursor using **Ctrl + ** (or Cmd + on macOS).
Then to chat with the model, press Ctrl + K (or Cmd + K on macOS) to open the chat input in the terminal.
and ask the model to generate a simple python file with a function that returns "Hello, World!". Let's do that.
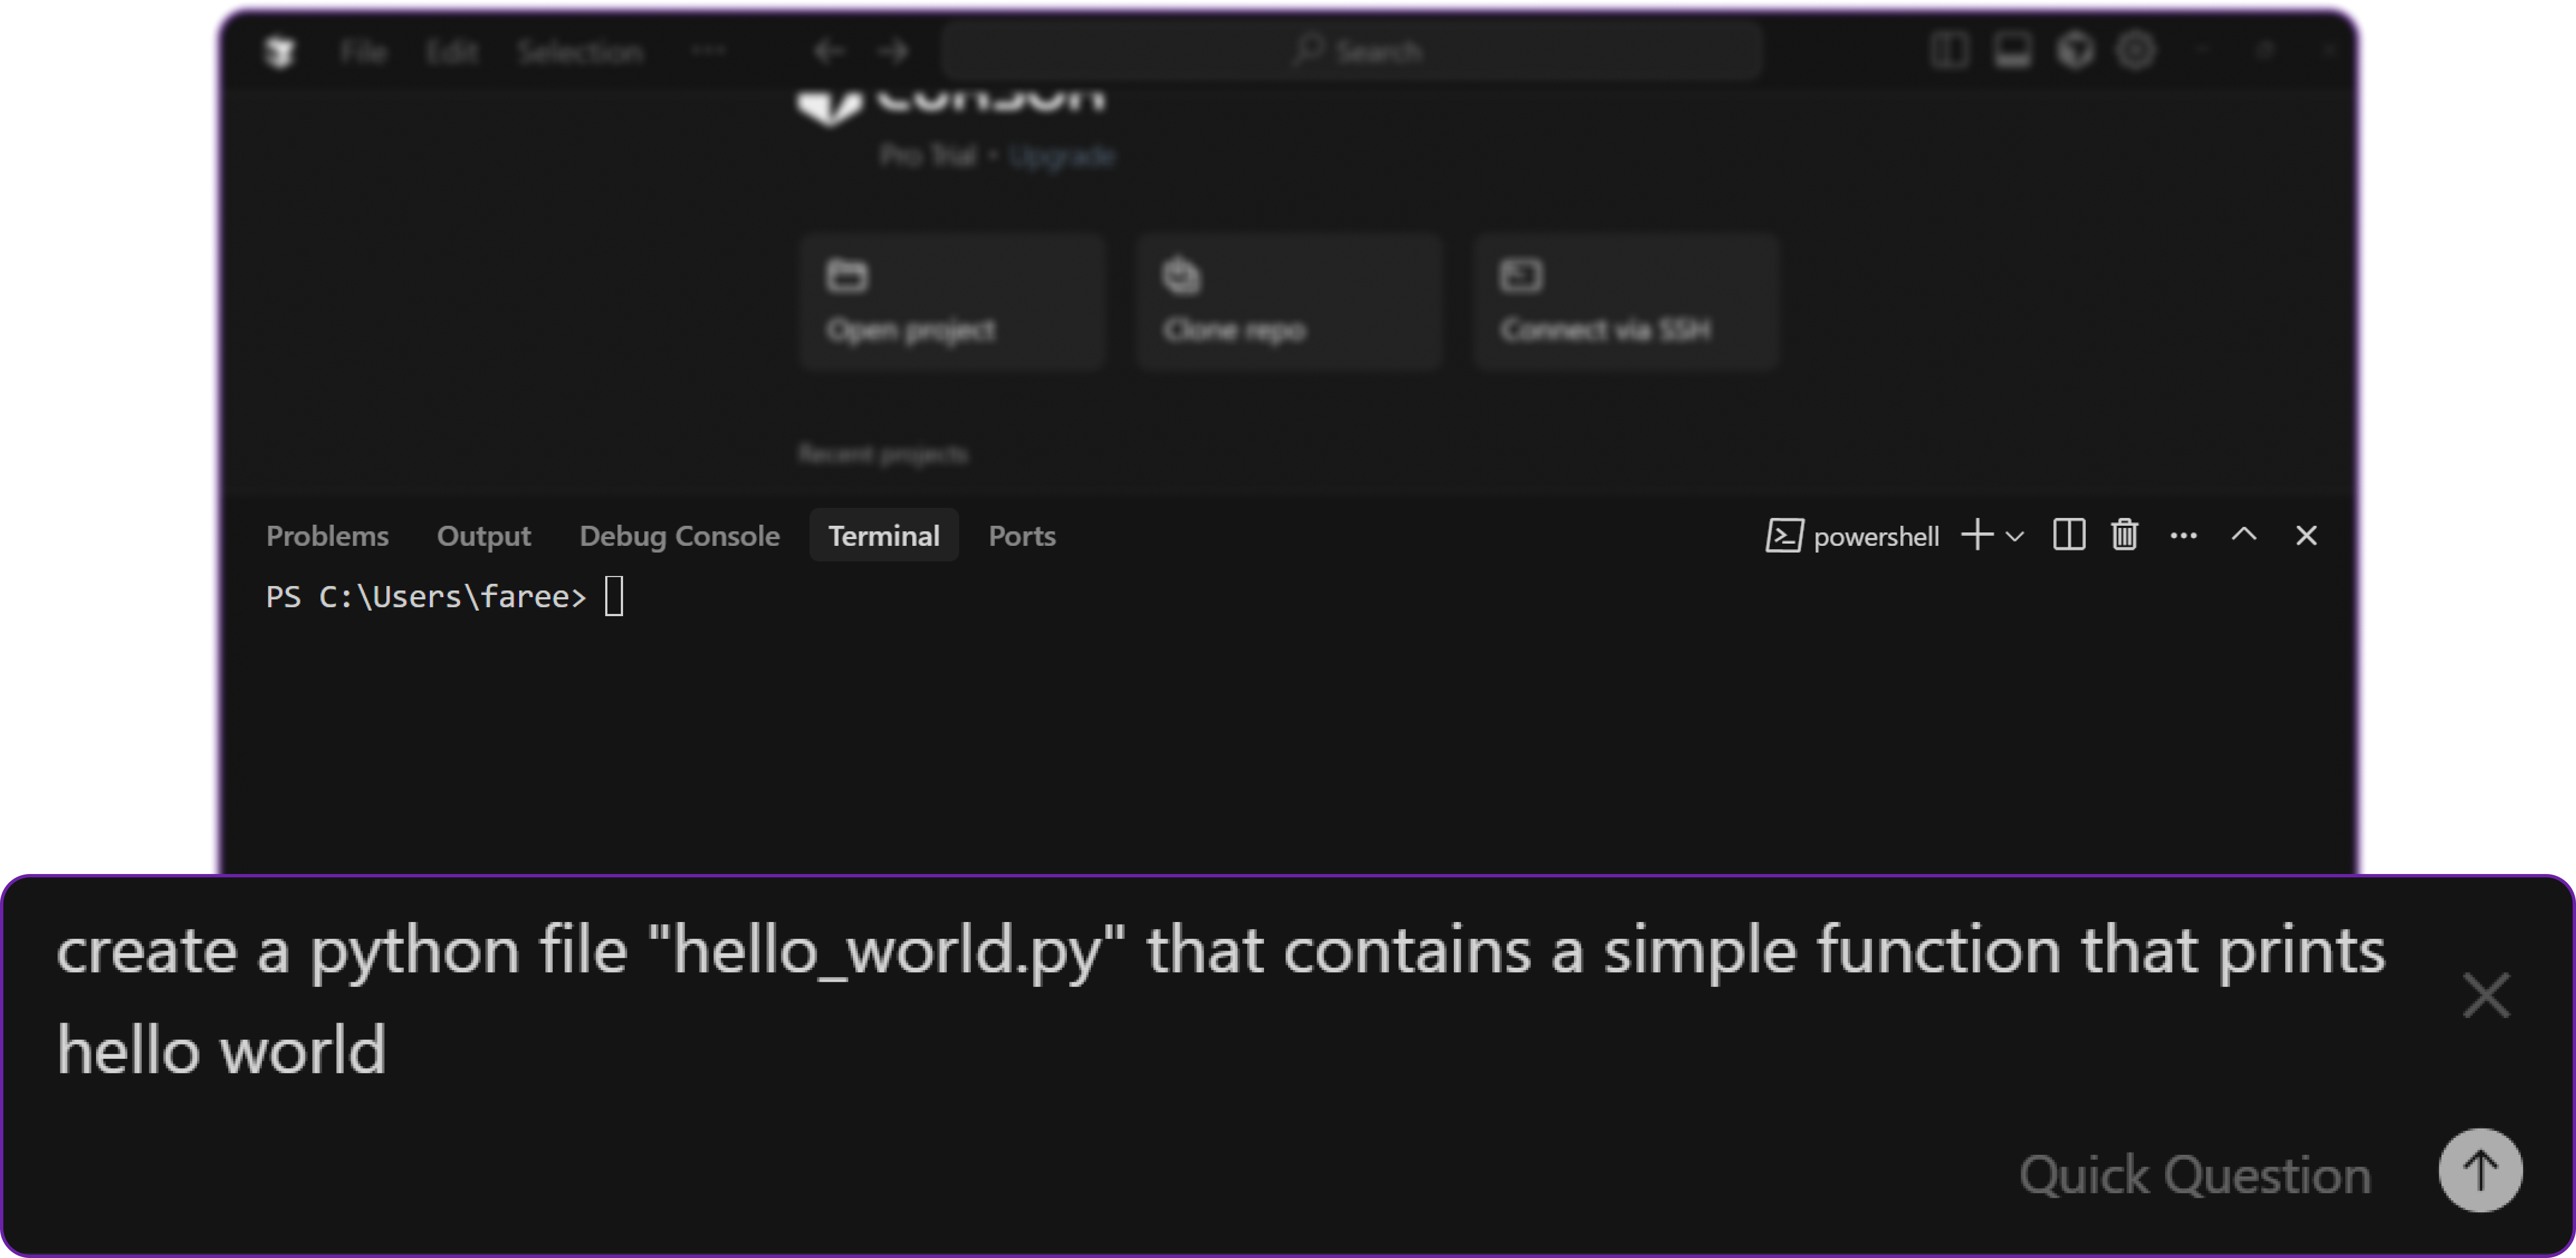
create a python file "hello_world.py"
that contains a simple function that prints hello world
When we run the command, Cursor will generate the command and execute it, creating the hello_world.py file in the current directory.
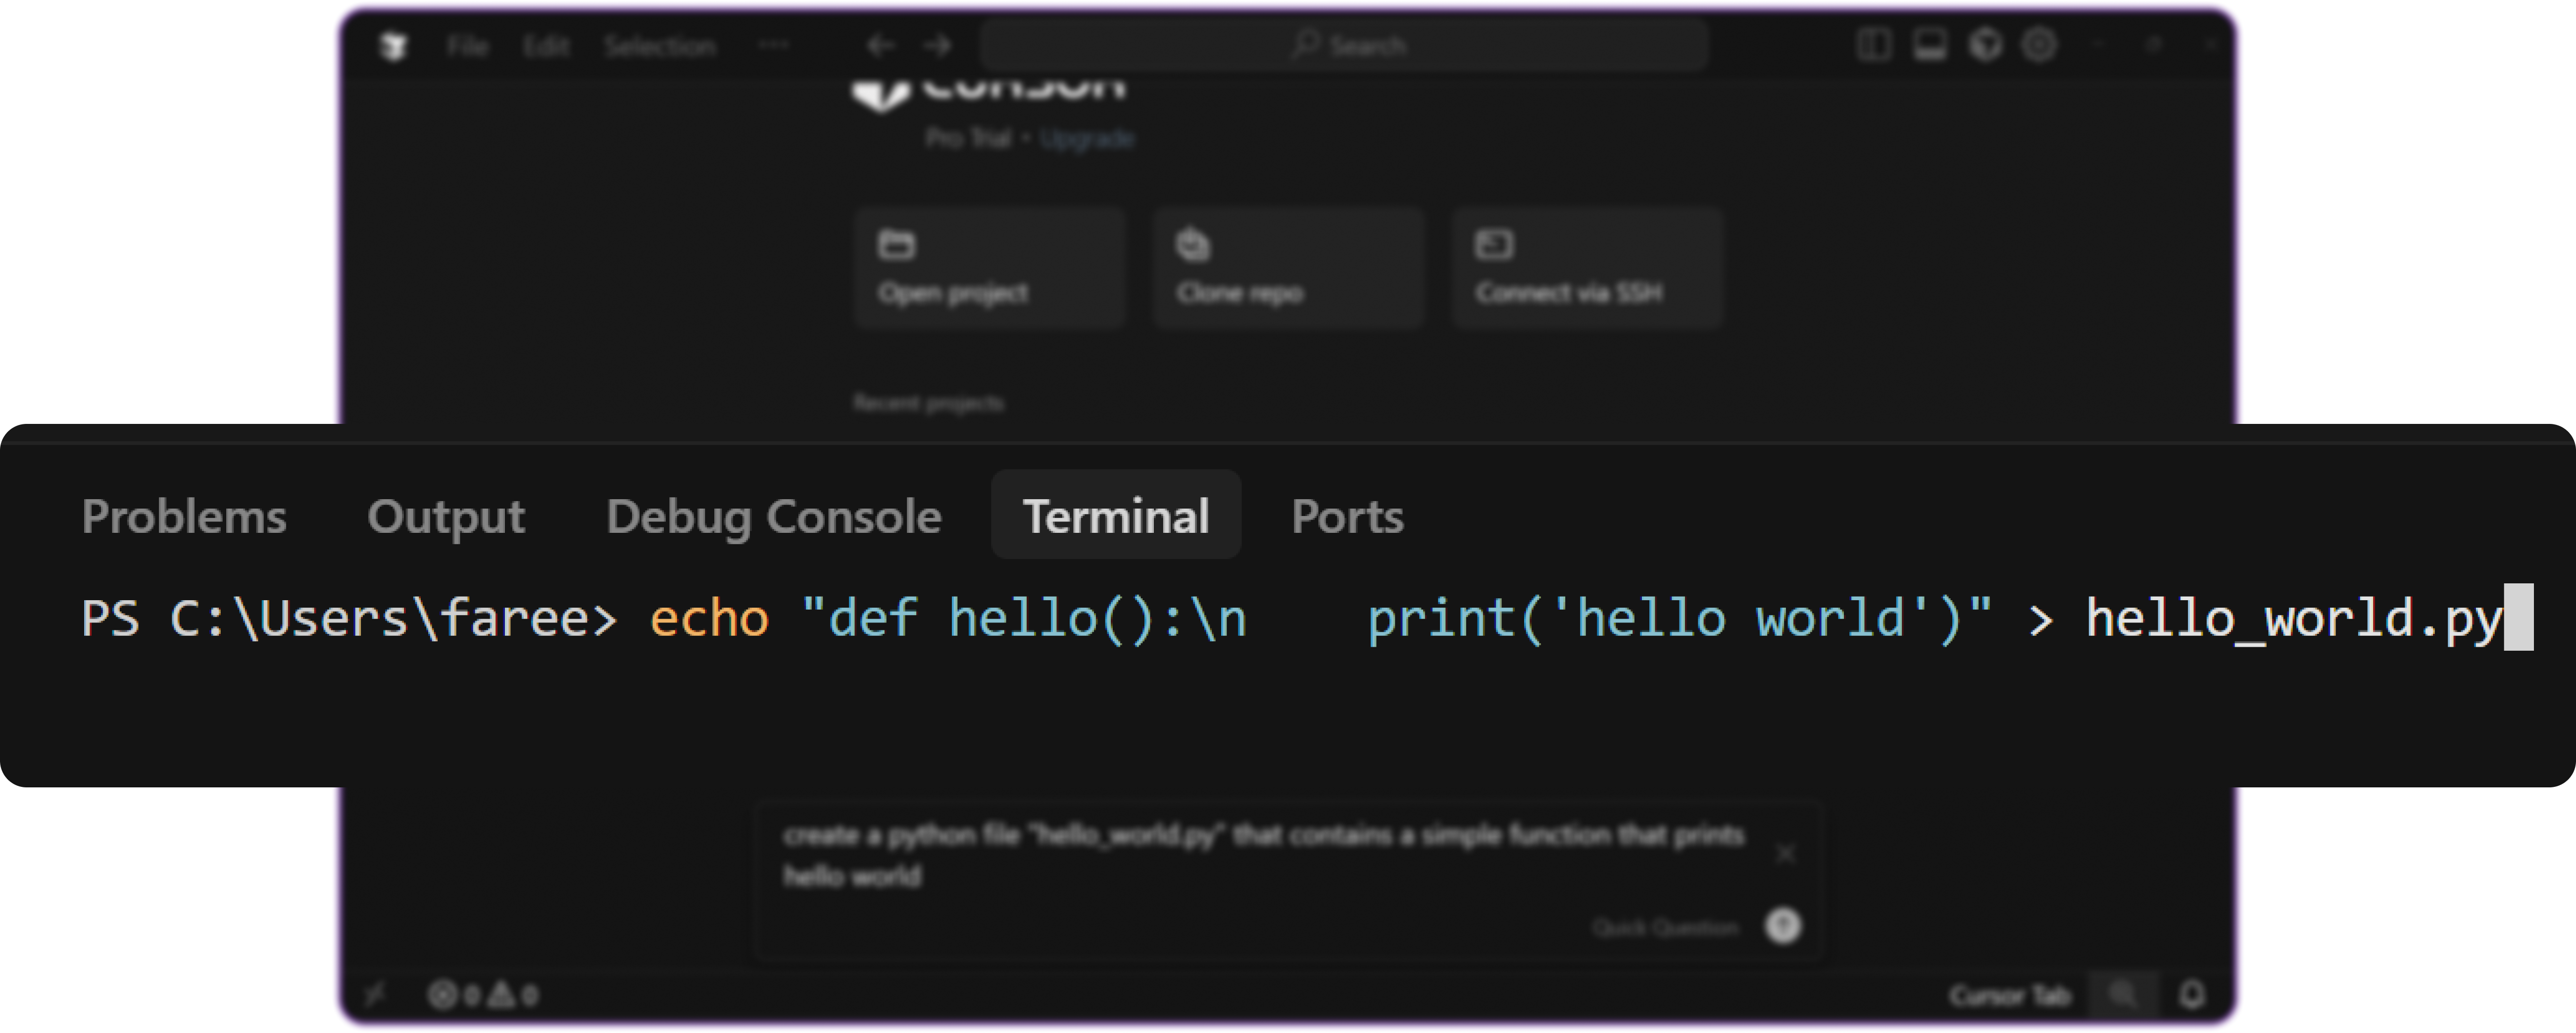
This confirms that our Hyperstack model is fully integrated and capable of handling coding tasks directly within Cursor.
Monitoring and Next Steps
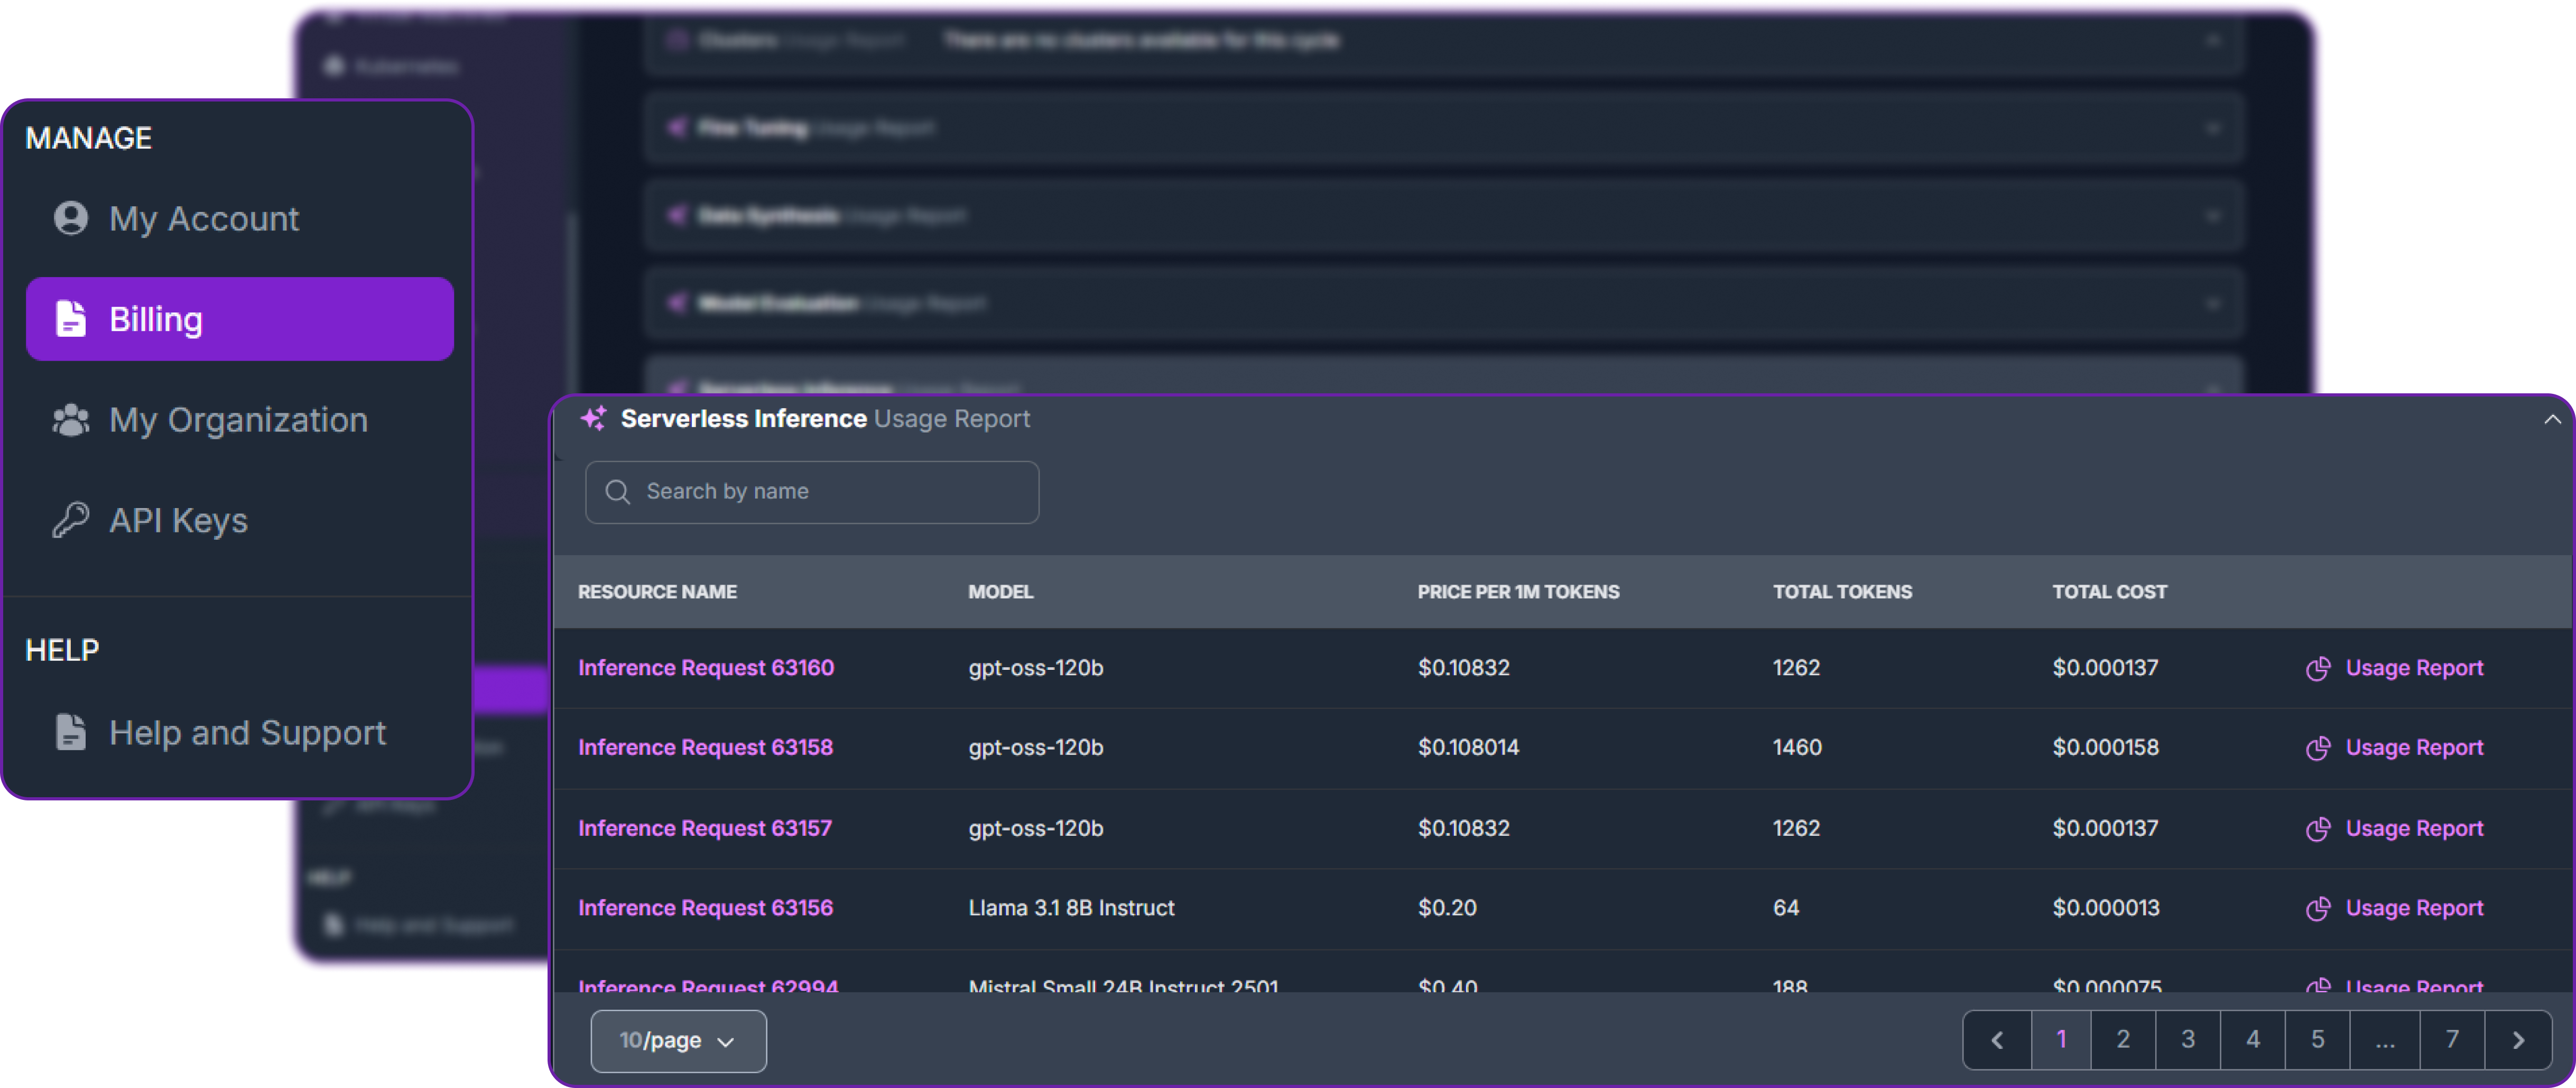
There are two ways to monitor usage of our Hyperstack models.
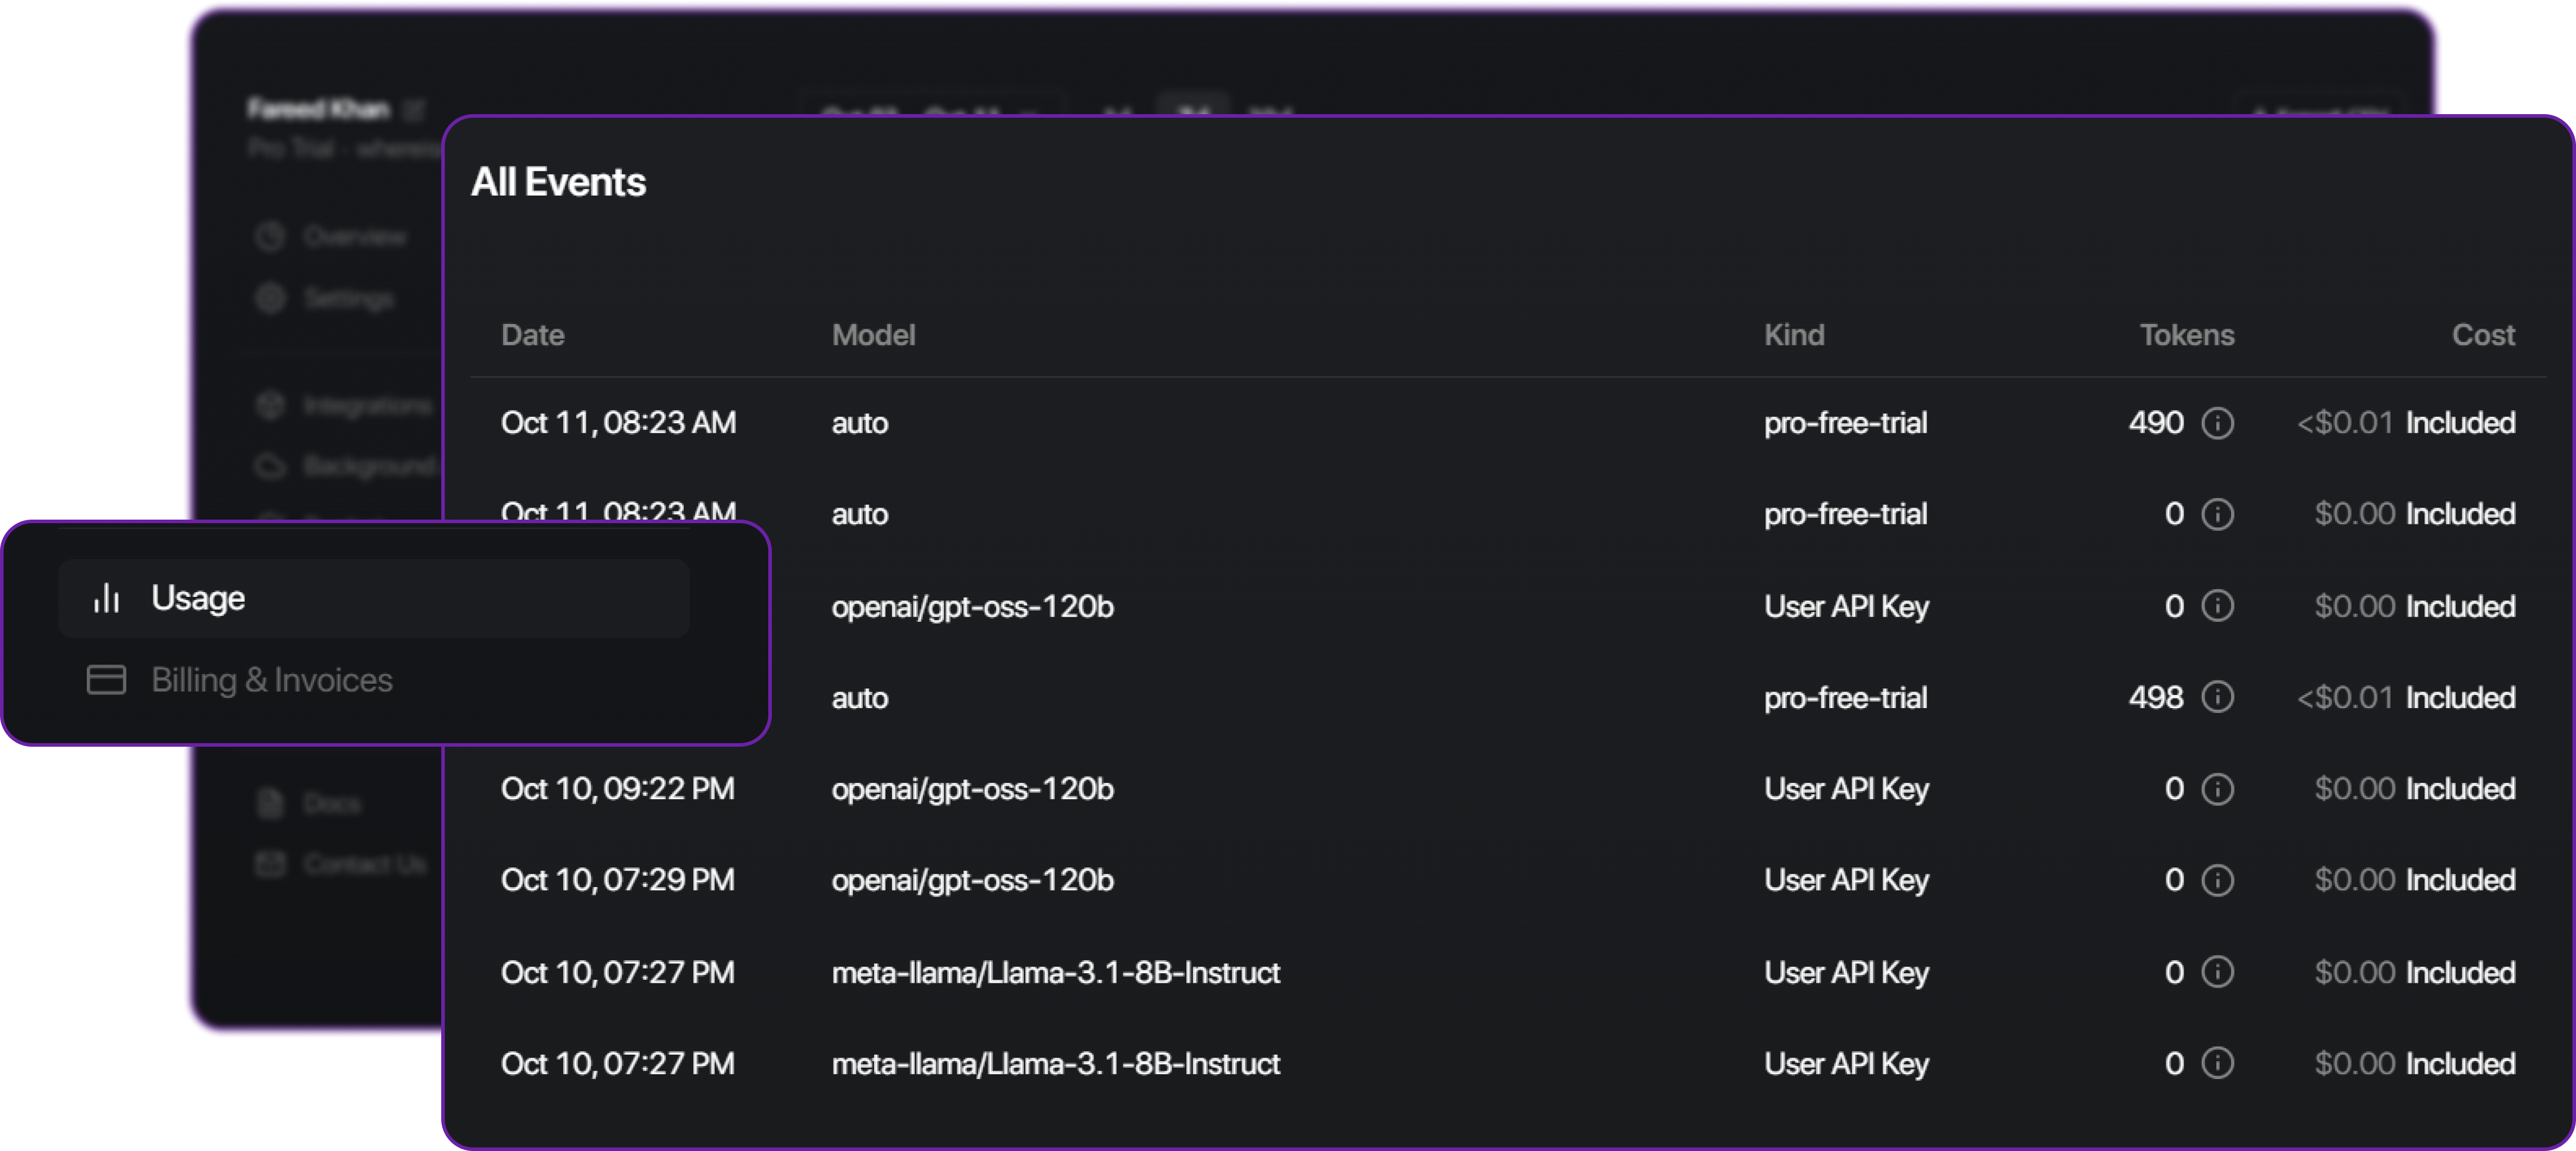
- Hyperstack Console: Go to the Usage Dashboard under billing to see API call metrics, token usage, and costs associated with your models.
- Cursor Logs: In Cursor, there exist a dashboard to view recent API calls, errors, and latency for each model. This helps diagnose any issues with connectivity or performance.
Great! We have successfully integrated Cursor with Hyperstack AI Studio.
There are many next steps we can take to further enhance this setup:
- Fine-tune custom models: Use Hyperstack’s fine-tuning capabilities to create models tailored to your specific codebase or domain.
- Experiment with different models: Try out various base models from Hyperstack to find the best fit for your workflow.
- Automate workflows: Leverage Cursor’s agent mode to build automated coding assistants powered by your Hyperstack models.
- Share with your team: Ensure all team members use the same Hyperstack endpoint in Cursor for consistent AI behavior across projects.
Conclusion
By combining Cursor and Hyperstack AI Studio, we create a powerful end-to-end workflow:
- Hyperstack acts as the backend hosting, fine-tuning, and serving models.
- Cursor serves as the frontend providing an intelligent, conversational interface for developers.
This setup gives us full control over our AI stack we can use open models, fine-tune for specific codebases, and integrate everything seamlessly without vendor lock-in.
FAQ
1. Do I need a Pro plan in Cursor for integration?
Yes. The Pro plan (or free trial) is required to enable the Custom Model Endpoint feature. Without it, Cursor won’t allow external model connections.
2. Which Hyperstack model should I use?
You can select any available model from the Hyperstack AI Studio catalog. For most integrations, we recommend starting with openai/gpt-oss-120b for balanced performance and context handling.
3. How do I get my Hyperstack API key and base URL?
Go to Hyperstack Console Page, generate a new key, and copy it. The base URL (usually https://api.hyperstack.cloud/v1) can be found in the Hyperstack playground or documentation.
4. How can I confirm if the connection is working?
In Cursor, open the Chat panel, select your configured model, and send a simple message like “Hello”. If the model responds, your integration is active and configured correctly.
5. Can I use fine-tuned models from Hyperstack?
Absolutely. Once you fine-tune and deploy a model in Hyperstack AI Studio, copy its endpoint and model name, then add it as a new entry in Cursor’s model settings.
Subscribe to Hyperstack!
Enter your email to get updates to your inbox every week

