TABLE OF CONTENTS
NVIDIA H100 GPUs On-Demand
Stable Diffusion 3.5 was released earlier this week, building on the success of earlier versions with improved image fidelity, faster generation times, and enhanced support for diverse artistic styles. Leveraging cutting-edge diffusion techniques, Stable Diffusion 3.5 can generate everything from hyper-realistic scenes to abstract art, making it a versatile tool for creative professionals and researchers alike.
In this guide, you’ll set up Stable Diffusion 3.5 on Hyperstack—a platform optimised for heavy computational workloads. Hyperstack's GPU options, including the NVIDIA RTX A6000 and NVIDIA A100, are ideal for running large-scale or high-resolution image generation tasks, providing you with the power needed to explore the model's full potential.
Our latest tutorial below explores how to deploy and use Stable Diffusion 3.5 on Hyperstack.
Why Deploy on Hyperstack?
Hyperstack provides a robust and scalable environment for deploying AI and ML models, especially those that require high computational power, like Stable Diffusion 3.5. By using Hyperstack, you can benefit from flexible GPU options to handle different image generation tasks.
How to Get Started with Stable Diffusion 3.5
Follow the steps below to set up and run Stable Diffusion 3.5 on Hyperstack.
Step 1: Accessing Hyperstack
- Visit the Hyperstack website and log in to your account.
- If you don't already have an account, you'll need to create one and set up your billing information. Check our documentation to get started with Hyperstack.
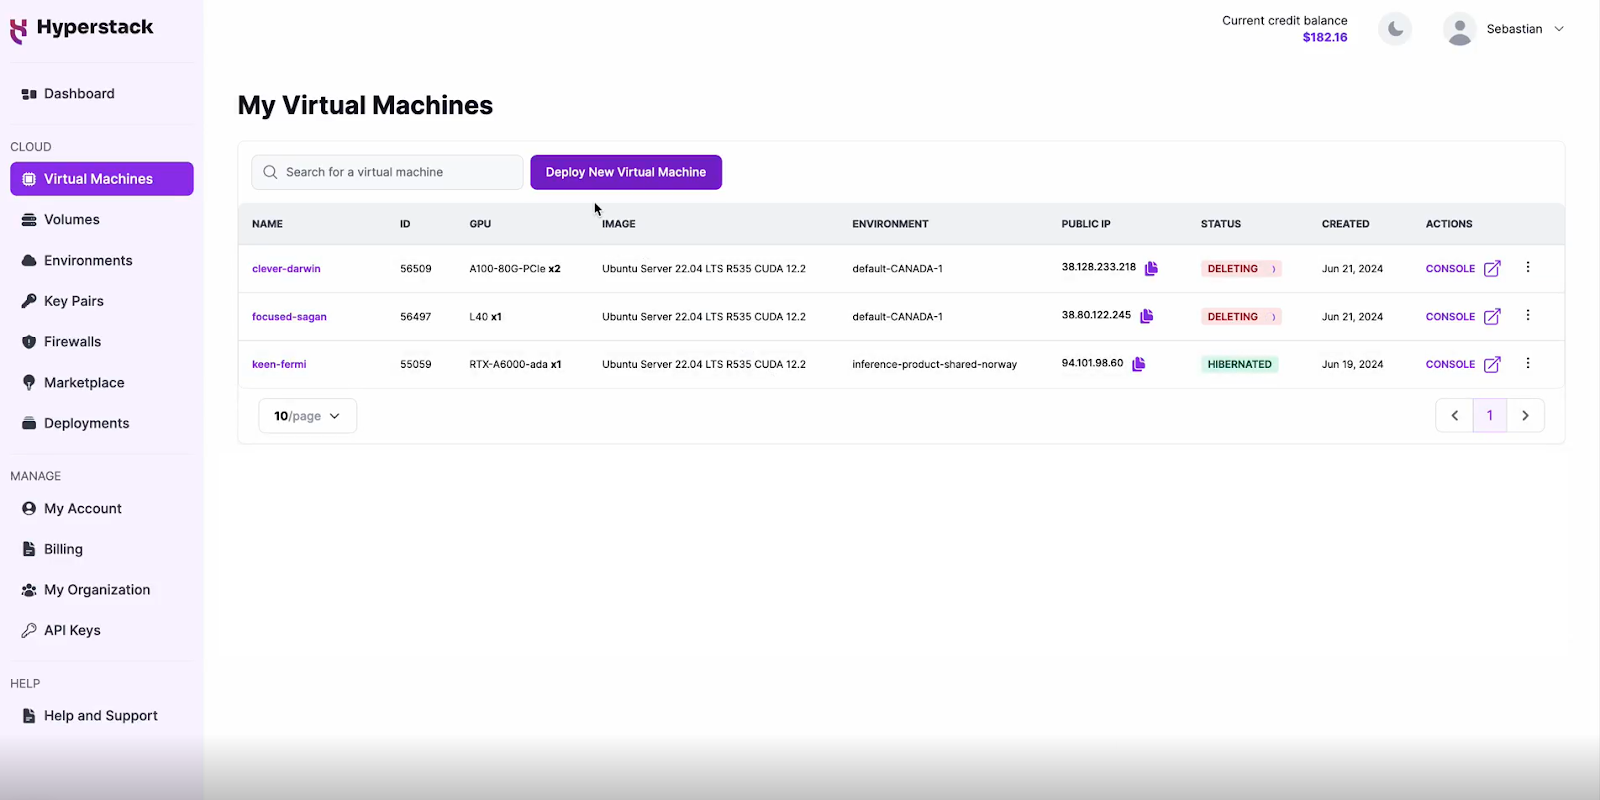
- Once logged in, you'll enter the Hyperstack dashboard, which overviews your resources and deployments.
Step 2: Deploying a New Virtual Machine
Initiate Deployment
- Navigate to the "Virtual Machines" section and click "Deploy New Virtual Machine."
- Click it to start the deployment process.
Select Hardware Configuration
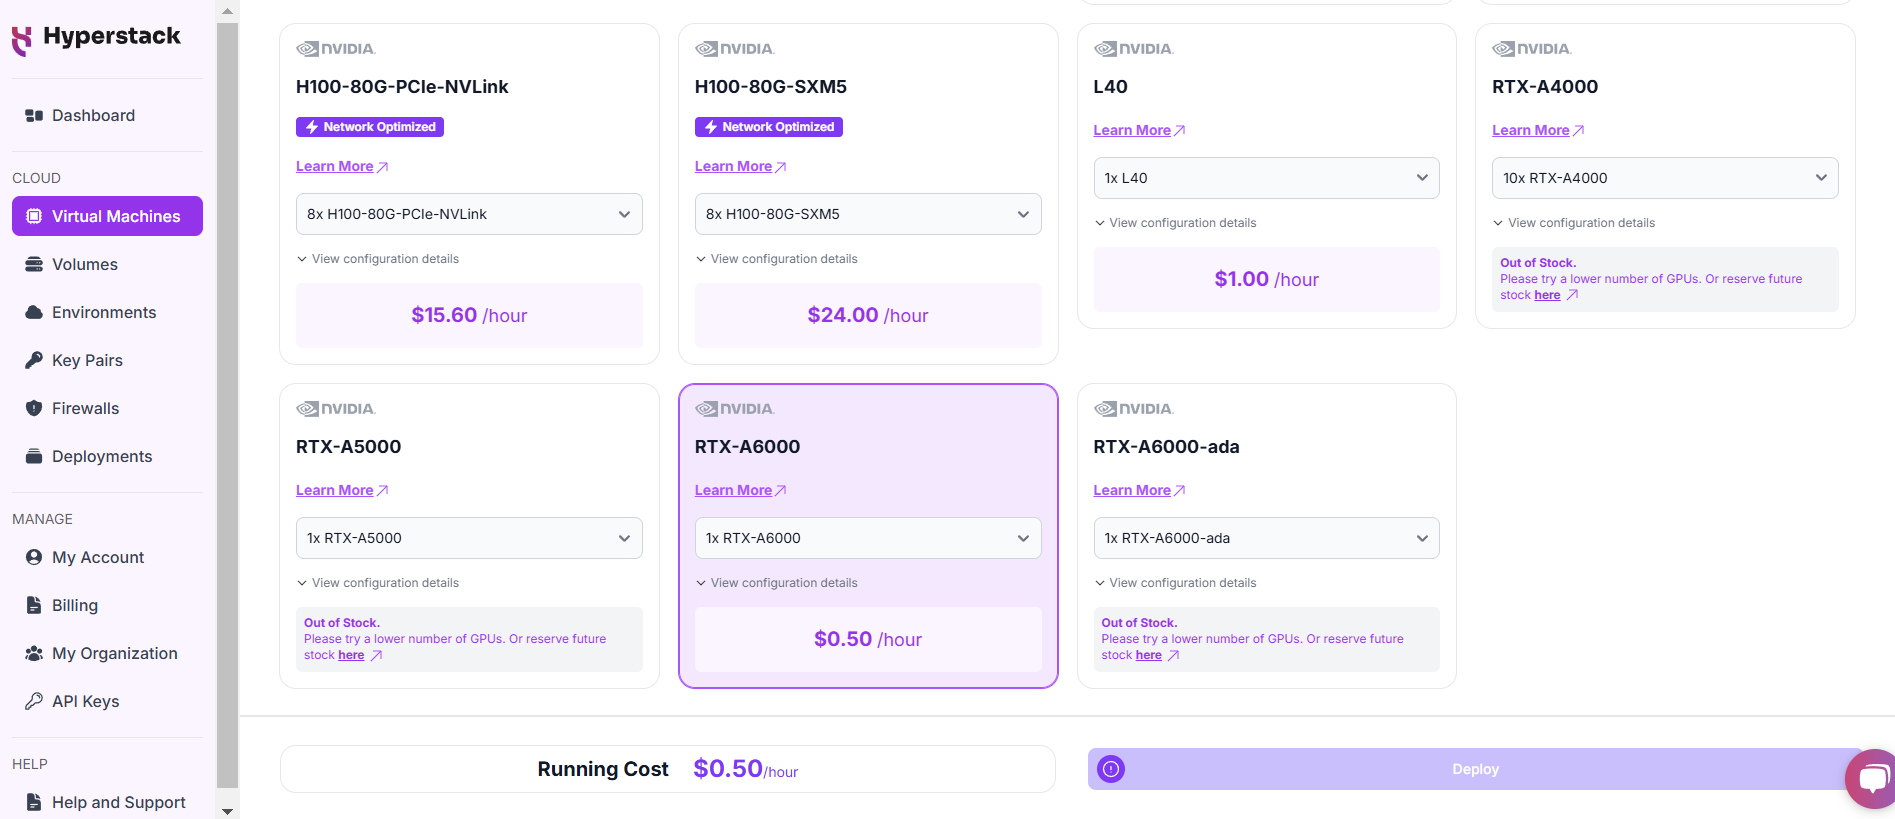
- For small images, we recommend choosing the NVIDIA RTX A6000 x1.For large or batch of images, we recommend the NVIDIA A100 x1.
Choose the Operating System
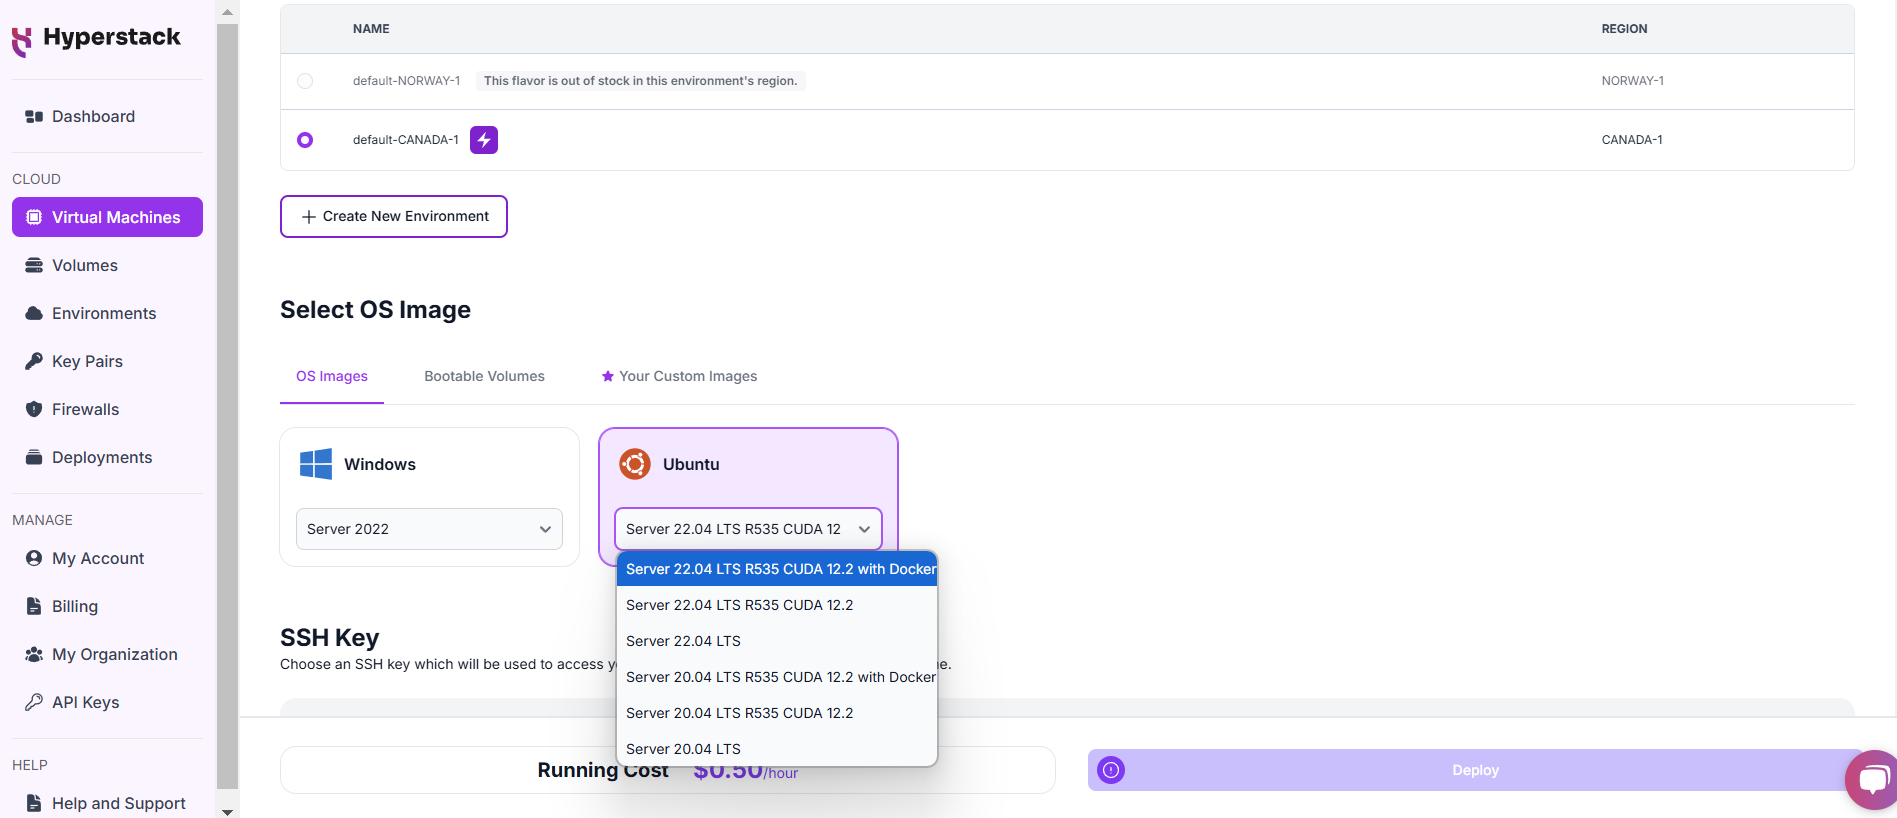
- Select the "Server 22.04 LTS R535 CUDA 12.2 with Docker".
- This image comes pre-installed with Ubuntu 22.04 LTS, NVIDIA drivers (R535), CUDA 12.2, providing an optimised environment for AI workloads.
Select a Keypair
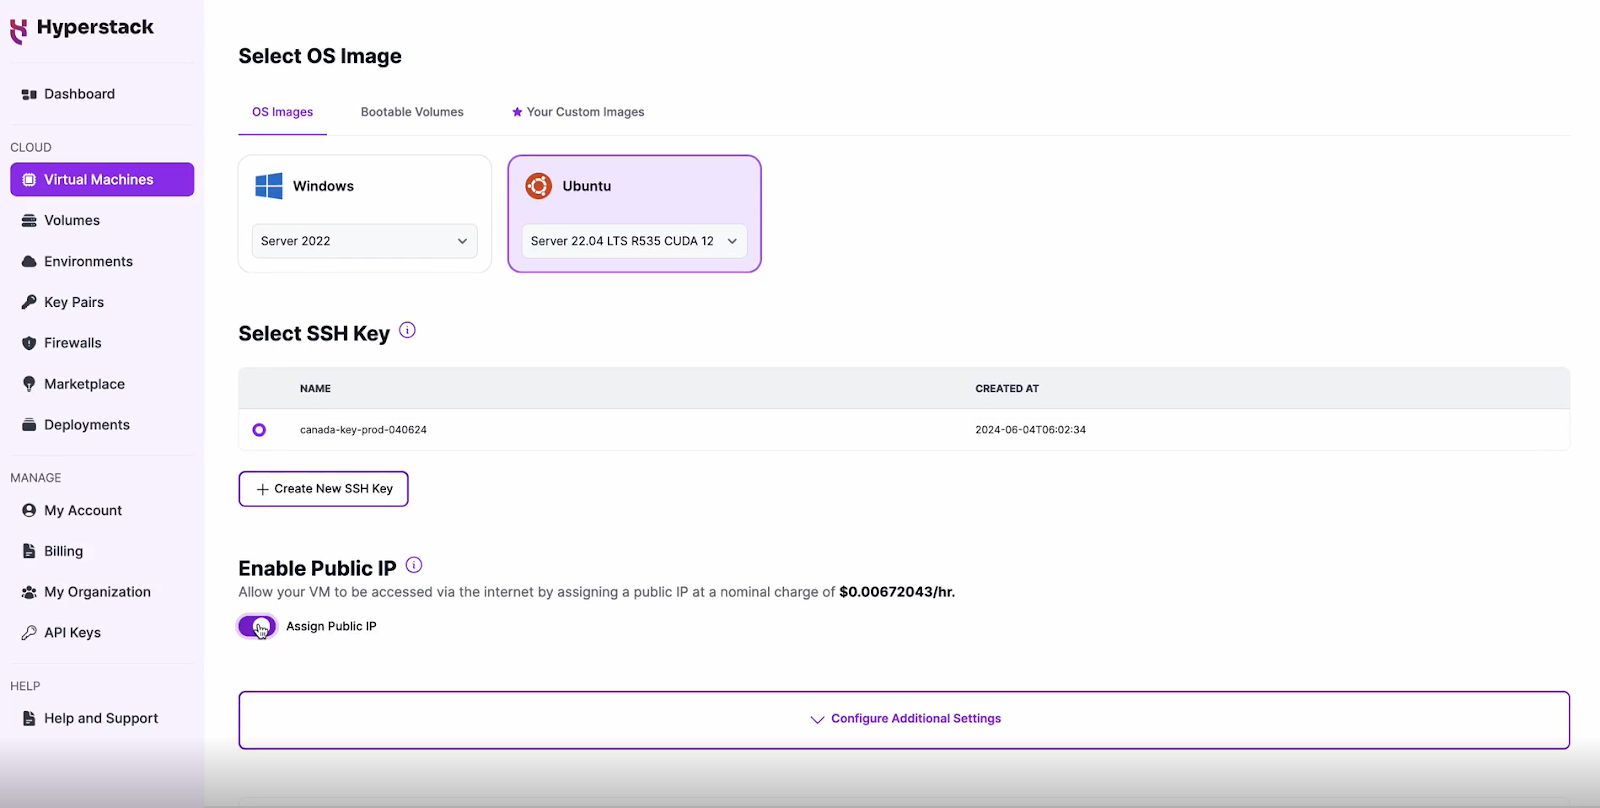
- Select one of the keypairs in your account. If you don't have a keypair yet, see our Getting Started tutorial for creating one.
Network Configuration
- Ensure you assign a Public IP to your Virtual machine.
- This allows you to access your VM from the internet, which is crucial for remote management and API access.
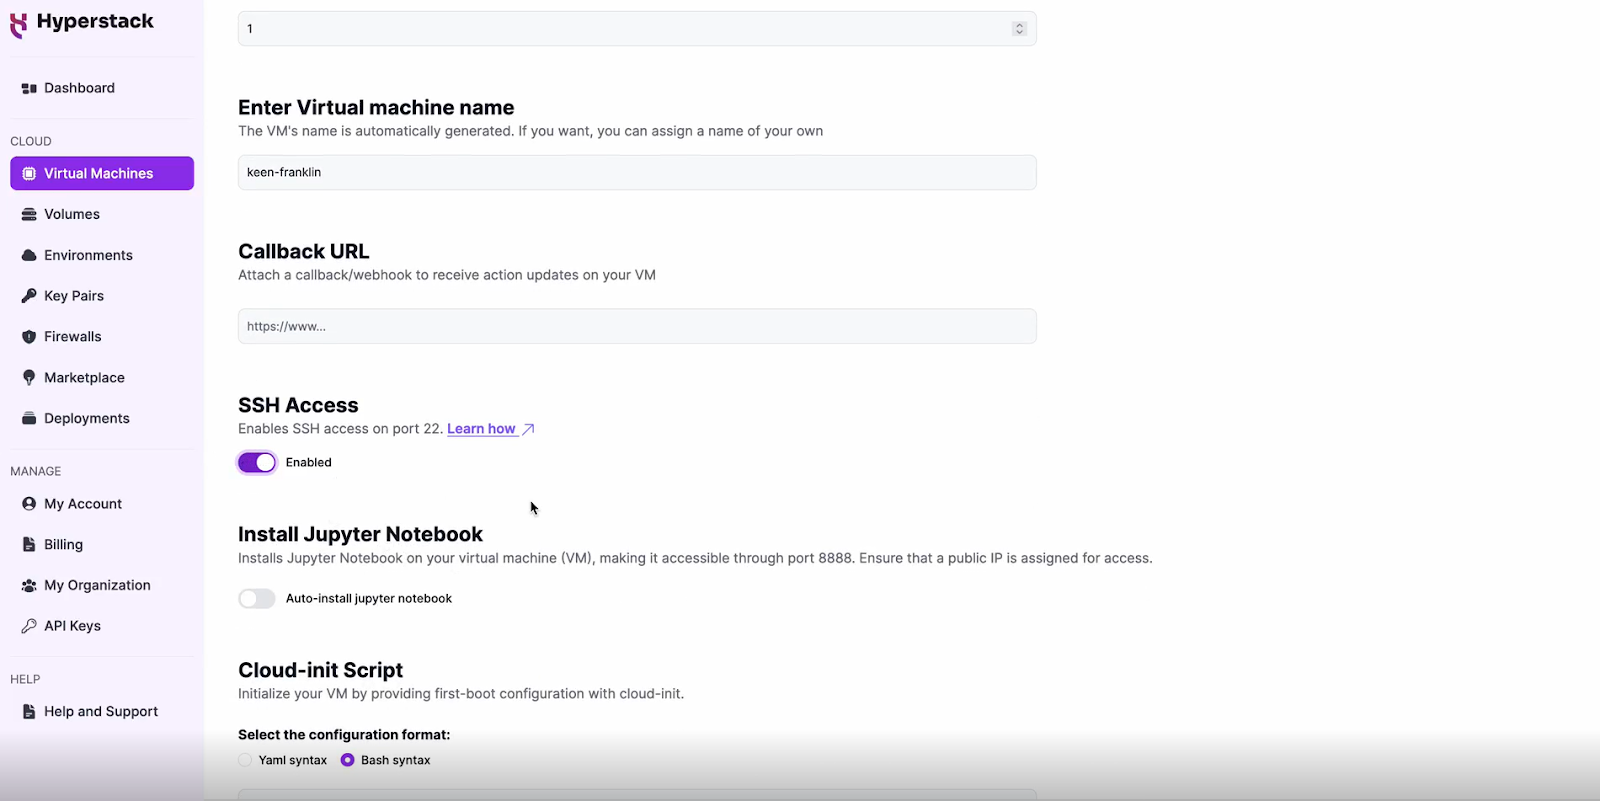
Enable SSH Access
- Make sure to enable an SSH connection.
- You'll need this to connect and manage your VM securely.
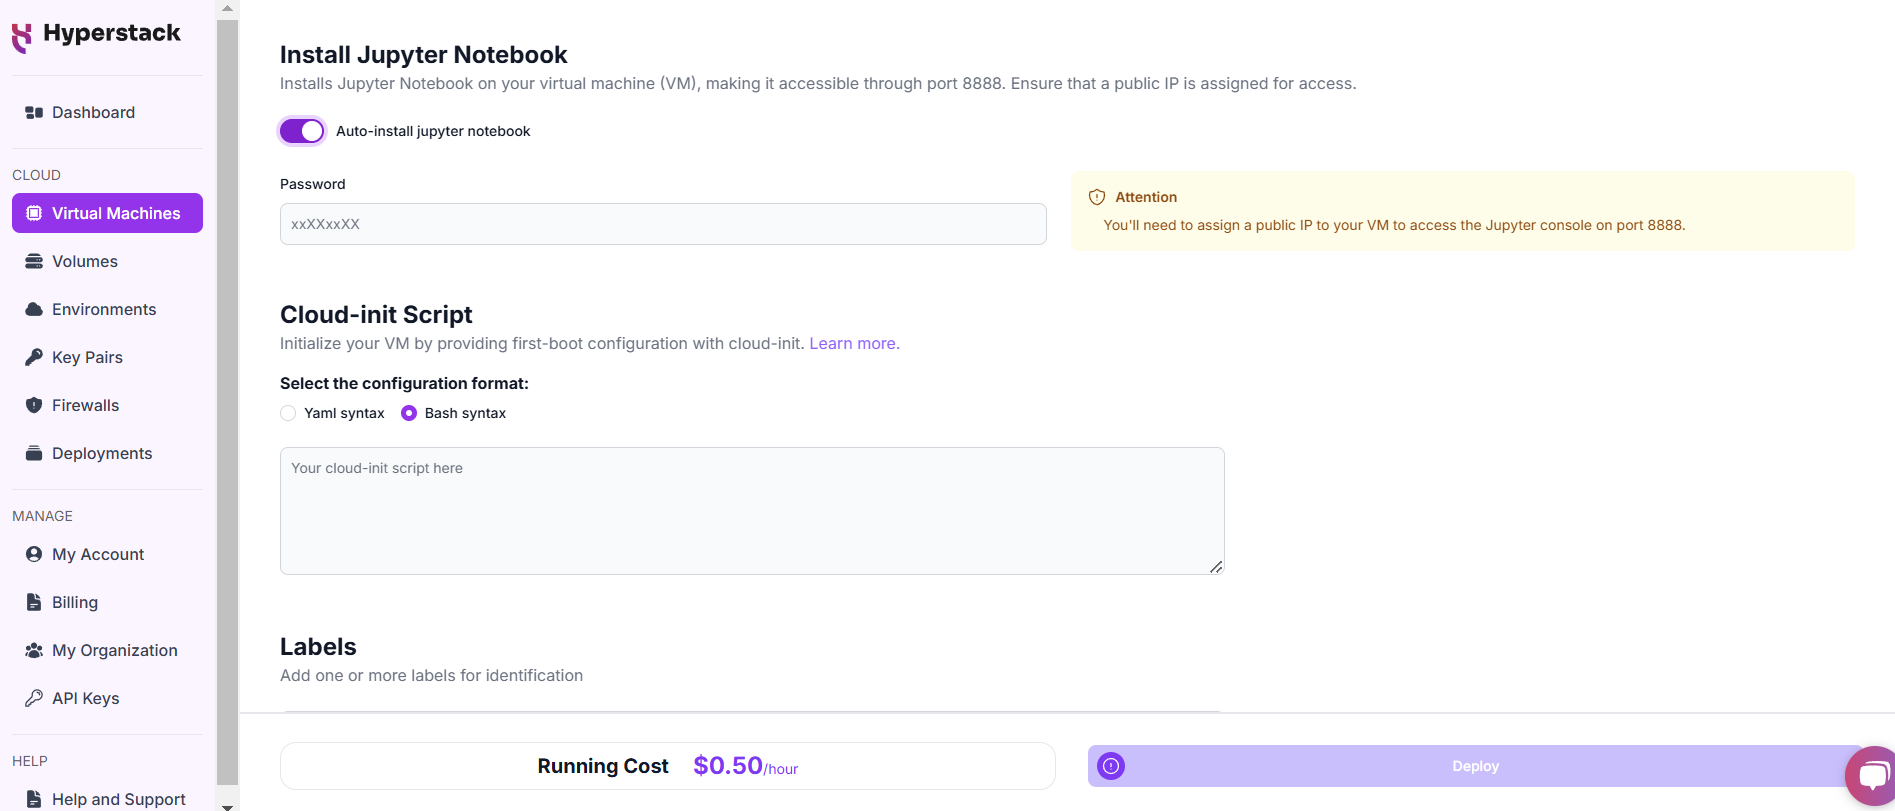
Configure Additional Settings
- Look for the "Configure Additional Settings" section and click on it.
- Here, you'll find the 'Install Jupyter Notebook' toggle. Enable this and set a password which you will need later.
Please note: This will open port 8888 to the public internet, allowing anyone with the public IP address and port number to access the dashboard. If you don't want this, you can restrict the IP addresses that can access the VM on port 8888 (see instructions here)
Review and Deploy the Script
- Double-check all your settings.
- Click the "Deploy" button to launch your virtual machine.
DISCLAIMER
This tutorial will only enable Stable Diffusion 3.5 once for demo-ing purposes. For production environments, consider using production-grade deployments with secret management, monitoring etc.
Step 3: Setting Up the Model
- The VM will configure install libraries and install the Jupyter Notebook server. This will take about 5 - 10 minutes.
Step 4: Accessing the Jupyter Notebook server
Once the initialisation is complete, you might need to reboot your VM to allow GPU access for your Jupyter Notebook server
ssh -i [path_to_ssh_key] [os_username]@[vm_ip_address]

# Once connected through SSH
sudo reboot
Afterwards, you can access your Jupyter Notebook server. If you are having any issues, please check out our Troubleshooting tips below.
Option 1: Connect via public IP
If you used the default settings, use the following steps to connect with the Jupyter Notebook server
- Open a browser on your local machine
- Go to https://[public-ip]:8888/lab (make sure to add the s in https)
Option 2 Connect via SSH tunnel
- Open a terminal on your local machine.
- Use the command
ssh -i [path_to_ssh_key] -L 8888:localhost:8888 [os_username]@[vm_ip_address] # e.g: ssh -i /users/username/downloads/keypair_hyperstack -L 8888:localhost:8888 ubuntu@0.0.0.0 - Replace username and ip_address with the details provided by Hyperstack.
- Open a browser on your local machine
- Go to https://localhost:8888/lab (make sure to add the s in https)
Afterwards, enter your password you created in the steps above.
If you see any SSL warnings, you can skip them for now. They are related to the self-signed certificates being used for the HTTPS connection. For more info on this and its potential risks, see this blog.
Run Stable Diffusion 3.5
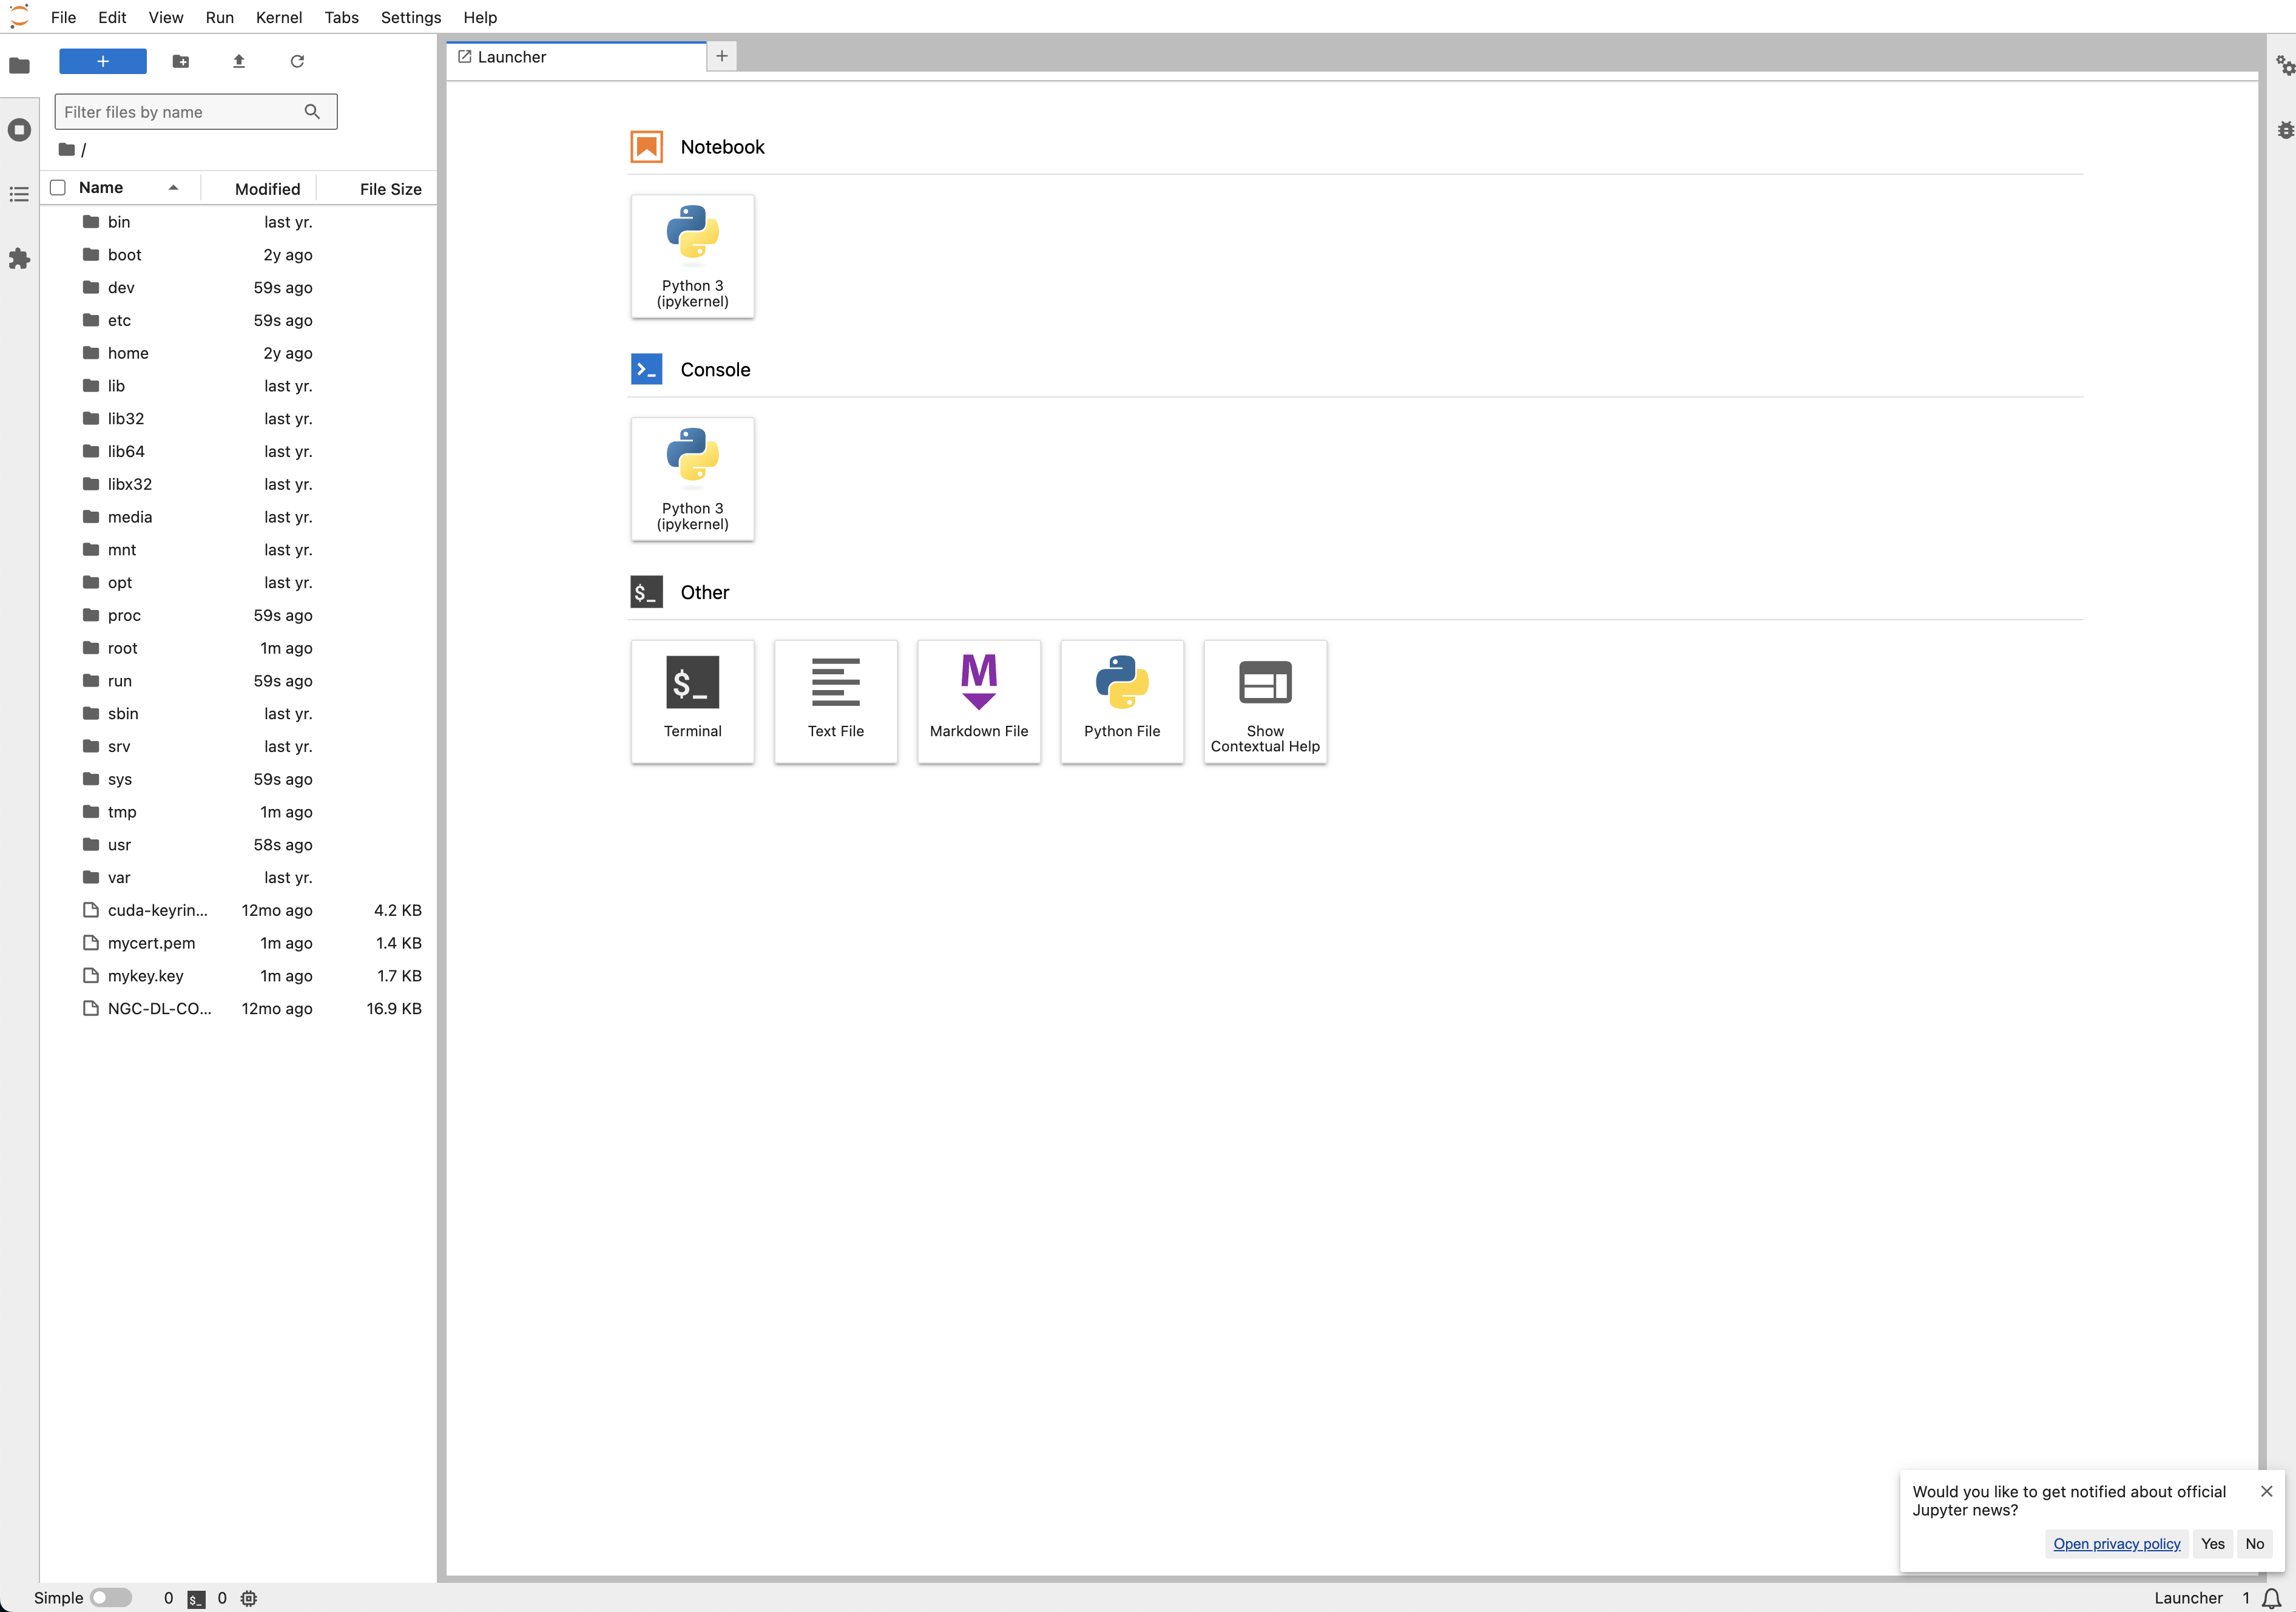
Once you open the Jupyter Notebook server, use the following steps to
- Enter the password you used in 'Deploying your Virtual Machine'
- Create a new notebook by clicking on 'Notebook Python 3 (ipykernel) -- see screenshot below
- Or upload the attached notebook to your Jupyter Lab to get started faster
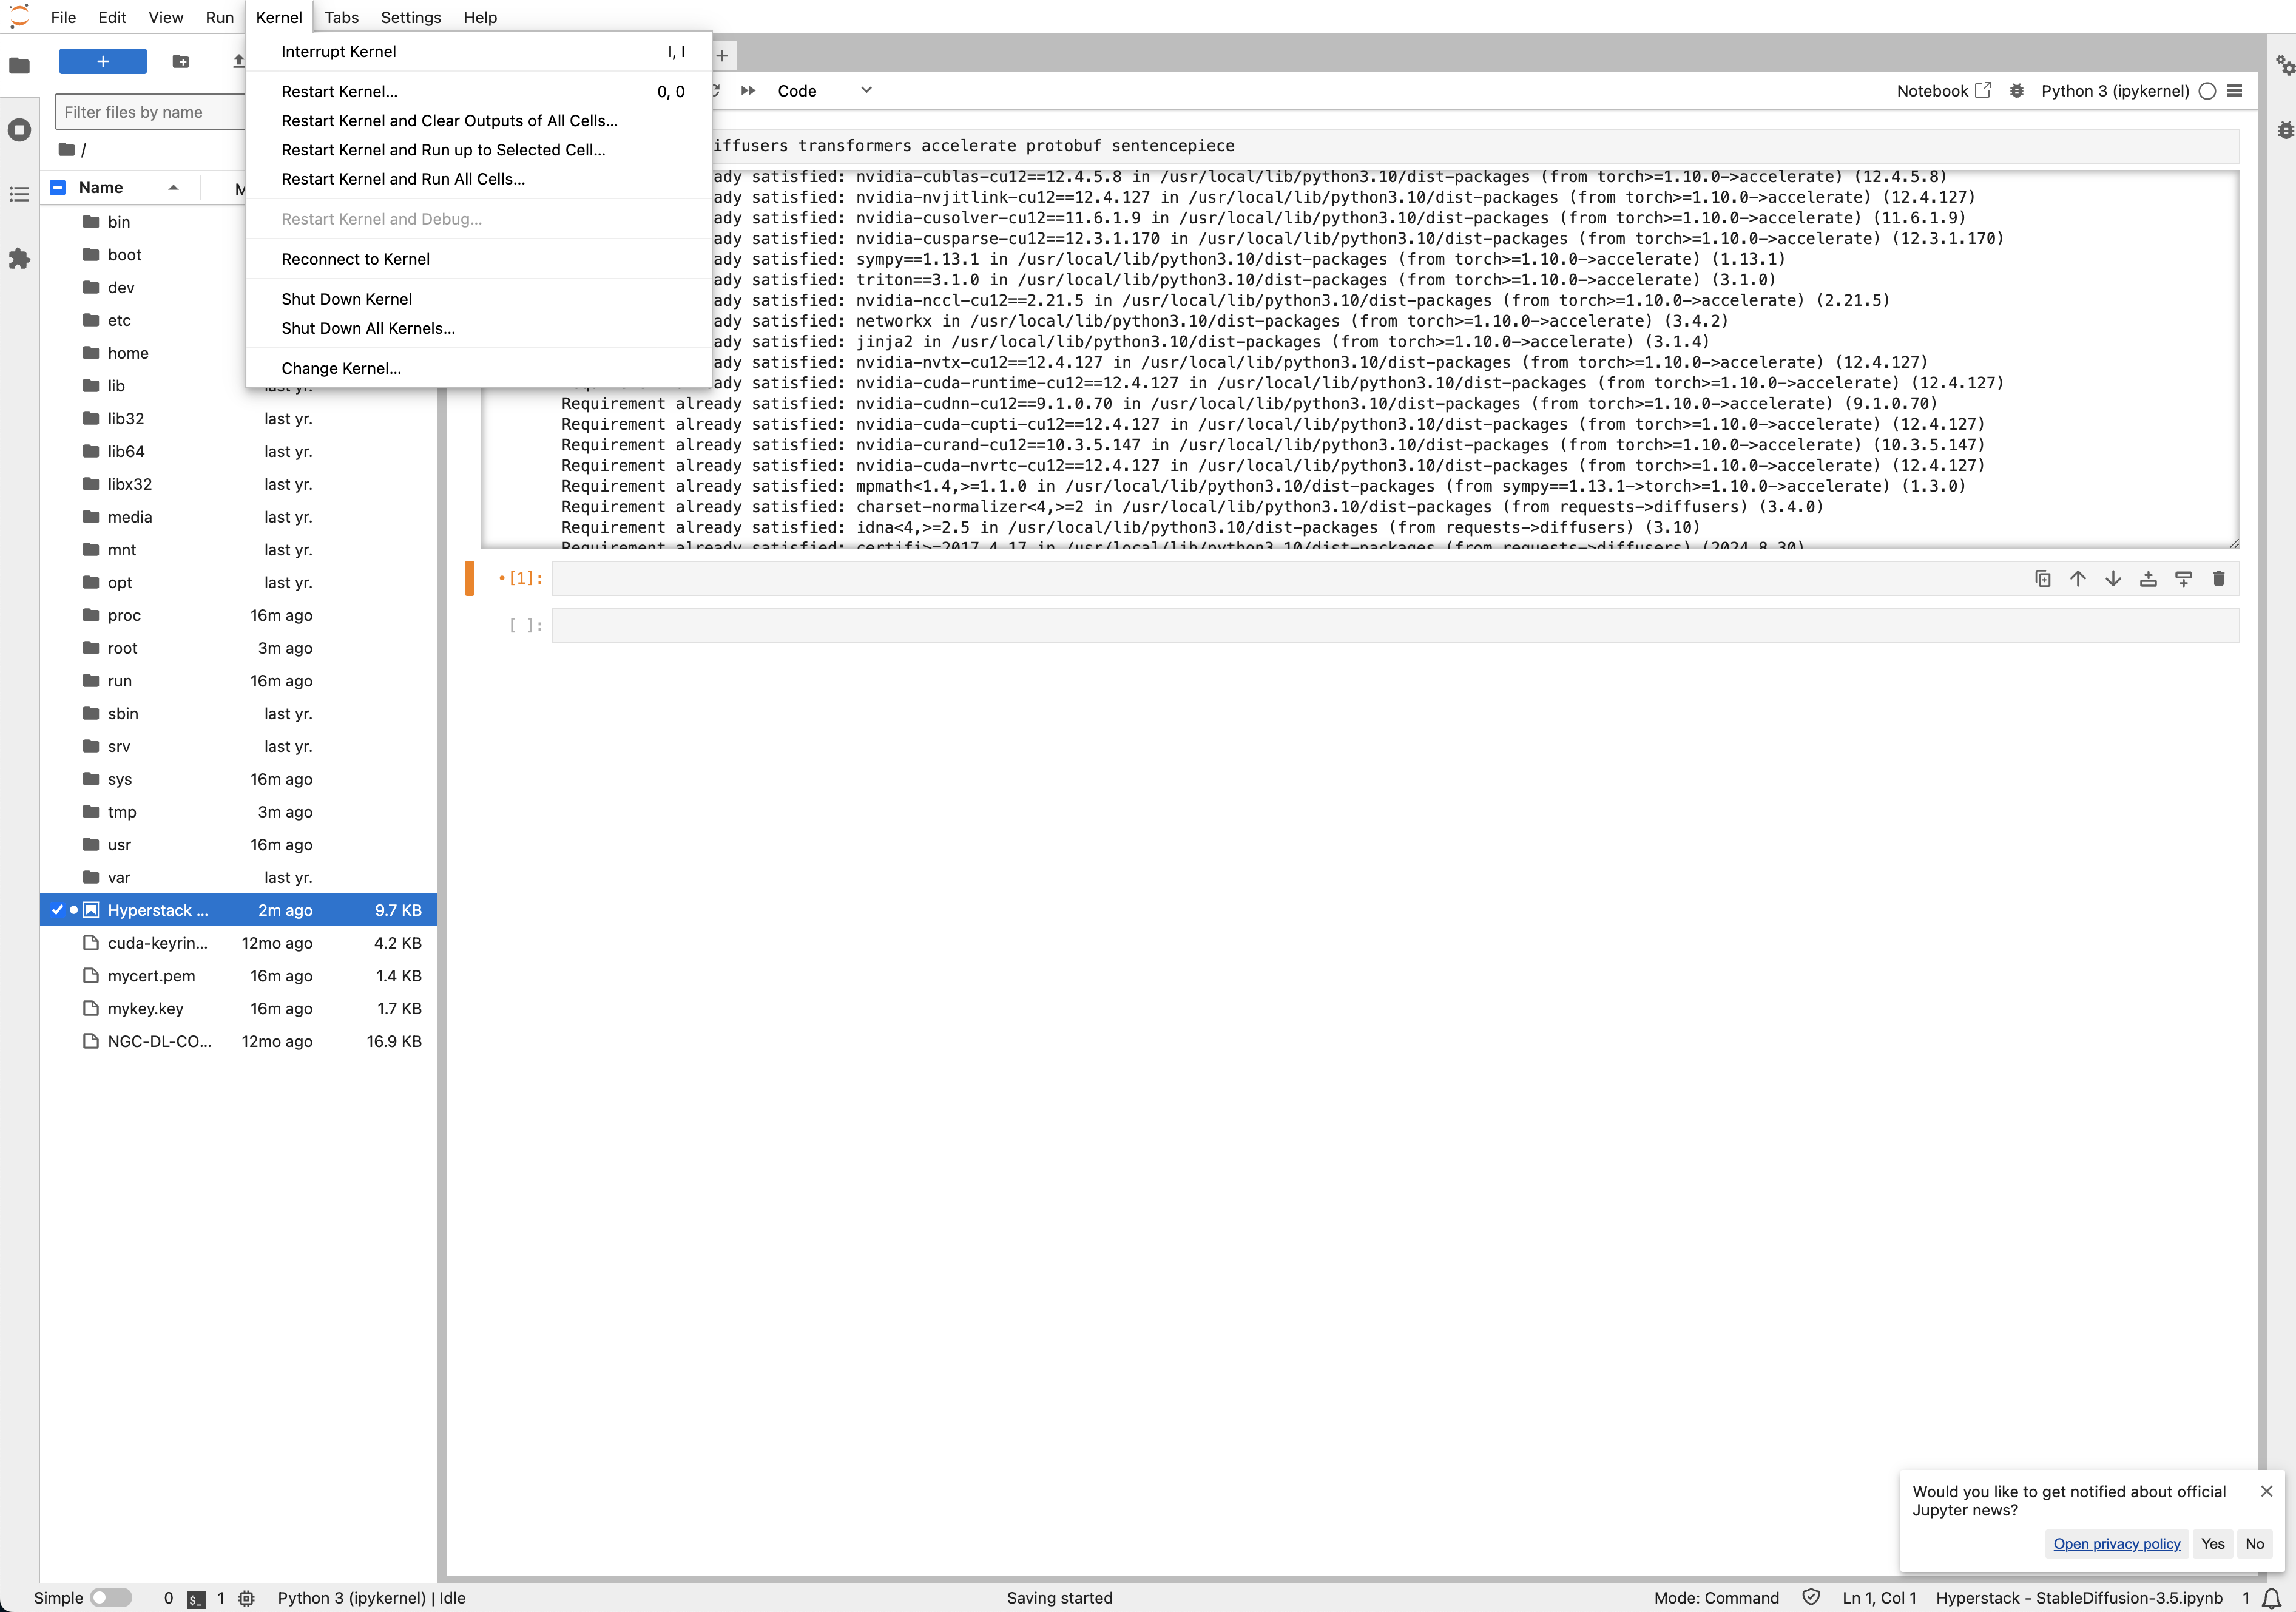
!pip install -U diffusers transformers accelerate protobuf sentencepiece5. Restart the kernel to enable the new libraries -- see screenshot below:
4. Create a HuggingFace token to access the gated Stable Diffusion 3.5 model, see more info here.
5. Add your HuggingFace token in the second cell:
import os

os.environ["HF_TOKEN"] = "[insert your_hf_token]"
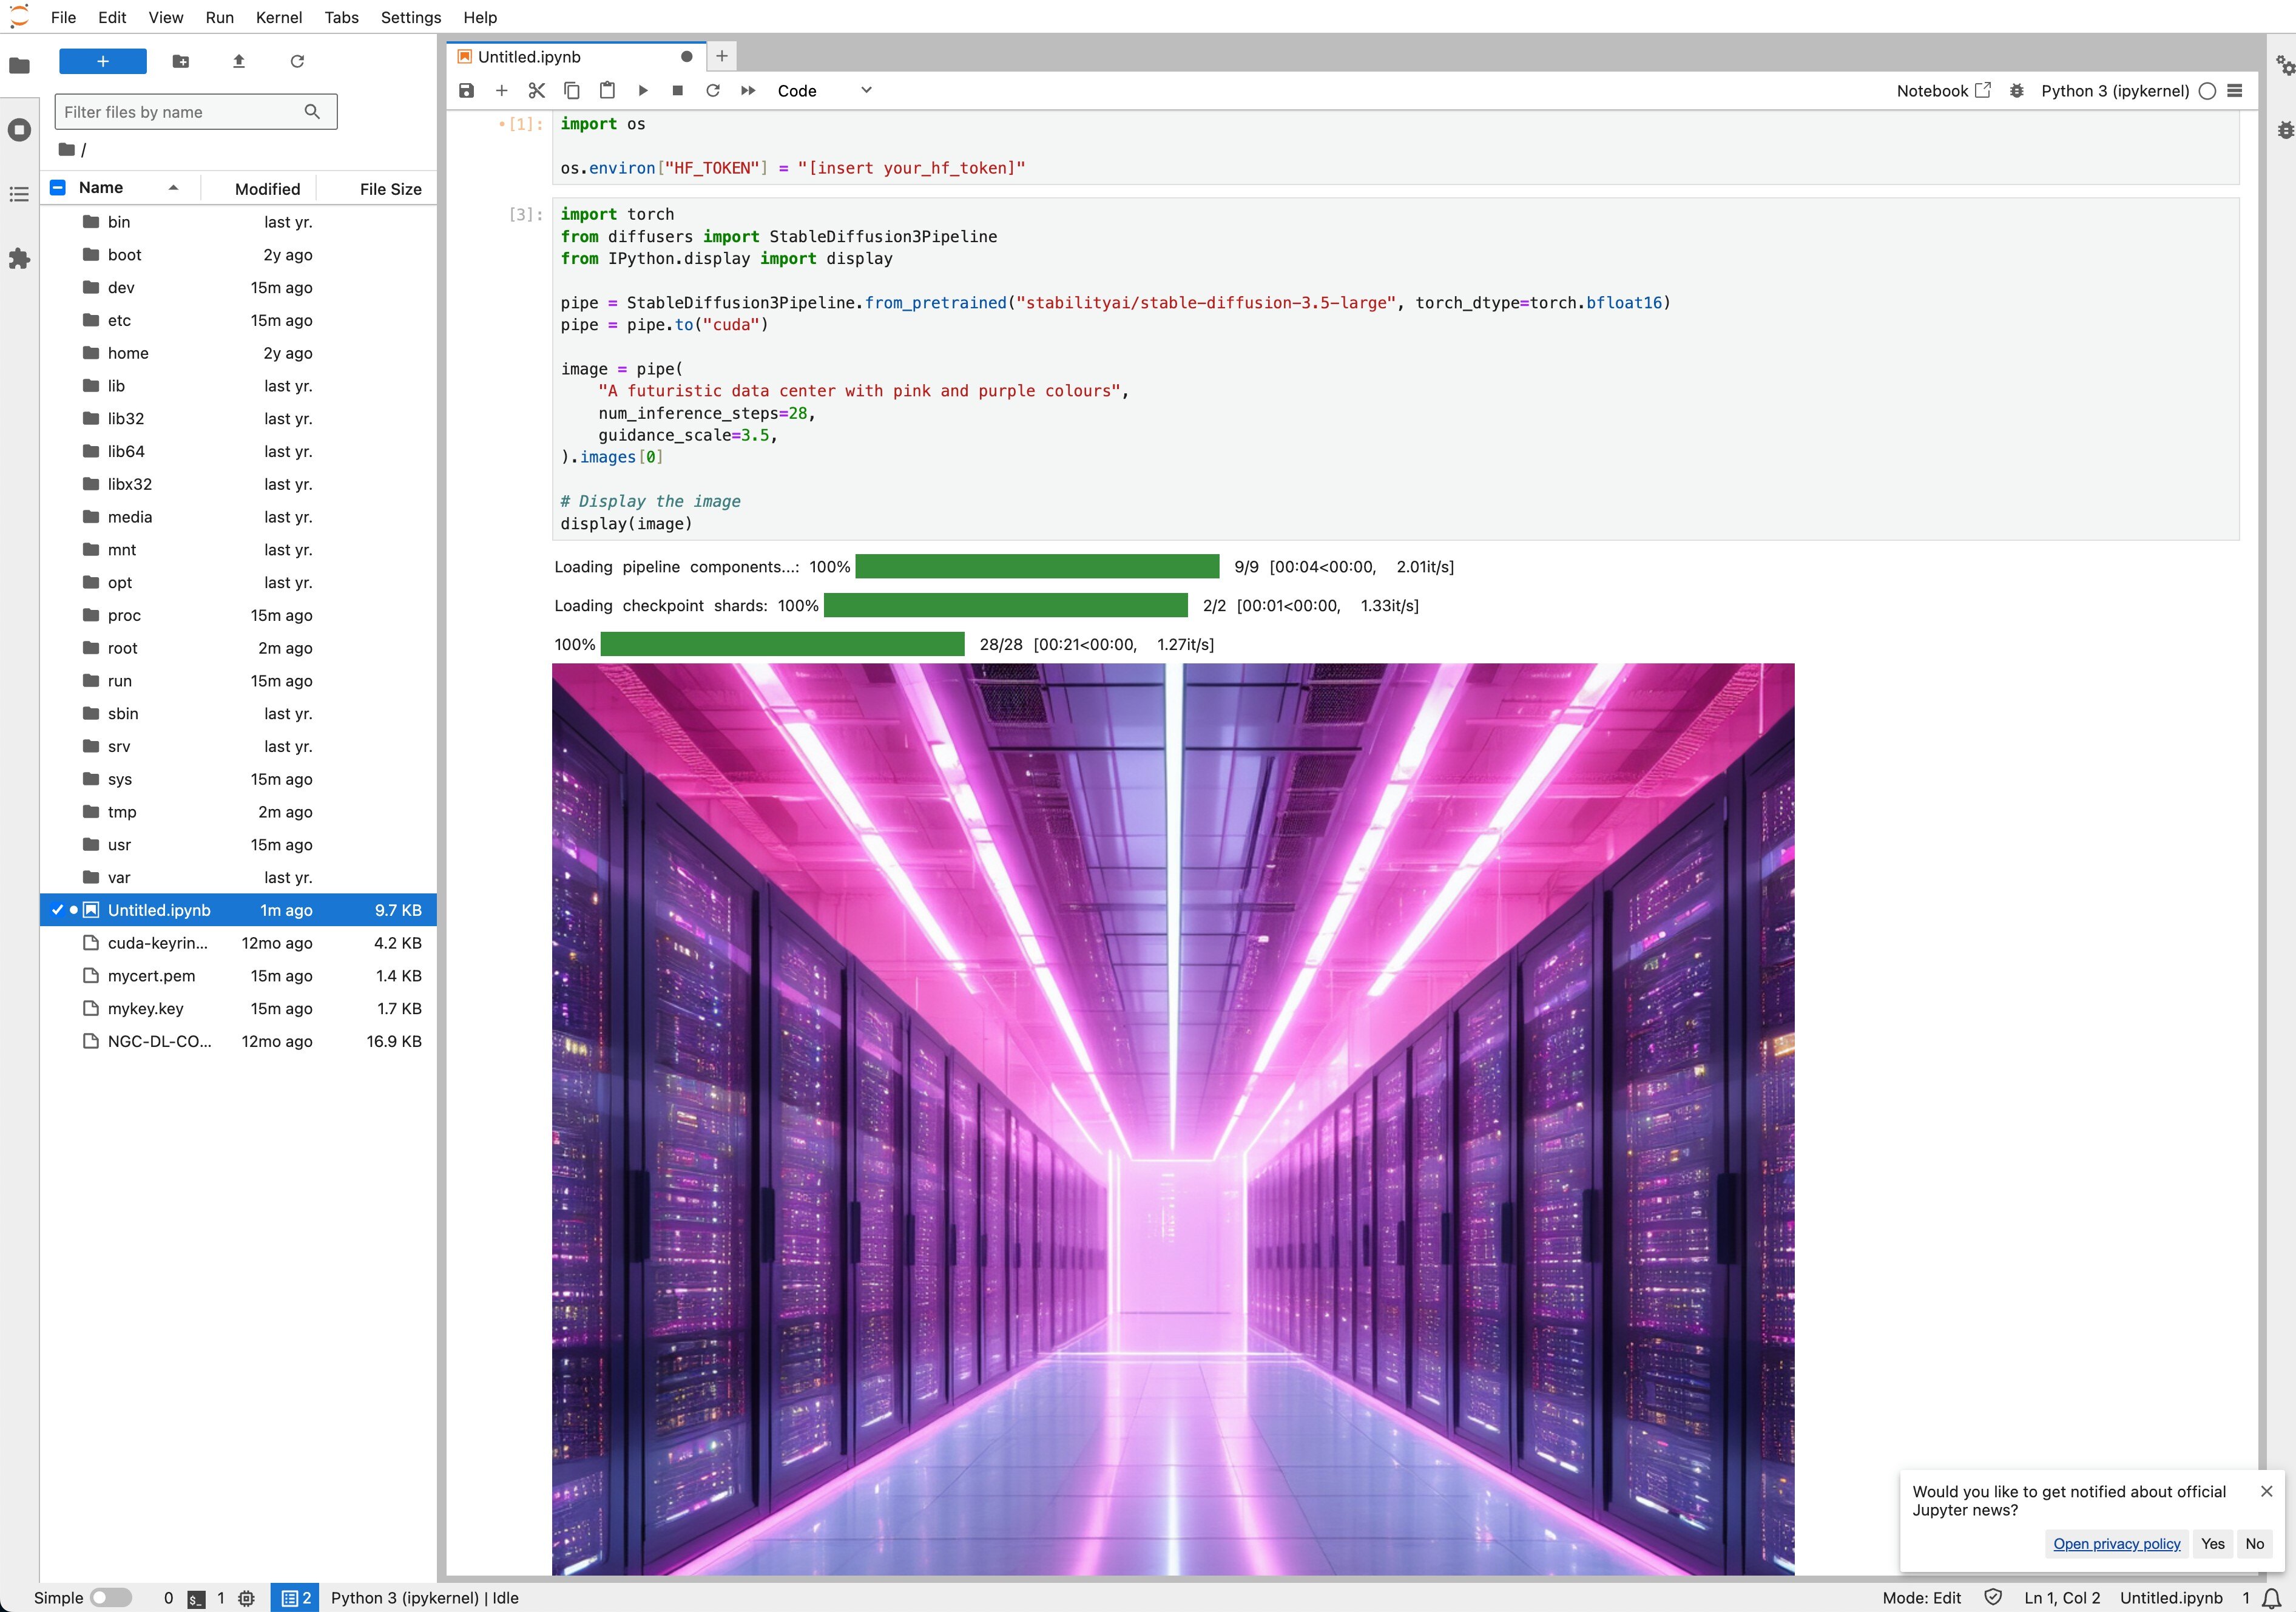
6. Add the code below to to the third cell to generate images:
import torch
from diffusers import StableDiffusion3Pipeline
from IPython.display import display

pipe = StableDiffusion3Pipeline.from_pretrained("stabilityai/stable-diffusion-3.5-large", torch_dtype=torch.bfloat16)
pipe = pipe.to("cuda")

image = pipe(
    "A futuristic data center with pink and purple colours",
    num_inference_steps=28,
    guidance_scale=3.5,
).images[0]

# Display the image
display(image)
7. Voila! Your final step should look like this:
Troubleshooting Tips
If you are having any issues, please follow the following instructions:
Jupyter notebook server
To resolve any Jupyter Notebook Server issues, run the commands below to debug your errors.
ssh -i [path_to_ssh_key] [os_username]@[vm_ip_address]

# Once connected through SSH

# Check whether the cloud-init finished running
cat /var/log/cloud-init-output.log
# Expected output similar to:
# Cloud-init v. 24.2-0ubuntu1~22.04.1 finished at Thu, 31 Oct 2024 03:33:48 +0000. Datasource DataSourceOpenStackLocal [net,ver=2].  Up 52.62 seconds

# Check whether the Jupyter notebook server has started
docker ps
# Expected output similar to:
# CONTAINER ID   IMAGE           COMMAND                  CREATED        STATUS                  PORTS                                       NAMES
# 5c77b8a4154c   jupyter_image   "jupyter notebook --…"   1 second ago   Up Less than a second   0.0.0.0:8888->8888/tcp, :::8888->8888/tcp   inspiring_thompson

# Check any errors during Jupyter notebook server setup
# cat load_docker_error.log
Step 5: Hibernating Your VM
When you're finished with your current workload, you can hibernate your VM to avoid incurring unnecessary costs:
- In the Hyperstack dashboard, locate your Virtual machine.
- Look for a "Hibernate" option.
- Click to hibernate the VM, stopping billing for compute resources while preserving your setup.
To continue your work without repeating the setup process:
- Return to the Hyperstack dashboard and find your hibernated VM.
- Select the "Resume" or "Start" option.
- Wait a few moments for the VM to become active.
- Reconnect via SSH using the same credentials as before.
Explore our tutorial on deploying and using Granite 3.0 8B and Llama-3.1 Nemotron 70B on Hyperstack.
Subscribe to Hyperstack!
Enter your email to get updates to your inbox every week
Get Started
Ready to build the next big thing in AI?


