



TABLE OF CONTENTS
Key Takeaways
- Kimi K3.1 Pro is Moonshot AI's open-weight, natively multimodal agentic model and its most capable 3T-class model to date, post-trained from Kimi K3 with large-scale joint reinforcement learning across hundreds of downstream domains.
- It uses a Mixture-of-Experts (MoE) architecture with 2.8T total parameters and 104B activated per token, routing each token to 16 of 896 experts.
- The main architectural change from Kimi K3 is attention: the 24 full-attention layers now use Gated DeepSeek Sparse Attention (DSA) for more efficient long-context modelling across a 1-million-token context window.
- The routed-expert weights ship in MXFP4 with MXFP8 activations through quantisation-aware training, a format NVIDIA Blackwell GPUs run natively and NVIDIA H100 GPUs serve through the Marlin kernel.
- This tutorial deploys Kimi K3.1 Pro on 32 NVIDIA H100 GPUs across four Hyperstack VMs using SGLang, with OpenAI- and Anthropic-compatible APIs; a single 8x NVIDIA HGX B300 VM with vLLM is the one-machine alternative.
- Hyperstack provides on-demand access to NVIDIA hardware, 6,500 GB of ephemeral storage per node for the 1.56 TB checkpoint, high-speed networking between nodes, and pre-configured CUDA and Docker images.
Kimi K3.1 Pro is Moonshot AI's open-weight, natively multimodal agentic model, post-trained from Kimi K3. Its sparse Mixture-of-Experts architecture has 2.8 trillion parameters, with 104 billion active per token, and a 1-million-token context window. Moonshot AI reports improvements in coding, 3D creation, financial research and factual accuracy, with benchmark results competitive with leading proprietary models.
This tutorial serves Kimi K3.1 Pro on 32 NVIDIA H100 GPUs across four Hyperstack virtual machines with SGLang, the same cluster shape as our Kimi K3 deployment, and then puts the endpoint to work: reasoning effort, preserved thinking, tool calls, image input, a coding agent, and Claude Code, Kimi Code CLI and OpenClaw on top. For the model family behind it, see our technical deep dive into Kimi K3.
What Is Kimi K3.1 Pro?
Kimi K3.1 Pro is built on the Kimi K3 architecture, with one major change to attention. Here is how the architecture works:
- Sparse MoE Routing: 896 experts in total, with 16 selected per token plus 2 shared experts, so only 104B of the 2.8T parameters are active for any single token.
- Hybrid Attention Stack: 93 layers made up of 69 Kimi Delta Attention (KDA) layers and 24 Gated DSA layers, with one dense layer.
- Gated DeepSeek Sparse Attention: Compared with Kimi K3, the full-attention Gated MLA layers are replaced with Gated DSA. A lightweight indexer with 32 heads scores every earlier token and keeps the top 2,048, and attention then runs exactly over only those tokens. The vLLM team reports that at long context a decode step reads about a quarter of the bytes per layer that dense MLA reads.
- Native MXFP4 Quantisation: The routed-expert weights are stored in MXFP4 with MXFP8 activations, trained with quantisation-aware training rather than quantised after the fact. Attention, the shared experts and the vision tower stay in BF16.
- Configurable Thinking Effort: Reasoning depth is set per request with
reasoning_effort, which accepts"low","high"and"max"(default"max"). - Native Multimodal Fusion (MoonViT-V2): A 401M-parameter vision encoder is integrated directly, so the model accepts images alongside text in the same request.
Inside Kimi K3.1 Pro
Ninety-three layers, sixty-nine of them Kimi Delta Attention and twenty-four Gated DSA, with a latent Mixture-of-Experts block that routes each token to sixteen of eight hundred and ninety-six experts.
Figures from the moonshotai/Kimi-K3.1-Pro model card and config.json; the byte count is the repository file list. The weights carry Moonshot AI's Kimi K3.1 Pro licence rather than a stock open-source licence, so read it before building a commercial service on top.
What one token touches
Kimi K3.1 Pro is dense in memory and sparse in compute. Both bars describe the same model, counted two different ways.
Size the cluster from the full bar: every one of the 896 experts has to be resident on some GPU, even though only 16 of them run for any given token.
Where the 24 Sparse Layers Sit
The layer pattern is regular. Three Kimi Delta Attention layers are followed by one Gated DSA layer, all the way down the stack, and the last two layers are both sparse. In the model configuration the DSA layers are 4, 8, 12 and every fourth layer up to 92, plus 93.
All 93 layers, in order
Lavender cells are Kimi Delta Attention, purple cells are Gated DSA.
Source: dsa_config.dsa_layers and linear_attn_config.kda_layers in the Kimi K3.1 Pro config.json.
How Gated DSA Picks 2,048 Tokens
Each sparse layer runs a small indexer next to its MLA attention. The indexer keeps one FP8 key per token, 132 bytes with its scale, scores every earlier token with 32 lightweight heads and keeps the 2,048 highest-scoring ones. MLA then attends exactly, but only over those tokens, reading their full 576-byte latents.
One Gated DSA layer
A cheap pass over everything, then exact attention over a fixed-size selection.
Byte sizes are FP8 figures from the vLLM Kimi K3.1 Pro launch post.
The saving grows with the context. Dense MLA reads 576 bytes per earlier token per layer. DSA still scans every earlier token, but only its 132-byte index key, and then reads full latents for a fixed 2,048 tokens. The chart works that arithmetic through from 4K to 1M tokens.
Bytes read per decode step, sparse against dense
Share of the bytes a dense MLA layer would read, for one decode step at each context length.
Calculated as (132 × L + 576 × min(L, 2,048)) ÷ (576 × L) for L tokens of context, from the per-token sizes in the vLLM Kimi K3.1 Pro post.
Kimi K3.1 Pro Features
Kimi K3.1 Pro is designed for long-running, multi-step work rather than single-turn chat:
- Agentic Coding: Scores 65.7 on Terminal-Bench 4.0, 51.7 on SWE Marathon v1.1 and 75.5 on DeepSWE v1.1, with the coding results evaluated through an agent harness.
- Agentic Search and Tool Use: Scores 92.1 on BrowseComp and 70.0 on HLE-Full with tools, and 73.3 on Automation Bench-AA.
- Office and Knowledge Work: Moonshot AI highlights financial research and document work, with 64.4 on OfficeQA Pro v2 and 85.7 on GDP.pdf with Python.
- Factual Accuracy: On Moonshot AI's internal hallucination benchmark with tools, Kimi K3.1 Pro records a claim-level hallucination rate of 8.3 per cent (lower is better), down from 23.4 per cent for Kimi K3.
- 3D Creation: Scores 72.8 on BenchCAD without tools and 92.7 with tools.
- Multimodal and Long Context: A 1,048,576-token context window with native image understanding through MoonViT-V2.
Against Kimi K3 itself, the Kimi K3.1 Pro release reports gains on every internal benchmark it lists:
61.2
Kimi Code Bench 3.0 Long-horizon, up from 55.95 for Kimi K3
8.3%
claim-level hallucination rate on Kimi Hallu Bench Hard, from 23.4%
+11.6
points on the internal Financial Research benchmark
+7.2
points on the internal Financial Modelling benchmark
About 4.2×
Kimi K3's score on the Business Operation simulation
Kimi K3.1 Pro vs Leading Models on Coding and Agentic Benchmarks
Kimi K3.1 Pro against the leading proprietary models
Six coding and agentic benchmarks from the model card. Higher is better on every one.
Claude Fable 5.1 has no reported BrowseComp score. Source: the Kimi K3.1 Pro model card, whose footnotes give the harness for each benchmark.
| Benchmark | Kimi K3.1 Pro | Claude Opus 5.5 | GPT-6 Astra | Claude Fable 5.1 | DeepSeek-V4.1-Flash-1017 |
|---|---|---|---|---|---|
| Terminal-Bench 4.0 | 65.7 | 66.4 | 58.2 | 57.9 | 42.3 |
| SWE Marathon v1.1 | 51.7 | 46.3 | 42.5 | 45.6 | 40.0 |
| DeepSWE v1.1 | 75.5 | 74.2 | 74.1 | 67.4 | 77.0 |
| HLE-Full w/ tools | 70.0 | 67.7 | 57.2 | 65.6 | 58.8 |
| BrowseComp | 92.1 | 90.8 | 91.5 | n/a | n/a |
| Automation Bench-AA | 73.3 | 69.5 | 68.5 | 59.4 | 66.6 |
| GPQA-Diamond | 94.2 | 93.9 | 96.1 | 93.7 | 92.2 |
| Kimi Hallu Bench Hard w/ tools (lower is better) | 8.3 | 15.0 | 5.5 | 23.3 | 23.3 |
The deepest purple marks the best score in each row; on the hallucination row that is the lowest. Kimi K3.1 Pro and DeepSeek-V4.1-Flash-1017 run at max effort; the proprietary models at max effort with fallback, as the model card reports them.
What Kimi K3.1 Pro Builds
Moonshot AI published a set of projects that Kimi K3.1 Pro built end to end, across game engines, web pages and 3D tools. The coding examples run in Unreal Engine and Godot, and mix in web search and 3D generation. Pick a project under the player to switch the clip.
Celestial Palace battle game in Unreal Engine
A mythical Eastern palace in the sky, built in Unreal Engine 5.8: a 36-bay colonnade with a radius of 1,750 metres, a colossal dragon modelled procedurally in Blender, a MetaHuman lead character, and 36 million source triangles rendered with Nanite and lit with Lumen.

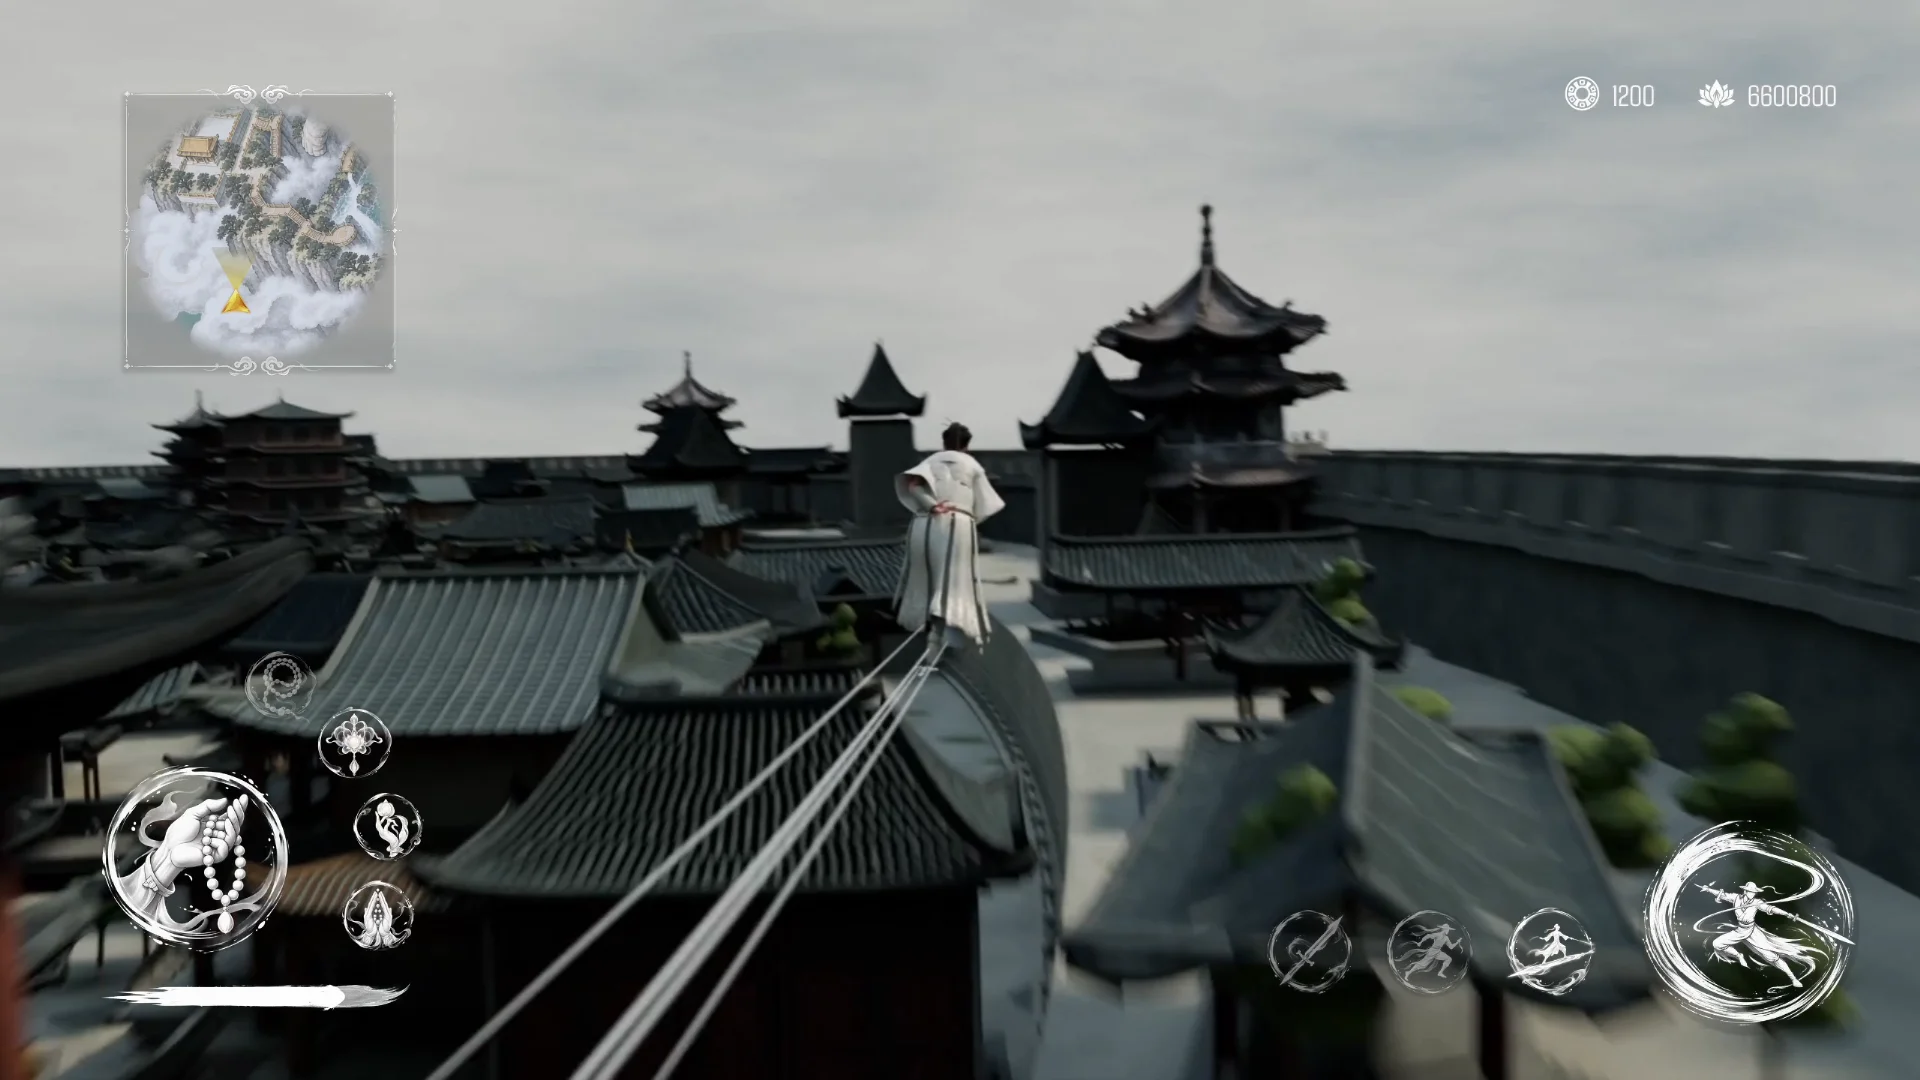
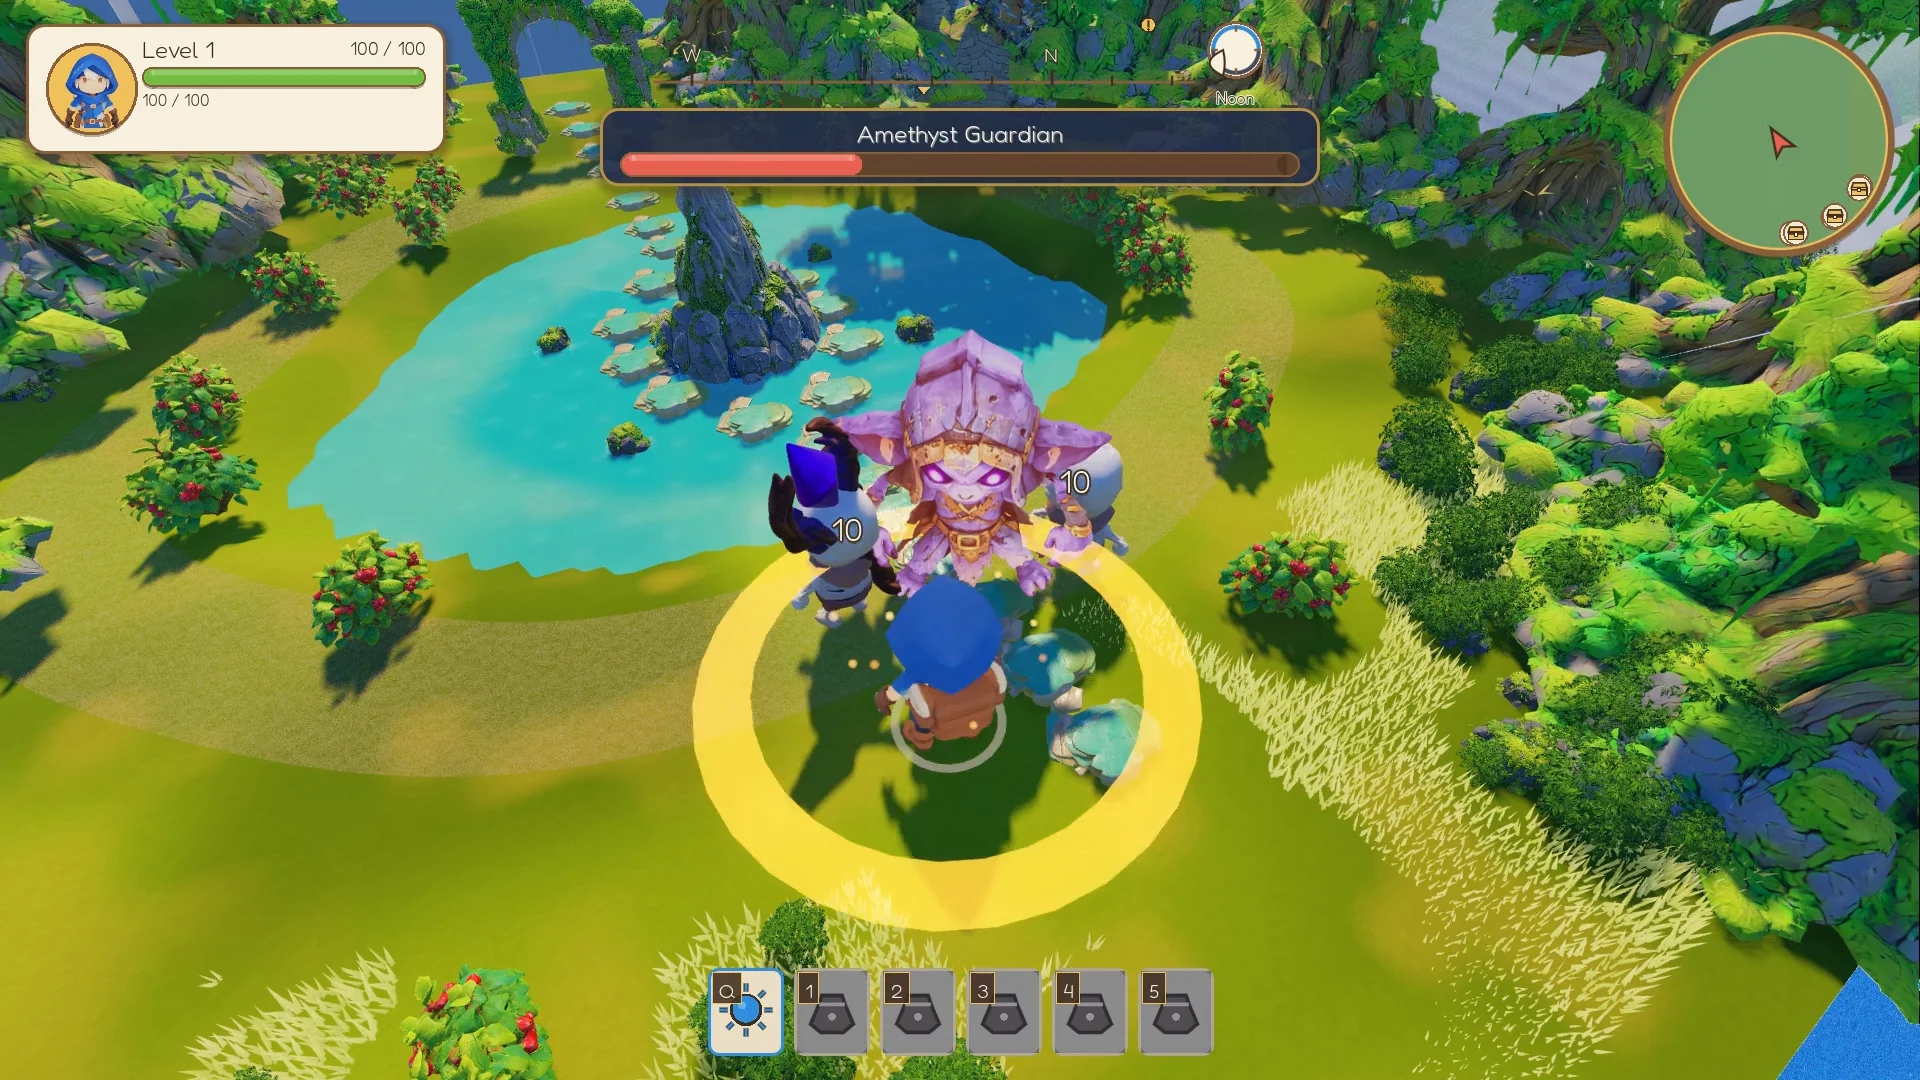
Videos: Moonshot AI, Kimi K3.1 Pro release blog and Kimi K3.1 Pro quickstart.
One of the coding projects is still live. Kimi K3.1 Pro generated a browser-based 3D robotic-arm reveal with exploded views, transparent shells and cross-sections: 2,317 parts and 268 dynamic wire routes, all produced in code and checked by 55 passing browser tests. It runs below.
The live robotic-arm page. Open it full screen at ayhiidmm4ui46.ok.kimi.link. Built by Kimi K3.1 Pro, published by Moonshot AI.
A Long-Horizon Run: Teaching a Body to Walk
Kimi K3.1 Pro's long-horizon coding is strengthened through large-scale reinforcement learning. In one internal test it built a human walking dynamics simulator, with training and evaluation pipelines, on top of an open-source anatomical model of the human body. When reward shaping failed to improve arm motion, it ran open-loop probes of the simulator's dynamics, corrected errors in the shoulder-muscle moment-arm calculations and retrained the controller.
296
skeletal components in the anatomical model, cartilage included
402
muscle components
167
missions, with 420 independent reviews
36
moment-arm errors found and corrected
11.2 s
of continuous walking, from collapsing within seconds
The walking simulator, from falling to a natural gait. Video: Moonshot AI, Kimi K3.1 Pro release blog.
3D Modelling and Design
Without MCP connectors, Kimi K3.1 Pro writes and runs scripts for tools such as Blender and CAD software to build and refine assets, edit components, and adjust geometry, materials and scene layout. On BenchCAD, which tests 3D reconstruction from multi-view renderings through CAD code generation, it scores 92.7 with tools. These are four of the assets it built:
Turbofan model built in FreeCAD
A turbofan built in FreeCAD from Python: fan, reduction gearbox, compressors, combustor, turbines and external piping across 2,100 solids, with step-by-step assembly, an exploded internal view, and the fan, low-pressure and high-pressure spools turning at 2,780, 8,590 and 12,400 RPM.
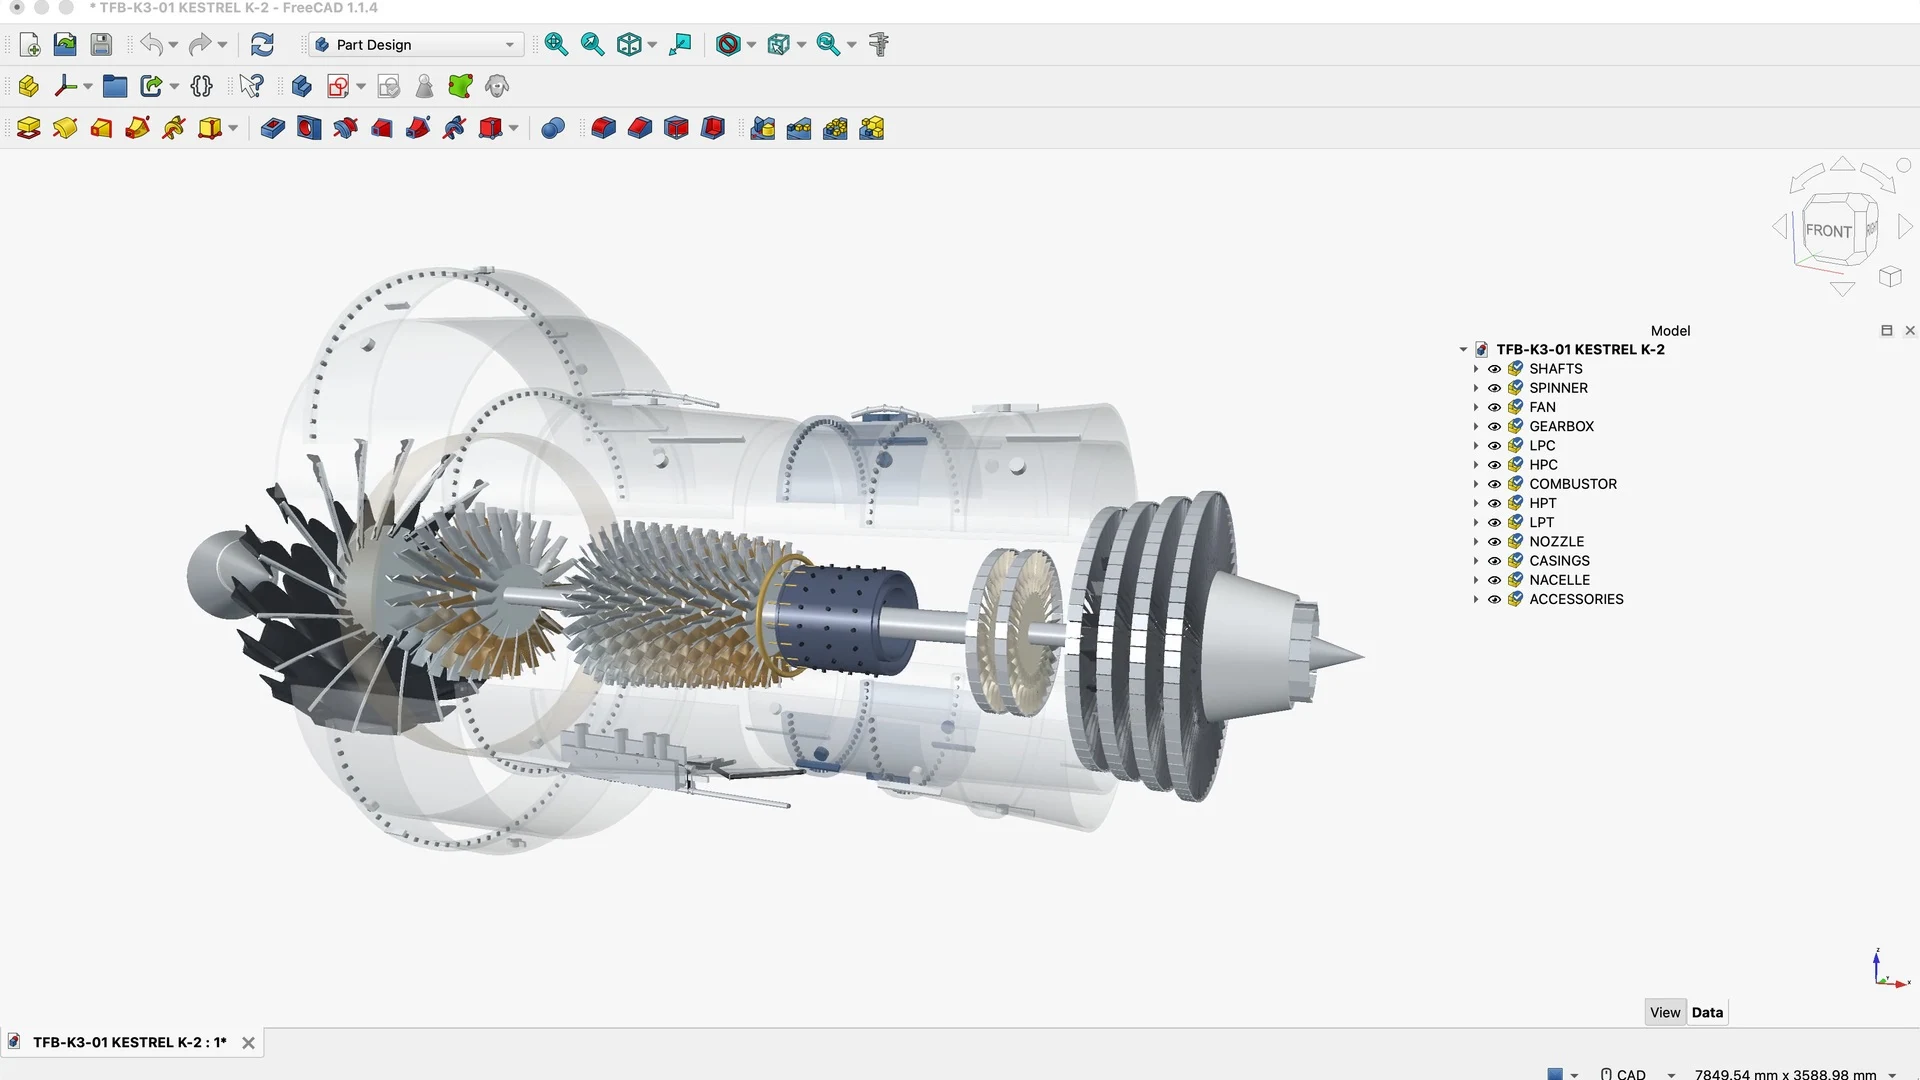
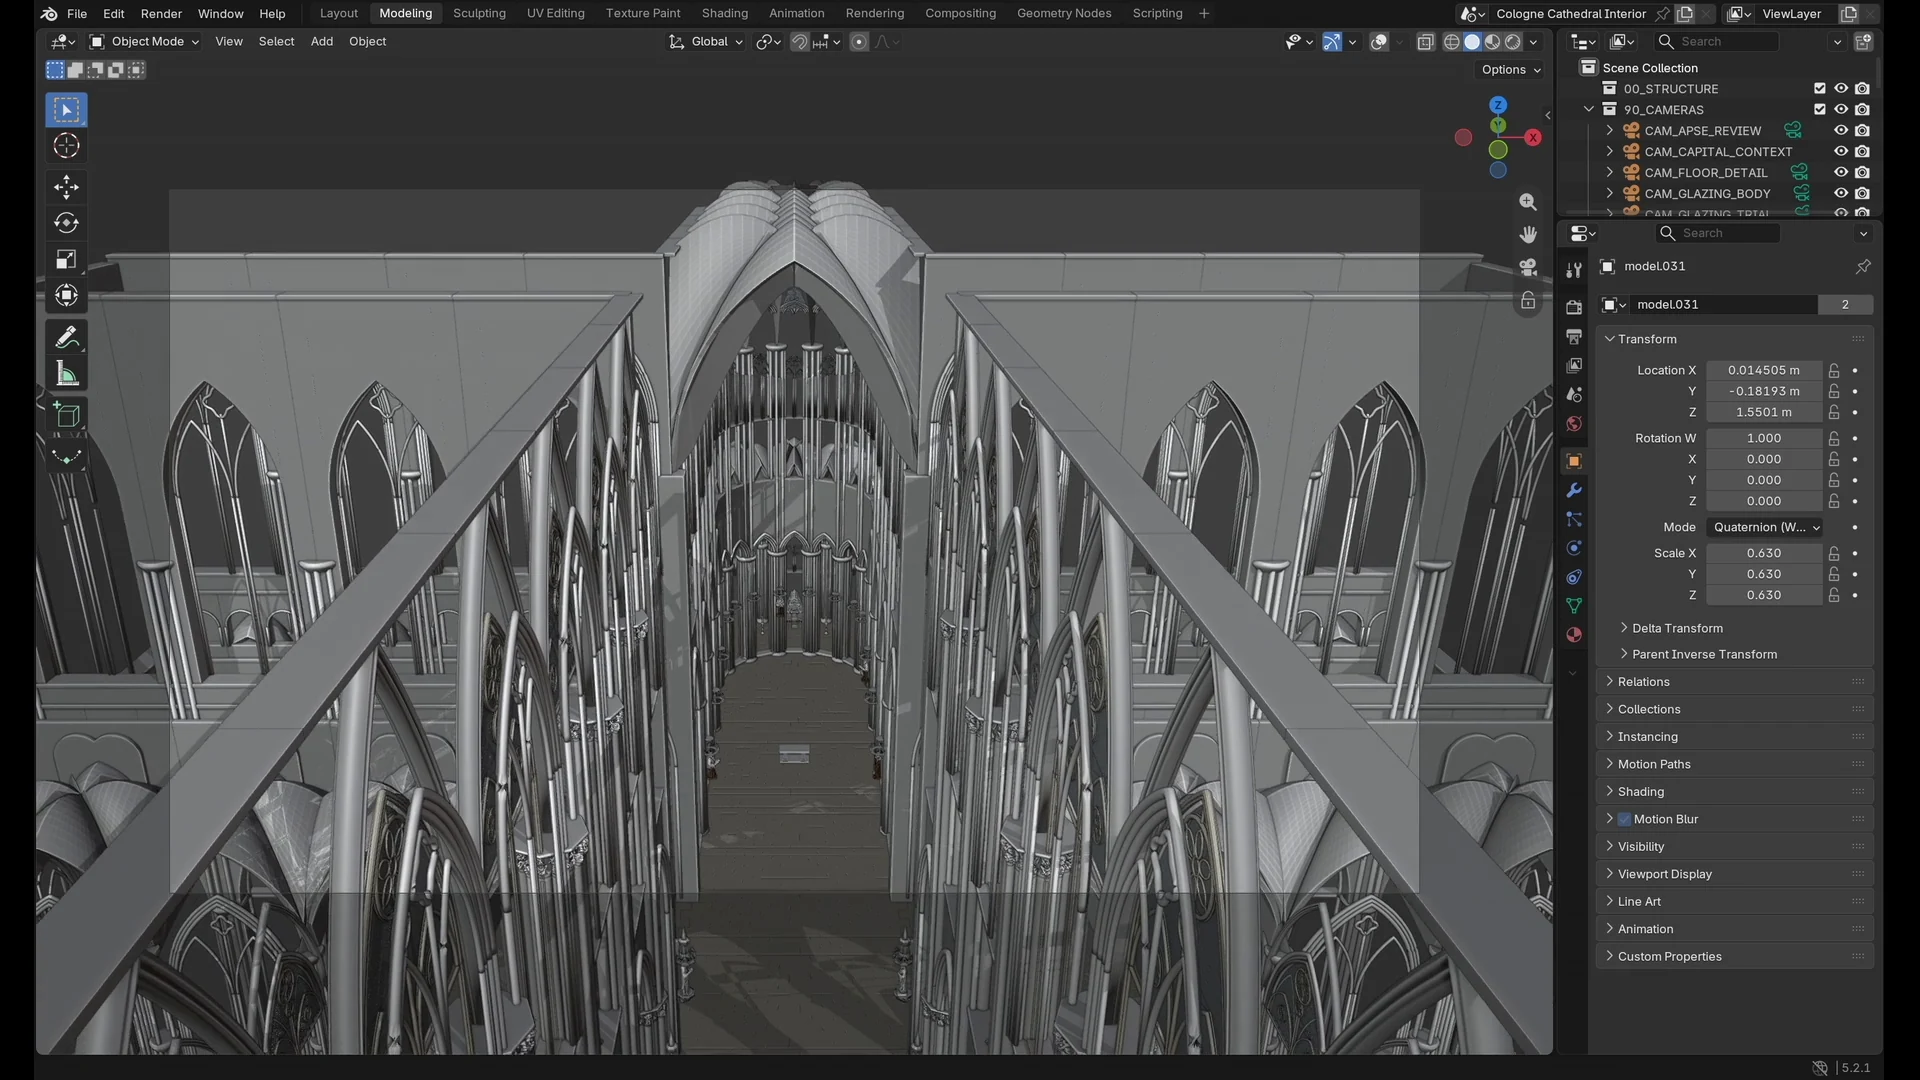

Videos: Moonshot AI, Kimi K3.1 Pro release blog and Kimi K3.1 Pro quickstart.
Kimi K3.1 Pro Deployment Architecture on 32 NVIDIA H100 GPUs
Kimi K3.1 Pro keeps the MXFP4 expert format of Kimi K3, and every expert has to stay resident in GPU memory. The checkpoint is 1,561,293,160,568 bytes across 96 shards in the repository file list, about 357 MB more than Kimi K3, in line with the small indexer added to each of the 24 sparse layers. That number decides the shape of the cluster.
Ninety-six shards, four times over
Tensor parallelism shards the model across GPUs at load time, but every node still needs the complete checkpoint on its own disk first, because each rank reads its slice of every tensor locally.
The nodes do not wait for each other, so the wall clock is one download rather than four.
An NVIDIA H100 "80GB" card is a rounded label. On this flavour nvidia-smi reports 81,559 MiB per card and PyTorch counts 79.19 GiB of usable capacity, so thirty-two cards come to about 2,534 GiB. Set the 1,454 GiB of weights against that and the deployment fits, with about 1,080 GiB left for the KV cache, the recurrent state that Kimi Delta Attention keeps for every request, the activations and the communication buffers.
The Checkpoint Against the Cluster
Thirty-two NVIDIA H100 cards, four nodes, one model. The bar is the whole cluster, and the shaded part is what the weights claim before the engine asks for anything.
No single node holds the model: a quarter of the shaded region lives on each machine. Card capacity is the figure PyTorch reports for an NVIDIA H100 on this flavour.
Why Tensor Parallel Has to Be 32
Tensor parallelism has to divide both the 96 attention heads and the 7168 hidden size evenly. Their greatest common divisor is 32, so the valid tensor-parallel sizes are 1, 2, 4, 8, 16 and 32, and only the largest leaves the weights under the capacity of an 80 GB card.
Why tensor parallelism has to be exactly 32
Two tests have to pass at once: the size has to divide 96 and 7168 into whole numbers, and it has to leave the weights under 79.19 GiB per card.
Weights per card is the 1,454.07 GiB checkpoint divided evenly, before the engine adds anything of its own.
So four nodes of eight NVIDIA H100 GPUs is the shape for this model on this generation. A fifth node cannot lower the per-GPU weight load, because 40 does not divide 96, and data parallelism replicates the model rather than sharding it.
One Model, Four Machines
A multi-node deployment runs tensor parallelism across the node boundary, with expert parallelism laid over the top: thirty-two equal ranks in one process group. Three things follow, and they shape every command below. All four nodes sit in the same environment, which puts them on a shared private network. Collectives are pinned to that private interface with NCCL_SOCKET_IFNAME and run over TCP. And every node keeps its own full copy of the weights on its ephemeral disk.
Thirty-Two Equal Ranks
Every rank holds one thirty-second of every layer and one thirty-second of the experts. Rank 0 also runs the HTTP server, so it is the only node a client talks to.
a quarter of the model resident on this node
same launch command
same launch command
same launch command
Tensor parallel 32 and expert parallel 32 give a world size of 32: 28 of the 896 routed experts on each GPU.
The Kernel Path on NVIDIA H100
Kimi K3.1 Pro's routed experts are MXFP4, and SGLang resolves its native MXFP4 runner automatically only on NVIDIA Blackwell. On NVIDIA H100 the launch selects the Marlin W4A16 kernel with --moe-runner-backend marlin: weights stay four-bit in memory and are expanded inside the kernel for each matrix multiply, the same path that serves Kimi K3 on this cluster.
The attention side changes with Kimi K3.1 Pro. The SGLang Kimi K3.1 Pro cookbook notes that SGLang serves the model with an FP8 KV cache and a page size of 64, that the MLA latent and indexer keys take about 18.9 KB per token, and that tensor parallelism replicates them on every GPU. Its tuning notes add that the recurrent KDA state pool, held per request, sets the concurrency ceiling, and its NVIDIA H100 layout caps concurrency with --max-running-requests 64.
Why Deploy Kimi K3.1 Pro on Hyperstack?
Hyperstack is a cloud platform engineered specifically to accelerate AI and machine learning workloads. Here is why it suits Kimi K3.1 Pro:
Kimi K3.1 Pro runs across four 8x NVIDIA H100 virtual machines, and on a single NVIDIA HGX B300 virtual machine when one node is the better fit.
Network-optimised environments give compatible GPU virtual machines, NVIDIA H100 PCIe with NVLink among them, inter-VM bandwidth of up to 350 Gbps, the path every tensor-parallel layer crosses.
Each NVIDIA H100 NVLink node carries 6,500 GB of ephemeral storage, which holds the 1.56 TB checkpoint and the container image at
/ephemeral, off the small root disk.Ubuntu images with the NVIDIA driver, CUDA and Docker already installed remove the driver and runtime setup phase, so SGLang and vLLM, two of the engines Moonshot AI recommends, go straight from
ssh to docker run.Start on four NVIDIA H100 nodes or one NVIDIA HGX B300 node, then scale to NVIDIA GB300 NVL72 or a Secure Private Cloud deployment for production agentic serving.
Per-minute GPU billing means an evaluation run costs only the minutes the virtual machines are running.

How to Deploy Kimi K3.1 Pro on Hyperstack
Now, let us walk through the step-by-step process of deploying the necessary infrastructure, from four empty virtual machines to a live endpoint.
Sign in to the console and set up billing.
8x NVIDIA H100-80G-PCIe-NVLink each, in one environment.
Your own address for SSH and the API, the peers for everything.
Private IP, interface name, GPUs and disks on every node.
Docker and the model cache move to /ephemeral.
All 96 shards on every node, with the image pull alongside.
A complete checkpoint on every node before you serve.
One command per node; only the rank and the IP change.
The model list, then a first chat request.
Step 1: Accessing Hyperstack
First, you will need an account on Hyperstack.
- Go to the Hyperstack console and log in.
- If you are new, create an account and set up your billing information. Our documentation can guide you through the initial setup.
Step 2: Deploying Four 8x NVIDIA H100 Virtual Machines
From the Hyperstack dashboard, launch four identical GPU virtual machines. Tensor parallel 32 needs 32 GPUs, so the node count follows from the arithmetic above.
- Create a Network-Optimised Environment: On the Environments page, click Create New Environment, name it and select CANADA-1. Hyperstack marks network-optimised environments with the ⚡ icon, and inside one, compatible GPU virtual machines reach inter-VM bandwidth of up to 350 Gbps, against up to 125 Gbps in legacy environments. NVIDIA H100 PCIe with NVLink is on the compatible list, and at tensor parallel 32 every layer exchanges data across all four nodes.
- Initiate Deployment: Look for the "Deploy New Virtual Machine" button on the dashboard and click it.
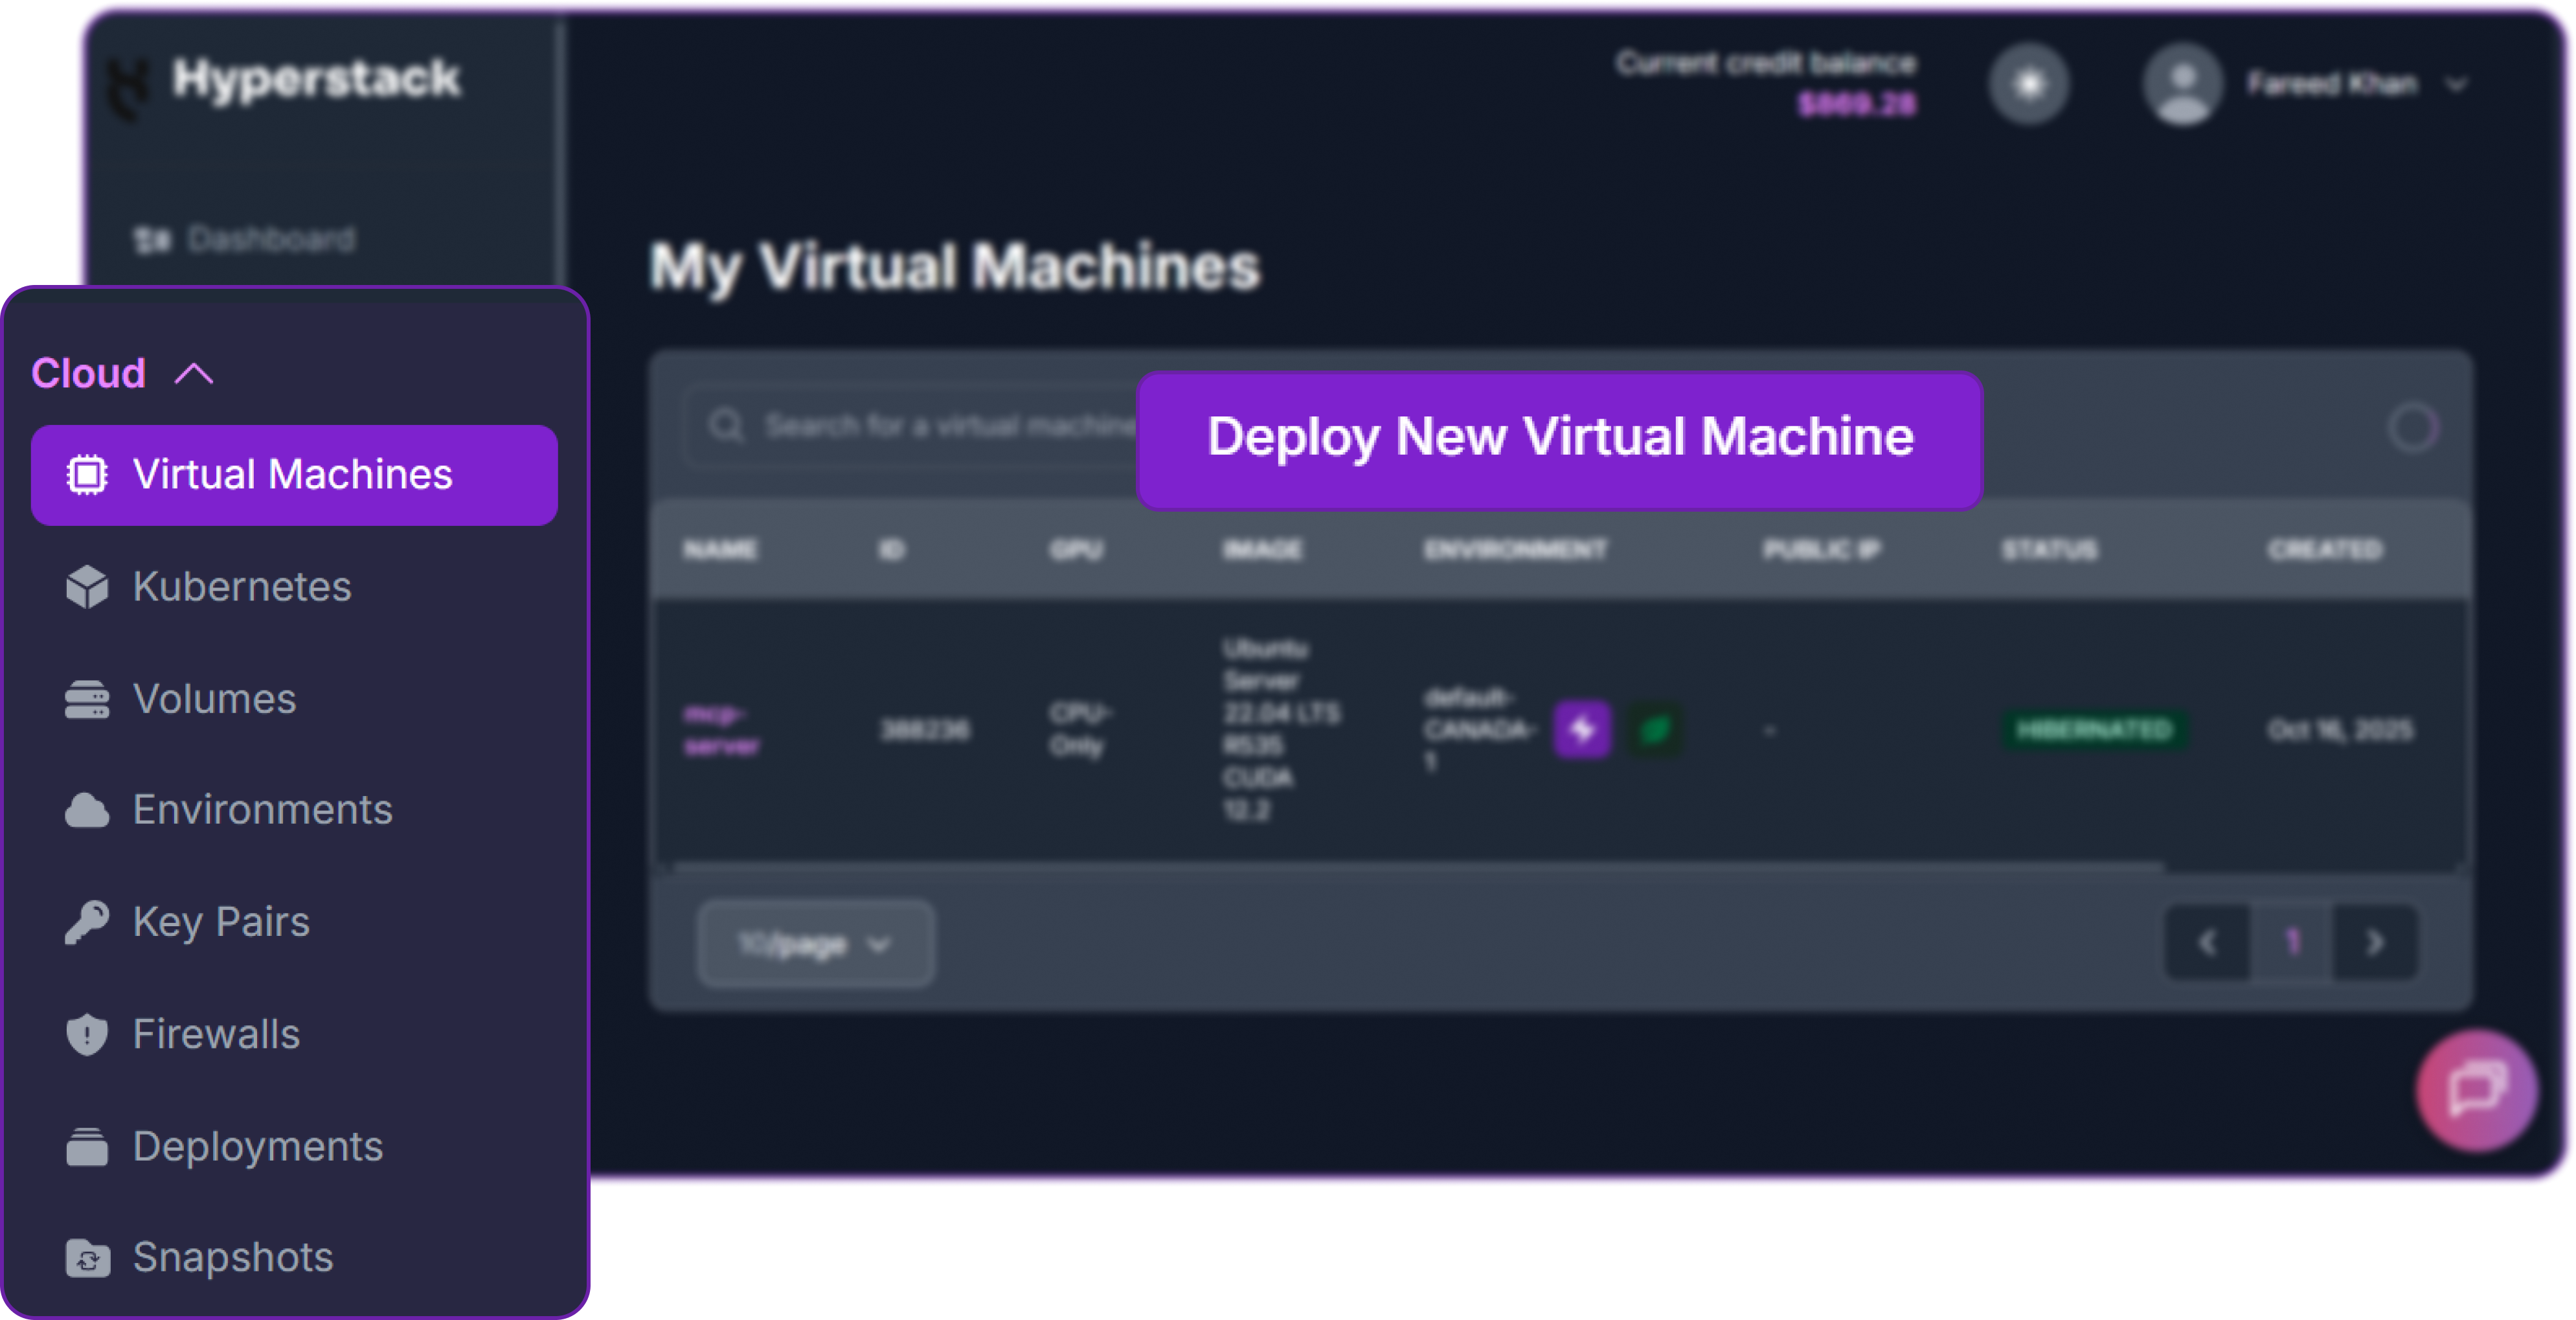
The Deploy New Virtual Machine button.
- Select Hardware Configuration: Choose the 8x NVIDIA H100-80G-PCIe-NVLink flavour, listed in the flavour reference as
n3-H100x8-NVLinkwith 252 CPUs, 1,440 GB of RAM, a 100 GB root disk and 6,500 GB of ephemeral storage. Take the NVLink variant rather than plain PCIe: per the NVIDIA H100 PCIe product brief it bridges each card to an adjacent card at 600 GB/s.
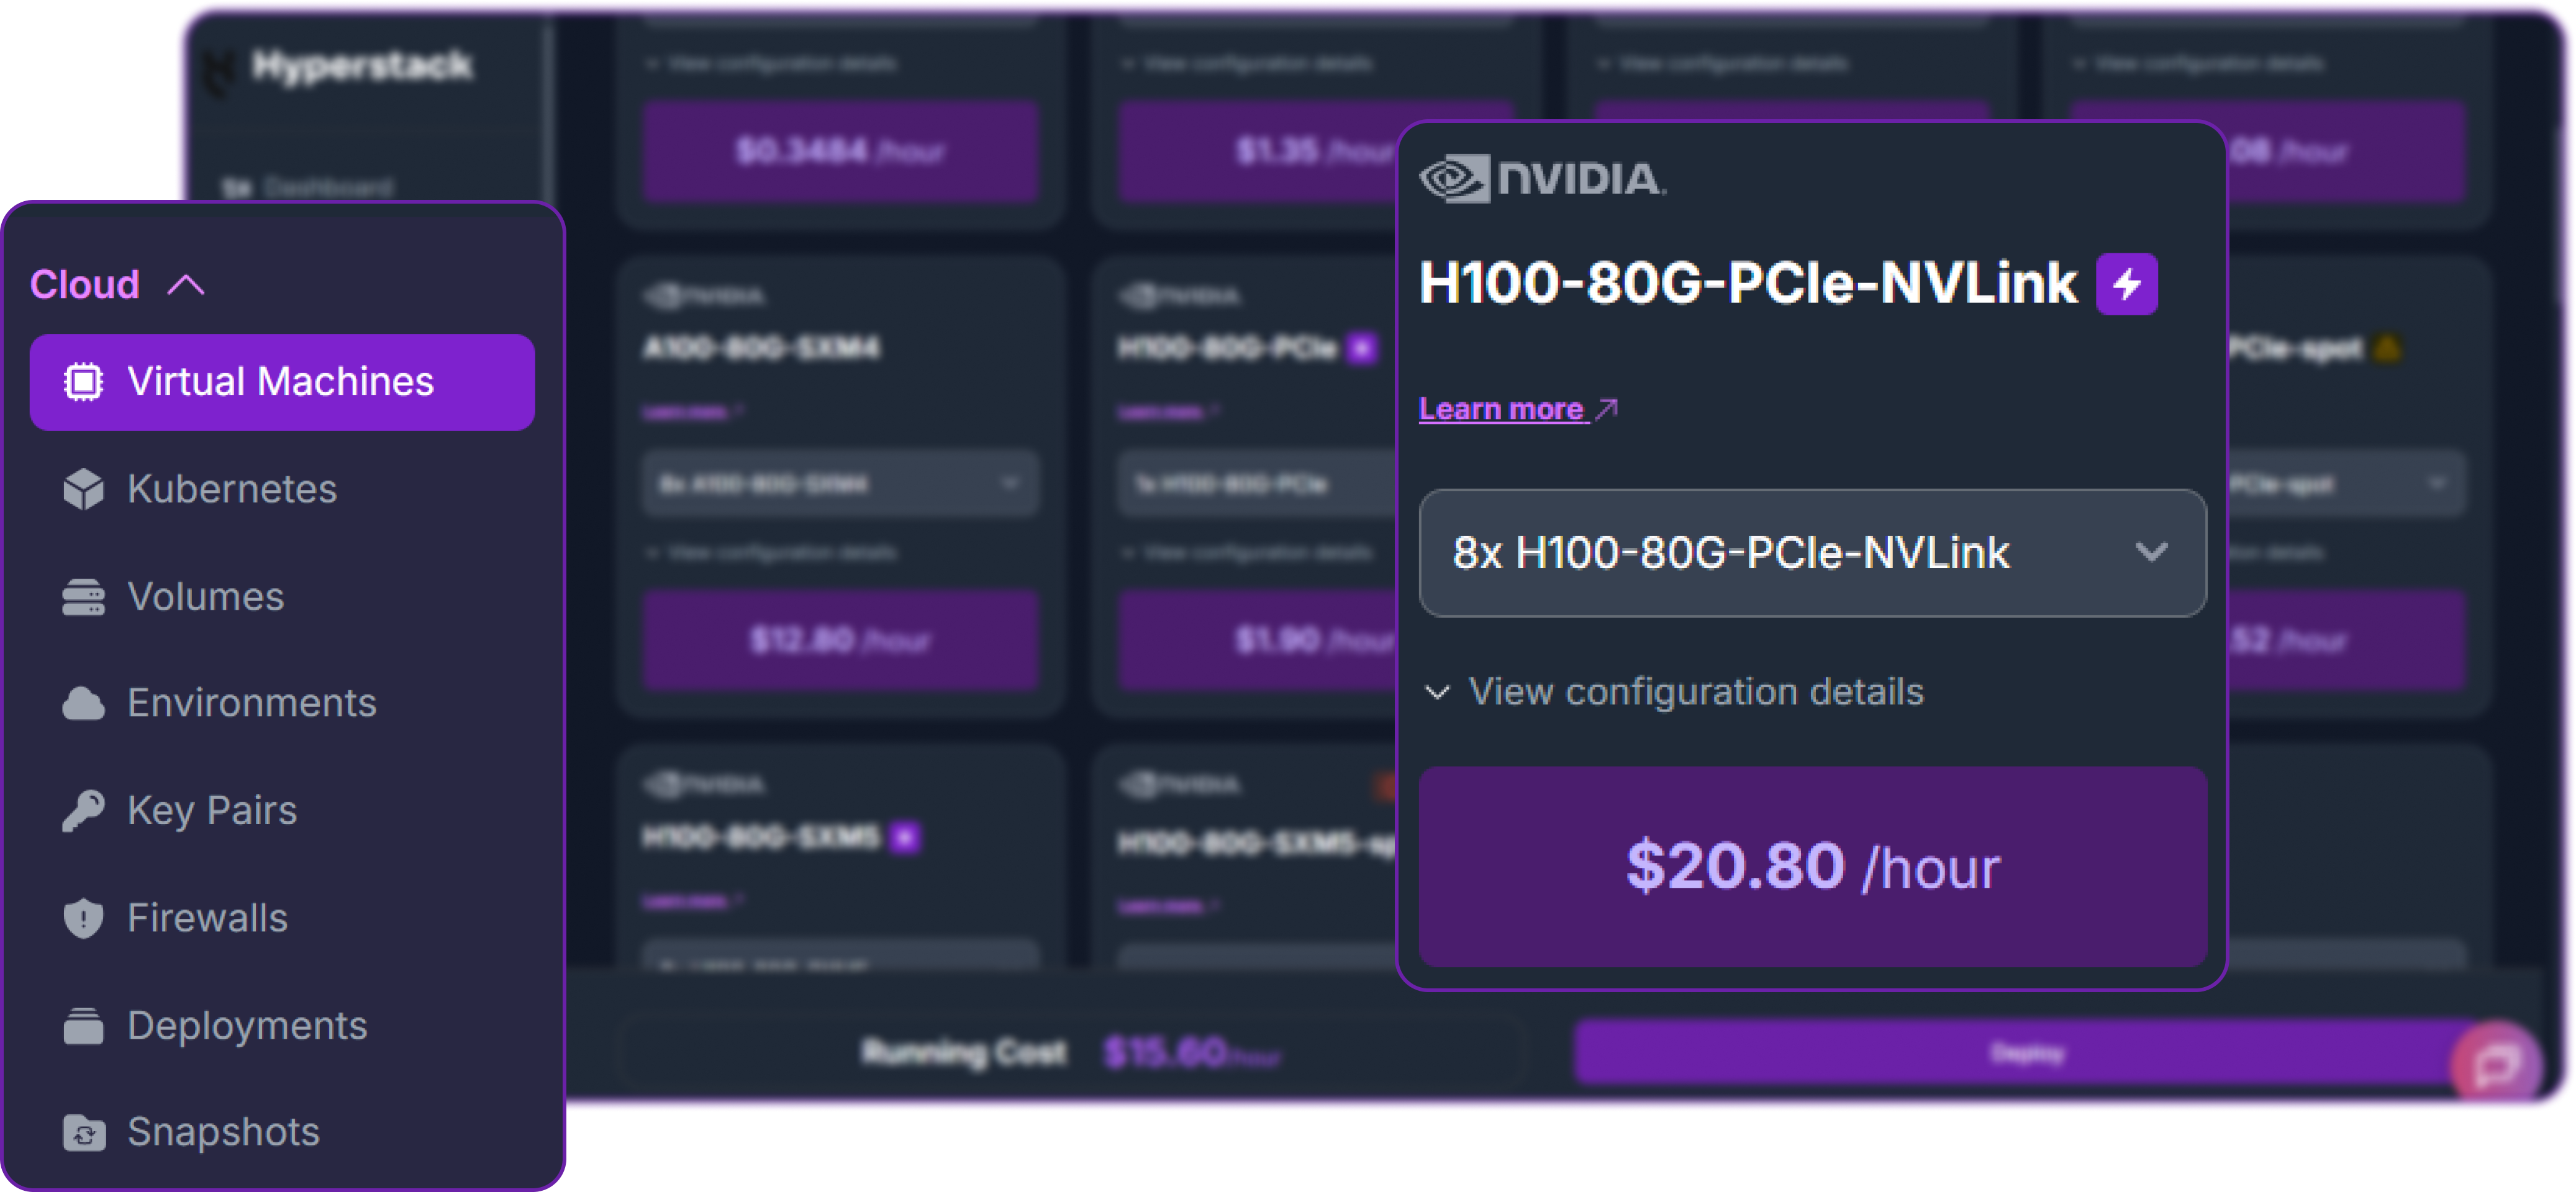
The flavour card for 8x NVIDIA H100-80G-PCIe-NVLink.
- Choose the Operating System: Select the "Ubuntu Server 24.04 LTS R570 CUDA 12.8 with Docker" image. The image reference lists it with the NVIDIA driver, the CUDA toolkit and Docker installed, so the node is ready for containers as soon as you connect.
- Environment: Choose the network-optimised environment you created. All four nodes must land in the same environment, because that is what puts them on a shared private network.
- Select a Keypair: Choose an existing SSH keypair from your account to securely access the VMs. Use the same keypair for all four nodes.
- Network Configuration: Ensure you assign a Public IP to every node. This is crucial for remote management and connecting your local development tools.
- Review and Deploy: Double-check your settings, click the "Deploy" button, and repeat until four identical nodes are running.
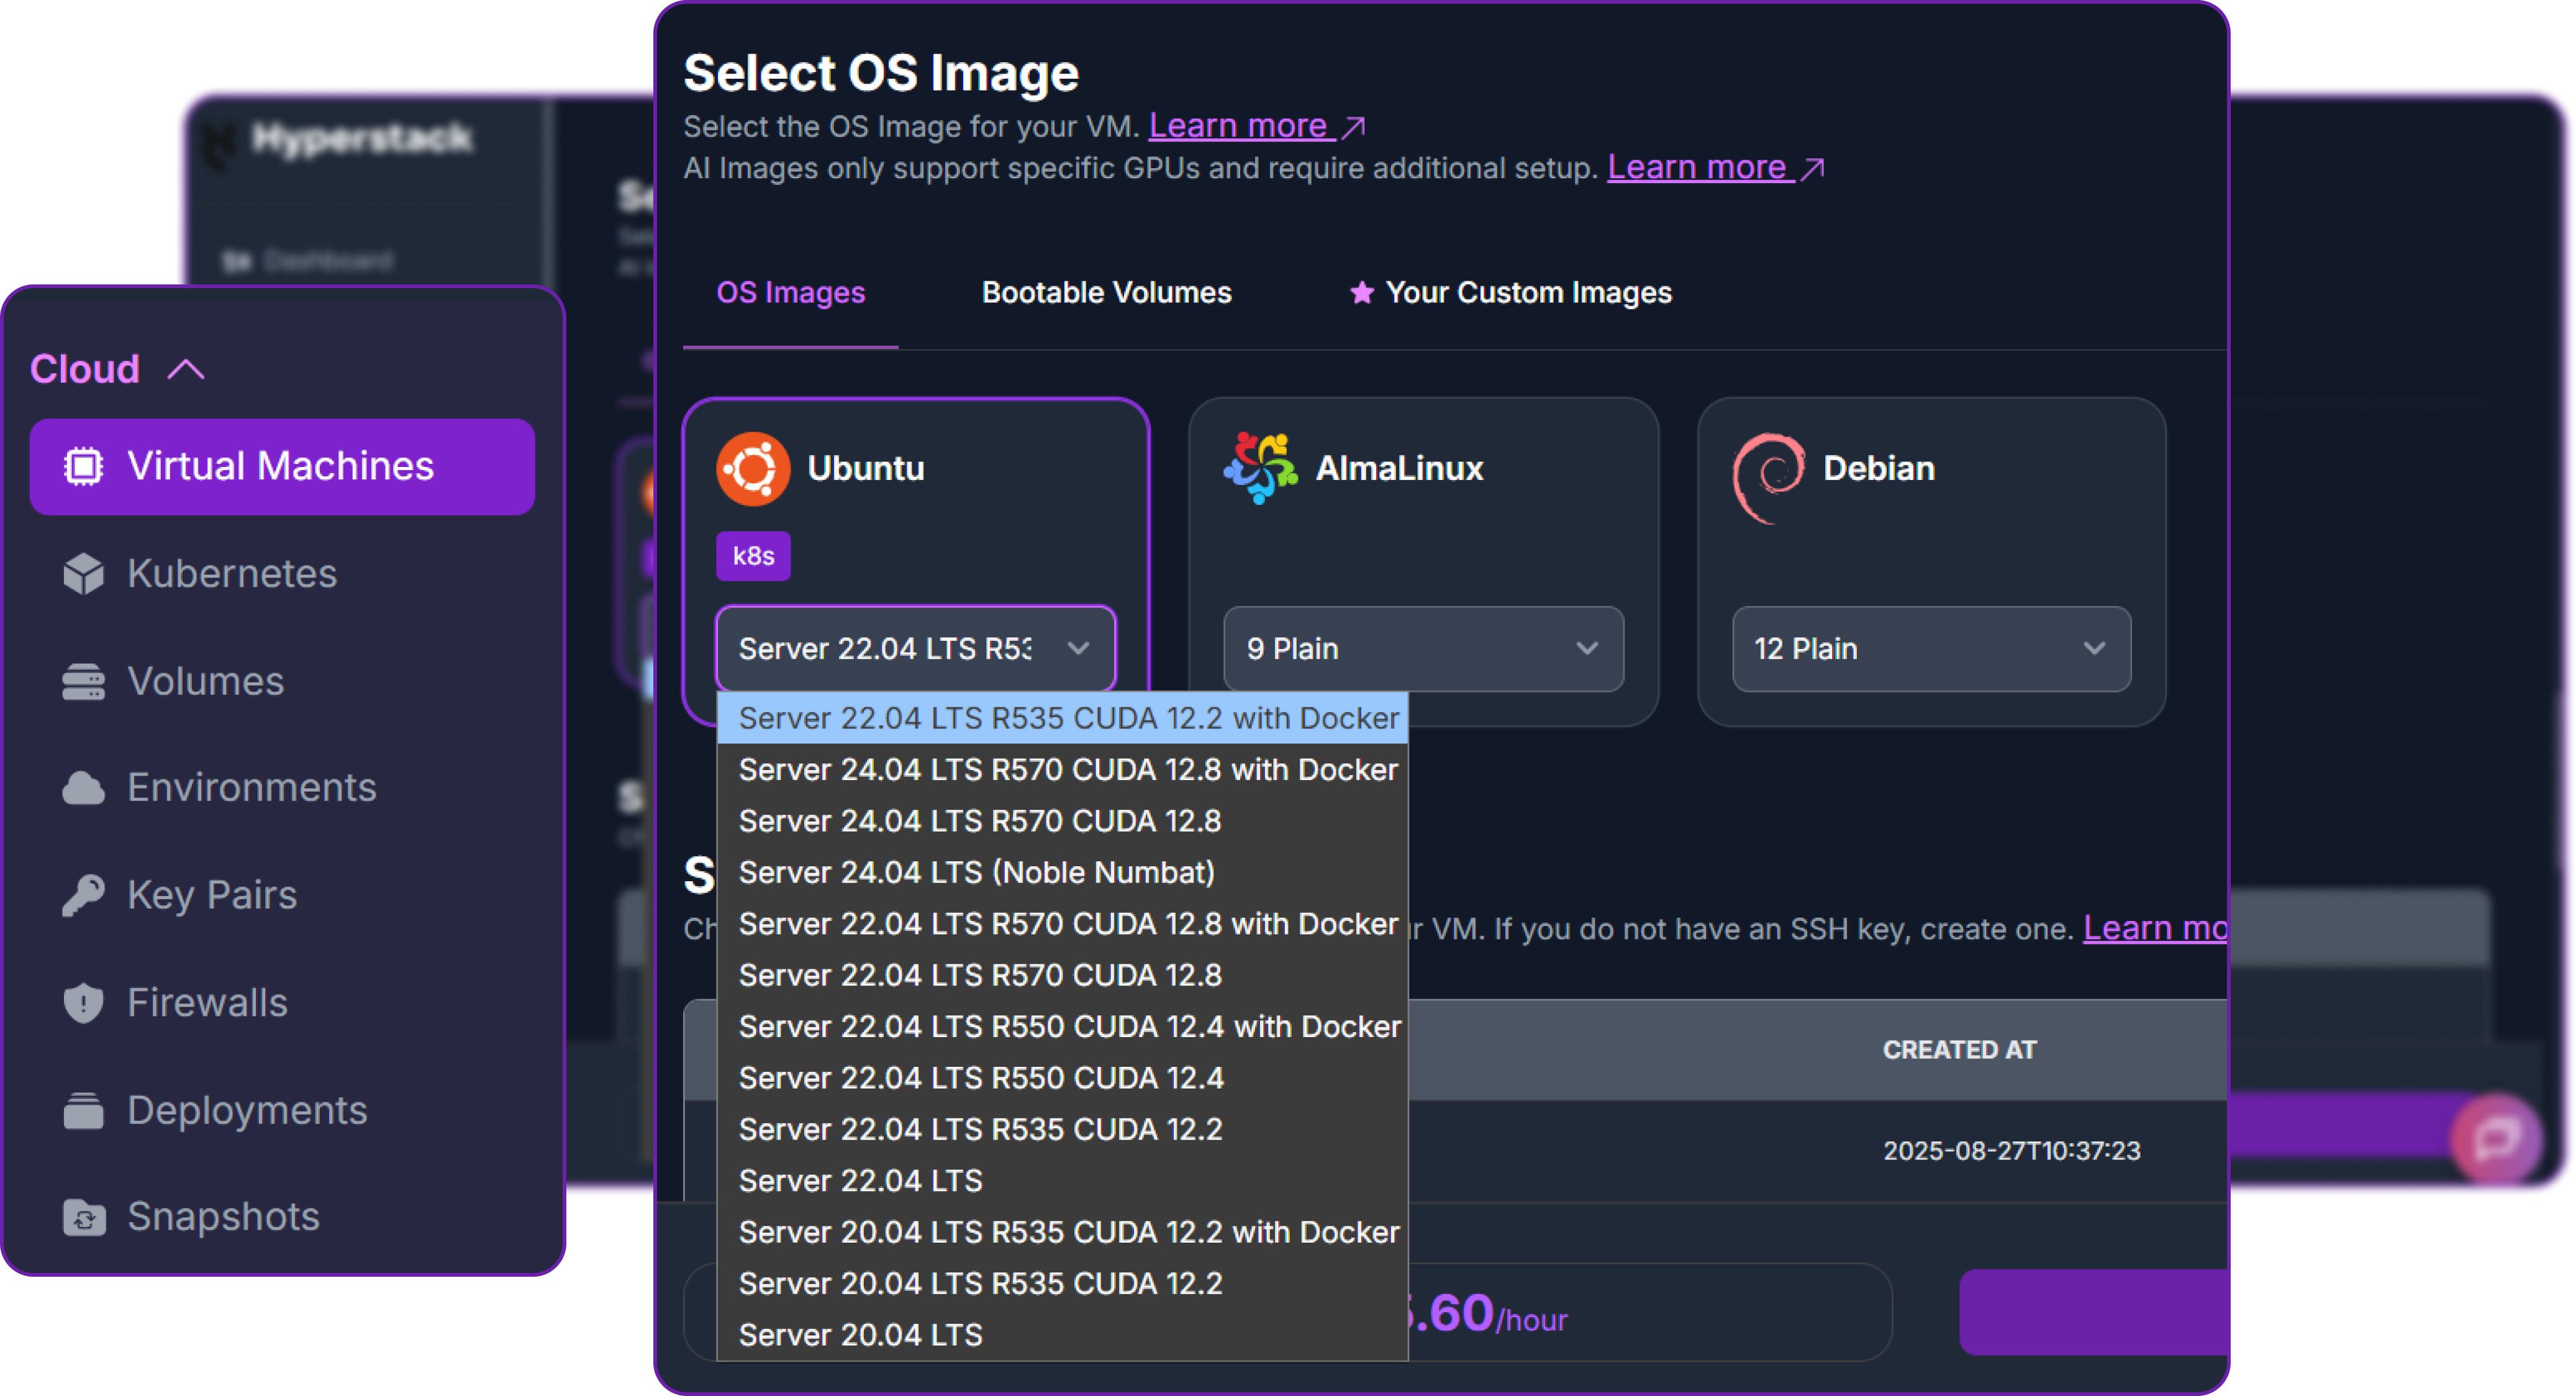
The OS image list. Choose Ubuntu Server 24.04 LTS R570 CUDA 12.8 with Docker.
Step 3: Configure the Firewall
The four nodes have to talk to each other freely on the private network, and you need to reach the API from your own machine. On each node's Firewall tab, add these firewall rules:
| Port | Source | Why |
|---|---|---|
22 |
your public IP /32 | SSH access to all four nodes |
8000 |
your public IP /32 | The inference API, on the head node only |
| 1 to 65535, TCP | the other nodes' private IPs | NCCL, Gloo and the torch.distributed rendezvous on port 20000 |
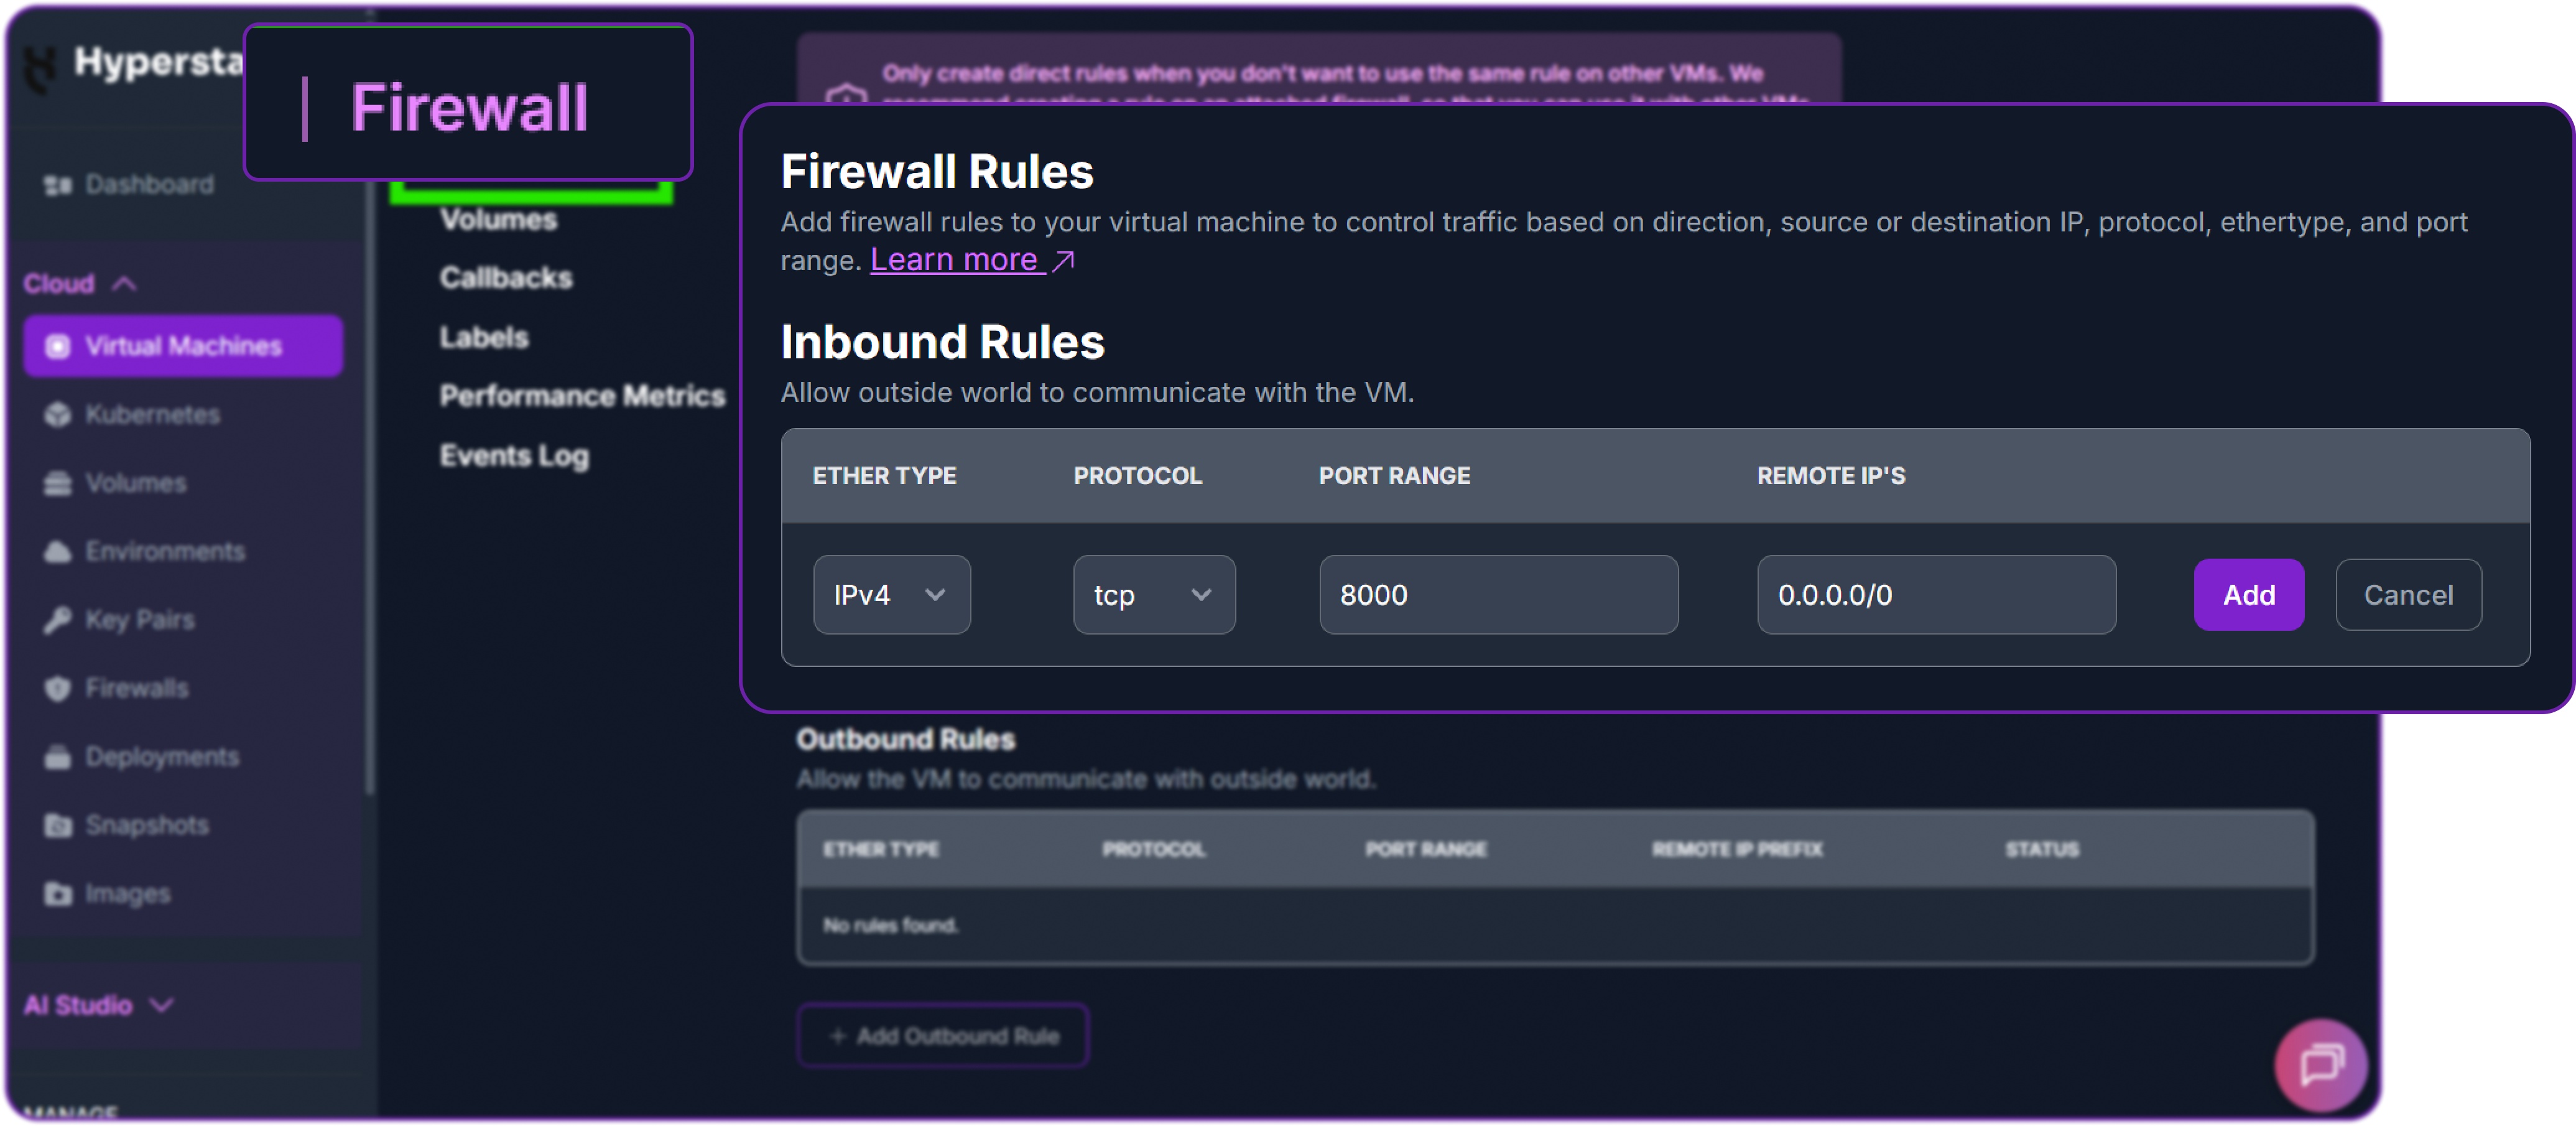
Adding an inbound rule on the Firewall tab. Use your own address followed by /32 rather than 0.0.0.0/0.
Every node's private IP is shown on its detail page in the dashboard, so you can fill in the third rule before logging in anywhere. NCCL negotiates its ports dynamically, so that range has to be wide, but its source does not: scope it to the peer nodes' private addresses.
The endpoint has no authentication by default. Every example passes EMPTY as the key, and anything that reaches port 8000 has full use of the model, so keep the rule scoped to your own IP and never open it to 0.0.0.0/0.
Step 4: Accessing Your Nodes
Once your VMs are running, find each node's Public IP address in the Hyperstack dashboard and connect to it in a separate terminal.
Replace [path_to_your_ssh_key] with the path to your private SSH key file and [your_node_public_ip] with the IP address of the node. Then, on every node, read its private IP and interface name, and confirm that all eight GPUs are visible and the large disk is mounted:
On these nodes the private interface is ens6 on a 10.0.0.0/24 subnet. Read both values from your own output and substitute them wherever this tutorial shows ens6 or a 10.0.0.x address; they go into the launch command in Step 8. The disk check shapes the rest: the root filesystem is about 96 GB, while the ephemeral disk mounted at /ephemeral offers about 6.3 TB.
Step 5: Prepare Storage on the Ephemeral Disk
The Kimi K3.1 Pro checkpoint is far too large for the root partition, so both the model weights and Docker's own storage go on the ephemeral disk mounted at /ephemeral. Everything in this step runs on all four nodes.
Next, move Docker itself. The data-root key tells the daemon to store images and layers on the ephemeral disk rather than the root partition, and it takes effect on a restart:
Finally, clear anything Docker has already written to the root disk, then confirm the move. docker info should report Docker Root Dir: /ephemeral/docker:
Prune first, then pull. Recent Docker releases also keep image layers under the containerd snapshotter at /var/lib/containerd, which data-root does not cover. Running the prune before the pull, and keeping an eye on df -h / while it runs, leaves room for the image on the root disk.
Step 6: Pre-Download the Model Weights
The download is large enough that it is worth running once outside Docker, so you can monitor progress and recover cleanly from interruptions. Every node needs its own complete copy, so run this step on all four nodes at the same time. First make sure the Hugging Face client is present:
Start the image pull first. It does not depend on the weights, so it can run while they download. The tag is the one the SGLang Kimi K3.1 Pro cookbook names for NVIDIA H100:
Then start the weights. HF_TOKEN authenticates the download, because Hugging Face applies tighter rate limits to anonymous traffic than to signed-in users, and HF_HOME puts the cache on the ephemeral disk:
Important: keep HF_HOME=/ephemeral/hf on the download command. Without it, the cache defaults to ~/.cache/huggingface on the 96 GB root disk, which cannot hold a 1.56 TB checkpoint.
Keep the checkpoint between sessions. Data on /ephemeral is cleared when a virtual machine is hibernated, so to reuse the 1.56 TB later, copy it to a shared storage volume first, as the ephemeral storage guide describes.
Step 7: Check All 96 Shards Before You Serve
A 32-rank cluster loads for several minutes before it is in a position to notice that one of the 96 shards is short. Checking the download first takes seconds and gives you a definite answer before the expensive part begins. The script reads your token from ~/hf_token.txt, so save it there first with echo "$HF_TOKEN" > ~/hf_token.txt. It starts with the arguments and the header that authenticates the API call:
Next it asks Hugging Face what should be there. The repository metadata lists every file, and keeping only the safetensors files gives the 96 names to look for:
Then it finds the local copy. The downloader writes into a directory named after the commit and fills it with links into the blob store, so the size of each file is read through os.path.realpath:
Finally it compares the two and exits non-zero if anything is missing, so it can sit in front of your launch command:
Run it on every node. This is the result to look for, with the same commit hash on all four:
Step 8: Launch Kimi K3.1 Pro Across All Four Nodes
All four nodes run the same command, and only two values change between them: --node-rank and SGLANG_HOST_IP. Rank 0 is the head, and it is the only node that answers HTTP. Set the values first; paste this block into each node's terminal and change the first two lines:
Next collect the engine arguments, which follow the SGLang cookbook's NVIDIA H100 layout for Kimi K3.1 Pro: tensor parallel 32, expert parallel 32 and a 0.85 static memory share across four nodes.
Then launch. Everything here is container-level: the GPUs, host networking and shared memory, the weights mounted where the engine looks for them, and the environment it reads at start-up:
Start rank 0 first, then the other three. The rendezvous on port 20000 waits for all four, and --dist-timeout 3600 gives it an hour. This is what each setting does:
What happens between docker run and the first request
Five stages, in order, on all four nodes at once.
SGLang reads the same flags on every node.
The rendezvous on port 20000 completes once all four nodes are up.
Each rank reads its slice of every tensor, and the experts are prepared for the Marlin kernel.
The KV cache and KDA state pools take what remains of the 0.85 share once the weights are resident.
The log prints its ready line and port 8000 starts answering.
Stages of an SGLang start-up for this configuration.
The process is complete when the head node's log shows:
Step 9: Test the Deployment
Run these from your local machine (not the VM), against the head node's public IP, once the port 8000 rule from Step 3 is in place. First list the served model:
Then send a first chat request. reasoning_effort is set to "low" to keep the check quick:
A successful response returns the answer in content and the model's thinking in a separate reasoning_content field. The Kimi K3.1 Pro model is now deployed on Hyperstack.
Moonshot AI's published evaluation results use the following sampling parameters:
Controlling Thinking Effort
Now that the SGLang server is running, we can interact with it from Python. The helper below uses only the standard library, so there is nothing to install; any OpenAI-compatible client works the same way against /v1/chat/completions.
A first request. The thinking and the answer come back in separate fields:
Kimi K3.1 Pro always thinks. Unlike Kimi K2.6, there is no instant mode to switch thinking off. Instead, the depth of thinking is set with the top-level reasoning_effort field, which accepts "low", "high" and "max" (default "max"). Moonshot AI's reasoning effort guide presents the three levels as a trade between reasoning depth, latency and token usage. Use "low" for direct questions and keep "max" for debugging, planning and maths.
Both efforts reach the same answer. What changes is the thinking in front of it:
Every request pays for a reasoning pass, even at "low". Read usage in the response when budgeting token costs, as a client that reads only content still pays for the thinking tokens.
Preserved Thinking for Multi-Turn Coding Agents
For multi-turn conversations and tool calls, Kimi K3.1 Pro requires the complete assistant message returned by the API to be passed back into messages as-is, including reasoning_content and tool_calls, not just content. This is a requirement rather than an option: if the reasoning is dropped between turns, the model loses the thinking it built on the previous turn.
The example below, adapted from the Moonshot AI model card, shows the pattern. The prior assistant turn carries reasoning that mentions five numbers, but its visible answer lists only three:
Because the prior reasoning trace mentioned 215 and 222, the model can answer with those exact numbers. If you rebuild the assistant turn from content alone, that reasoning is silently lost, so carry reasoning_content back explicitly, as assistant_turn() does.
Multimodal Capabilities with Kimi K3.1 Pro
Kimi K3.1 Pro is natively multimodal through its integrated MoonViT-V2 encoder, so it can analyse images alongside text in the same request. The image input format is identical to the OpenAI vision API. To make the check objective, the example builds its own test image, left half red and right half blue, with nothing but the standard library:
The image travels as a base64 data URI in the "url" field, so the server needs no outbound access to fetch it.
Agentic Use Case with Kimi K3.1 Pro
One of the defining features of moonshotai/Kimi-K3.1-Pro is long-horizon agentic tool calling. Unlike standard chat where the model just generates text, an agentic workflow lets it:
- Decide when external tools are needed
- Call tools automatically
- Receive tool outputs and continue reasoning
- Complete multi-step tasks autonomously
Because we launched SGLang with --tool-call-parser kimi_k3, the server emits structured tool calls in the standard OpenAI format. Start with a round trip that is easy to check: an arithmetic tool and a small weather lookup.
The loop sends the task, runs every tool call the model returns, appends the results and calls the model again until it stops asking for tools. Each assistant turn goes back whole:
Both calls arrive in a single turn, and the second turn combines the two results into one answer.
A Coding Agent with a Shell Tool
For sustained engineering work, the same harness gets a single shell tool scoped to a workspace directory. Run it on a machine you are happy for the model to change, since the tool executes whatever command the model writes:
Example 1: Long-Horizon Refactor
This is the kind of sustained, multi-step engineering work Kimi K3.1 Pro is built for: read existing code, plan a change, apply it and check it without losing track. We seed the workspace with a small file and ask the model to refactor it:
What happens internally over the tool calls:
- The model interprets the request and decides it needs to read
calc.pyfirst. - It calls
run_shellwithcat calc.pyand reads the existing structure. - It writes a refactored version of the file.
- It writes
test_calc.pywith three test cases. - It runs
pytest test_calc.py -qand reads the output. - If a test fails, it reads the failure, edits the file and re-runs. This is where preserved thinking matters most, as the model continues from its earlier reasoning instead of re-deriving it.
- It returns a summary of changes.
Example 2: Coding-Driven Design (Build a Website)
Using the same agent harness, Kimi K3.1 Pro can turn a single prompt into a self-contained website:
The model writes a complete index.html in ~/agent_workspace. Open the file in a browser to review the page it generated.
Integration with Third-Party Coding Assistants
Because SGLang exposes the OpenAI-compatible /v1/chat/completions endpoint alongside an Anthropic-compatible /v1/messages route, and we enabled the Kimi tool-call parser, the self-hosted Kimi K3.1 Pro plugs into most modern coding assistants. Below are three of the most useful integrations.
Integrating with Kimi Code CLI
Moonshot AI's own agent framework is the Kimi Code CLI, available at kimi.com/code, and Moonshot AI uses it as the harness for several of the published Kimi K3.1 Pro benchmark results. Install it with the official script:
By default Kimi Code talks to Moonshot AI's hosted API. To point it at your endpoint, add a provider and a model to ~/.kimi-code/config.toml. The providers reference documents the openai type for any OpenAI-compatible service, and it handles the reasoning_content field and effort settings itself:
max_context_size is required, and it tells the CLI when to compact a long session; keep it at or below the KV cache size SGLang prints at start-up as max_total_num_tokens. The field names follow the configuration file reference. Then start the CLI in a project directory:
Integration with Claude Code
Moonshot AI provides an Anthropic-compatible API for Kimi K3.1 Pro, and SGLang serves an Anthropic-compatible /v1/messages route on every server, so you can point Claude Code at your self-hosted Kimi K3.1 Pro server. Moonshot AI also evaluated many of the coding benchmarks above using the Claude Code harness.
Set the following environment variables before launching Claude Code:
Environment Variables Overview
Efficiency Tip: Add these environment variables to your shell profile (for example ~/.bashrc or ~/.zshrc) or define them inside ~/.claude/settings.json under the "env" key for a persistent setup.
Keep the prefix cache warm. Claude Code places a per-request attribution block at the start of the system prompt, which changes every turn. CLAUDE_CODE_ATTRIBUTION_HEADER=0 removes it, so SGLang's prefix cache can reuse the conversation from one turn to the next, as the SGLang Anthropic API guide and the Claude Code environment variable reference describe.
Once Claude Code launches, check the connection with a simple prompt. If the model responds correctly, your agentic coding environment is running on Kimi K3.1 Pro.
Deployment with OpenClaw
Kimi K3.1 Pro's long-horizon reasoning also makes it a strong engine for OpenClaw, the open-source, self-hosted agent platform. Pointing OpenClaw at your SGLang server gives you an autonomous coding environment in your terminal. Install it with the official installer:
Configuring the Local Provider
OpenClaw ships an SGLang provider for OpenAI-compatible SGLang servers. To bridge it to your cluster, merge the following provider block into ~/.openclaw/openclaw.json:
Configuration Tip: The id field must match the model id the server reports at /v1/models (here, moonshotai/Kimi-K3.1-Pro). contextWindow tells OpenClaw how much history to send, so keep it within the KV cache size in the SGLang start-up log, as with Kimi Code.
Once configured, set the model and launch the OpenClaw TUI:
From here you can issue high-level coding instructions and the Kimi K3.1 Pro-backed agent will plan, edit and check changes on your 32-GPU NVIDIA H100 cluster.
Running Kimi K3.1 Pro on One NVIDIA B300 Node
If you would rather serve Kimi K3.1 Pro from a single machine, the vLLM Kimi K3.1 Pro recipe gives the simplest working setup on NVIDIA Blackwell: one tensor-parallel group of eight GPUs, on one NVIDIA B300 node. Hyperstack offers it as the NVIDIA HGX B300 flavour n3-B300-SXM6x8, with 224 CPUs, 1,920 GB of RAM, a 1,000 GB root disk, 40,000 GB of ephemeral storage and 2.3 TB of HBM3e across its eight GPUs, so the whole checkpoint fits on one node and NVIDIA Blackwell runs the MXFP4 experts natively.
- The flavour reference requires the "Ubuntu Server 24.04 LTS R595 CUDA 13.2 with Docker" image for this flavour, which suits the CUDA 13 build of the vLLM image.
- The checkpoint goes on
/ephemeralas on the NVIDIA H100 nodes, using Steps 5 to 7 on the one machine. - The firewall needs only the SSH and port 8000 rules, since there are no peers to reach.
Then start the recipe's command for one NVIDIA B300 node, with the cache mounted from the ephemeral disk:
The vLLM team reports that tensor parallel 8 on eight NVIDIA B300 GPUs holds about 2.6 million tokens of FP8 KV cache, and that decode context parallelism raises that to about 18.5 million when long sessions need more. One client-side difference from the SGLang endpoint: vLLM returns the thinking in a reasoning field rather than reasoning_content, and accepts either name on the way back in.
For production agentic serving beyond one node, the same recipe runs tensor parallel 8 across two trays of an NVIDIA GB300 NVL72, and a Secure Private Cloud keeps the whole deployment on dedicated infrastructure.
Kimi K3.1 Pro Deployment Cost
The four-node cluster bills as four 8x NVIDIA H100 NVLink virtual machines. At the GPU pricing rate of $2.60 per GPU per hour on demand, and from $1.82 per GPU per hour reserved, the cluster comes to:
| Basis | One node, per hour | Cluster, per hour | Cluster, per day | Cluster, 730-hour month |
|---|---|---|---|---|
| On demand, $2.60 per GPU hour | $20.80 | $83.20 | $1,996.80 | $60,736.00 |
| Reserved, from $1.82 per GPU hour | $14.56 | $58.24 | $1,397.76 | $42,515.20 |
Hyperstack bills per minute, with your balance updating as resources run, so an evaluation run costs only the minutes the nodes are active. The download and the start-up are part of that time, which is one more reason to start the four downloads in parallel.
FAQs
What is Kimi K3.1 Pro?
Kimi K3.1 Pro is Moonshot AI's open-weight, natively multimodal agentic model and its most capable 3T-class model to date. It uses a Mixture-of-Experts architecture with 2.8T total parameters and 104B activated, and is post-trained from Kimi K3 with large-scale joint reinforcement learning.
What is the difference between Kimi K3 and Kimi K3.1 Pro?
Kimi K3.1 Pro keeps Kimi K3's parameter count, layer count, 896-expert MoE and MXFP4 expert format. The main change is attention: the 24 full-attention Gated MLA layers become Gated DeepSeek Sparse Attention (DSA). Moonshot AI also reports gains in coding, 3D creation, financial research and factual accuracy.
What is Kimi K3.1 Pro's context window?
Kimi K3.1 Pro supports a native 1,048,576-token context window. How much a deployment can use at once depends on the KV cache left after the weights, which SGLang prints at start-up as max_total_num_tokens.
Can I turn off thinking in Kimi K3.1 Pro?
No. Kimi K3.1 Pro always reasons before answering. You control how much it reasons with the reasoning_effort field, which accepts "low", "high" and "max" (default "max"). For multi-turn conversations and tool calls, pass the full assistant message back, including reasoning_content.
What hardware is needed for Kimi K3.1 Pro?
Every one of the 896 experts has to stay resident in GPU memory, so total GPU memory is the constraint. This tutorial serves the 1.56 TB checkpoint on 32 NVIDIA H100 GPUs across four Hyperstack nodes with SGLang; one 8x NVIDIA B300 node with vLLM also holds it.
Which inference engines support Kimi K3.1 Pro?
Moonshot AI recommends vLLM, SGLang and TokenSpeed. vLLM and SGLang both use the kimi_k3 reasoning and tool-call parsers for Kimi K3.1 Pro.
Subscribe to Hyperstack!
Enter your email to get updates to your inbox every week